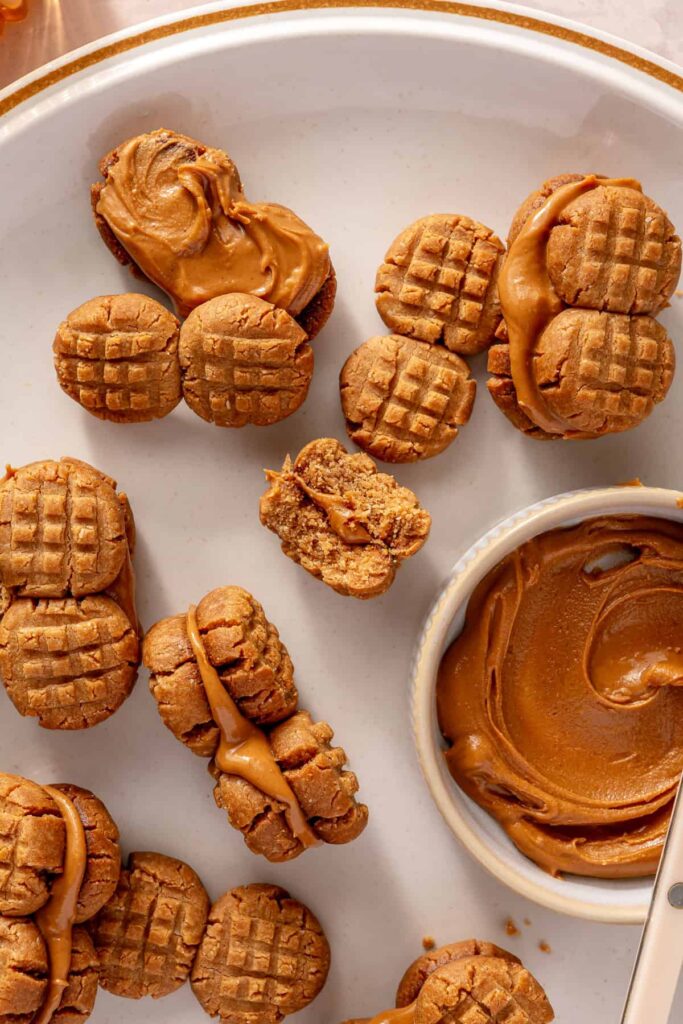
These Peanut Butter-Lover’s Nutter Butters are just as good, if not better, than the originals. Made from scratch using only 5 real ingredients (and under 30 minutes to make!), they’re a gluten-free, dairy-free, and refined sugar-free treat you’ll want to keep on-hand at all times.
As a die-hard peanut butter lover, specifically a Nutter Butter-enthusiast, this homemade version was a must-make in the RGE repertoire. They even make an appearance in my first cookbook, Rachael’s Good Eats – had to include ‘em!
PEANUT BUTTER LOVER’S PARADISE
One of the things I love most about recipe creating, is re-creating my favorite childhood meals, snacks and sweets with better-for-you ingredients.
Growing up, I was obsessed with the OG’s. Whether it was after sports, or as a treat in my school lunch or at home, I couldn’t get enough.
But now I know better than to indulge in all the processed foods that are loaded with all the inflammatory oils, high-fructose corn syrups, and more.
I’m now obsessed with this version because, like I said, they taste just as good, if not better! Seriously – one bite and you’re in peanut butter lover’s paradise.
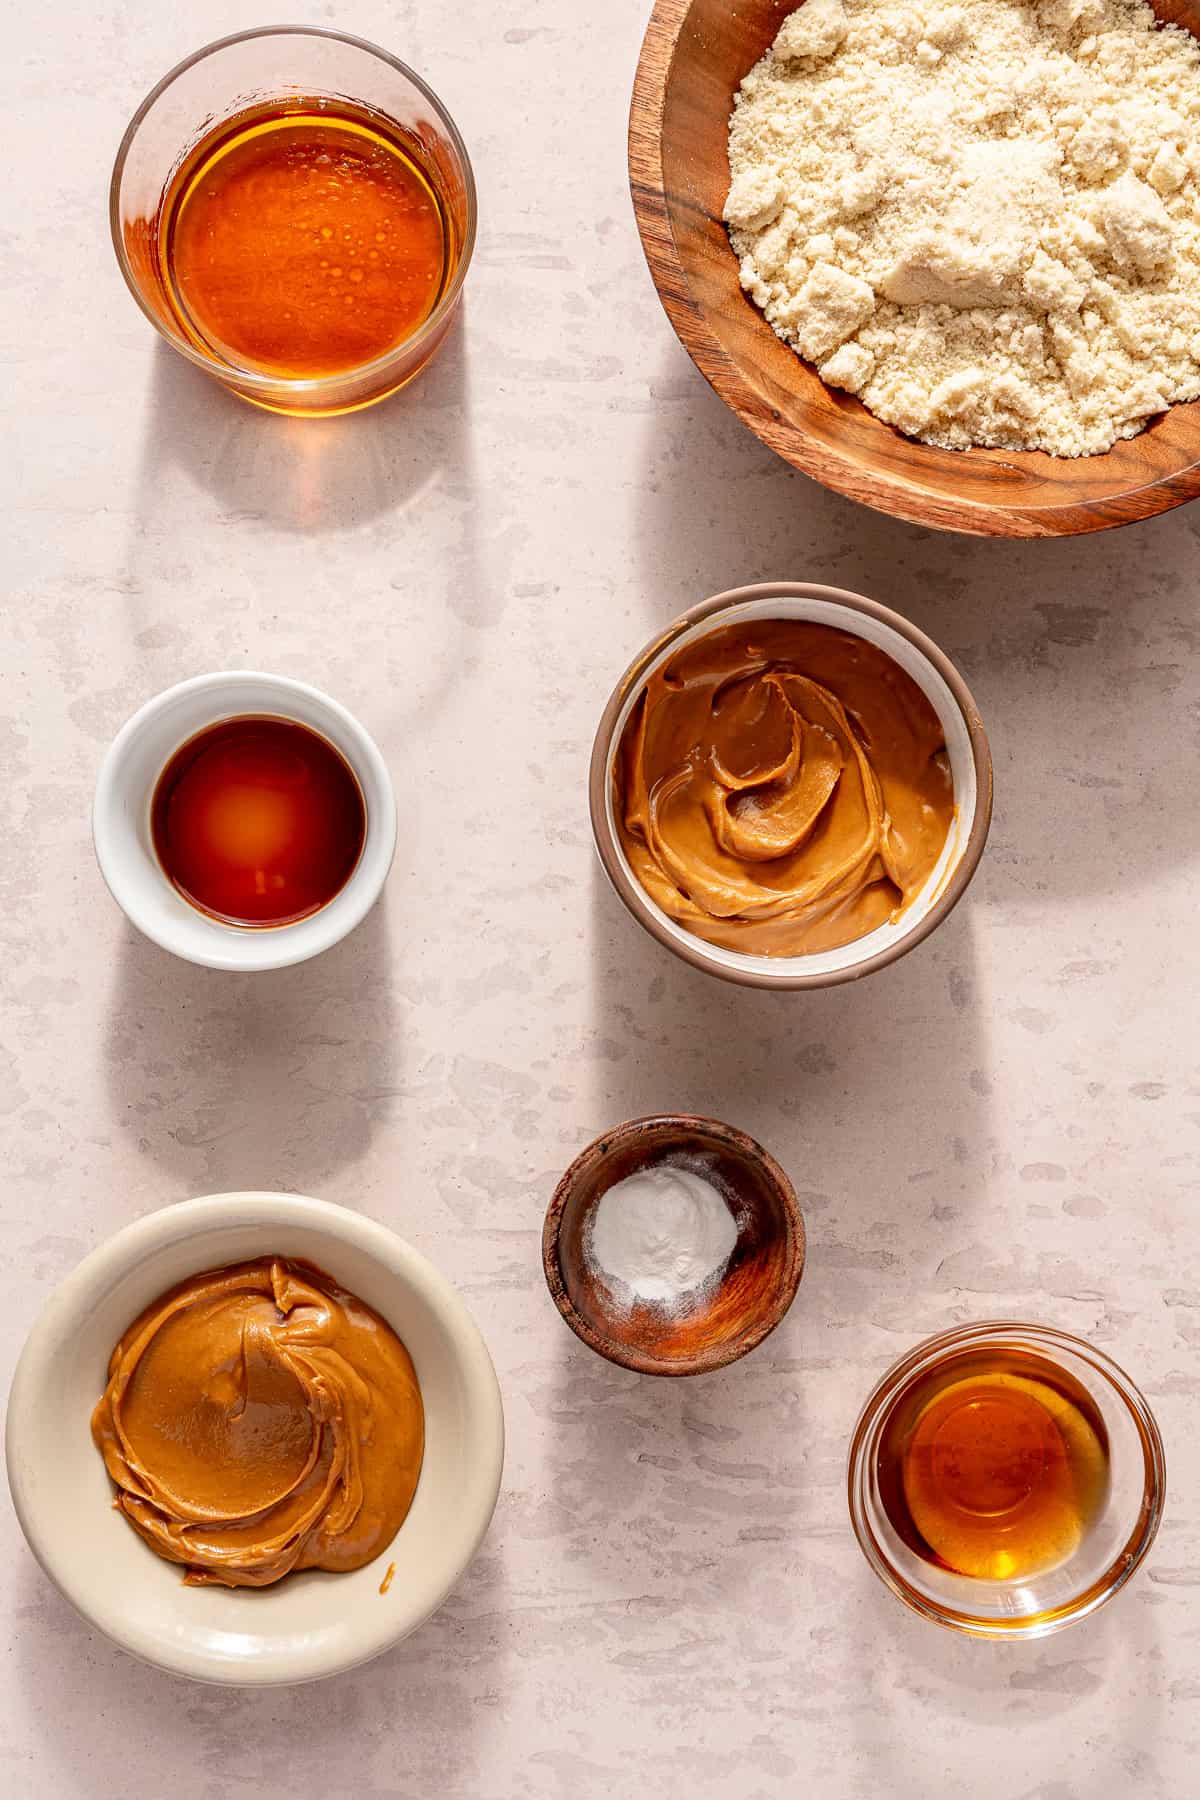
Plus, jokes aside, it feels good to know they’re made with only 5 real ingredients: natural, unsweetened creamy peanut butter (good source of protein, healthy fats and fiber!), maple syrup (a natural sweetener), vanilla extract (for flavor), almond flour (also high in fiber, healthy fats, protein and other nutrients), and baking powder. Major win!
BETTER-FOR-YOU AND EASY-TO-MAKE NUTTER BUTTERS
Not to mention these cutie little homemade cookies are so easy, and fun, to whip up any day. Easy enough to get the kids involved too! They take just about 30 minutes to prep and bake the cookies, whisk together the filling, and put ‘em all together.
Whether you’re making them to fulfill that PB craving (it’s me, hi!), or to bring to a party or gathering – no excuse necessary – you won’t be disappointed. Let me know what you think below!
INGREDIENTS YOU’LL NEED:
Cookies:
- Unsweetened creamy peanut butter
- Maple syrup
- Vanilla extract
- Almond flour
- Baking powder
Filling:
- Unsweetened creamy peanut butter
- Maple syrup
HOW TO MAKE MY PEANUT BUTTER-LOVER’S NUTTER BUTTERS
Cookies:
Preheat oven to 350°F. Line a baking sheet with parchment paper and set aside.
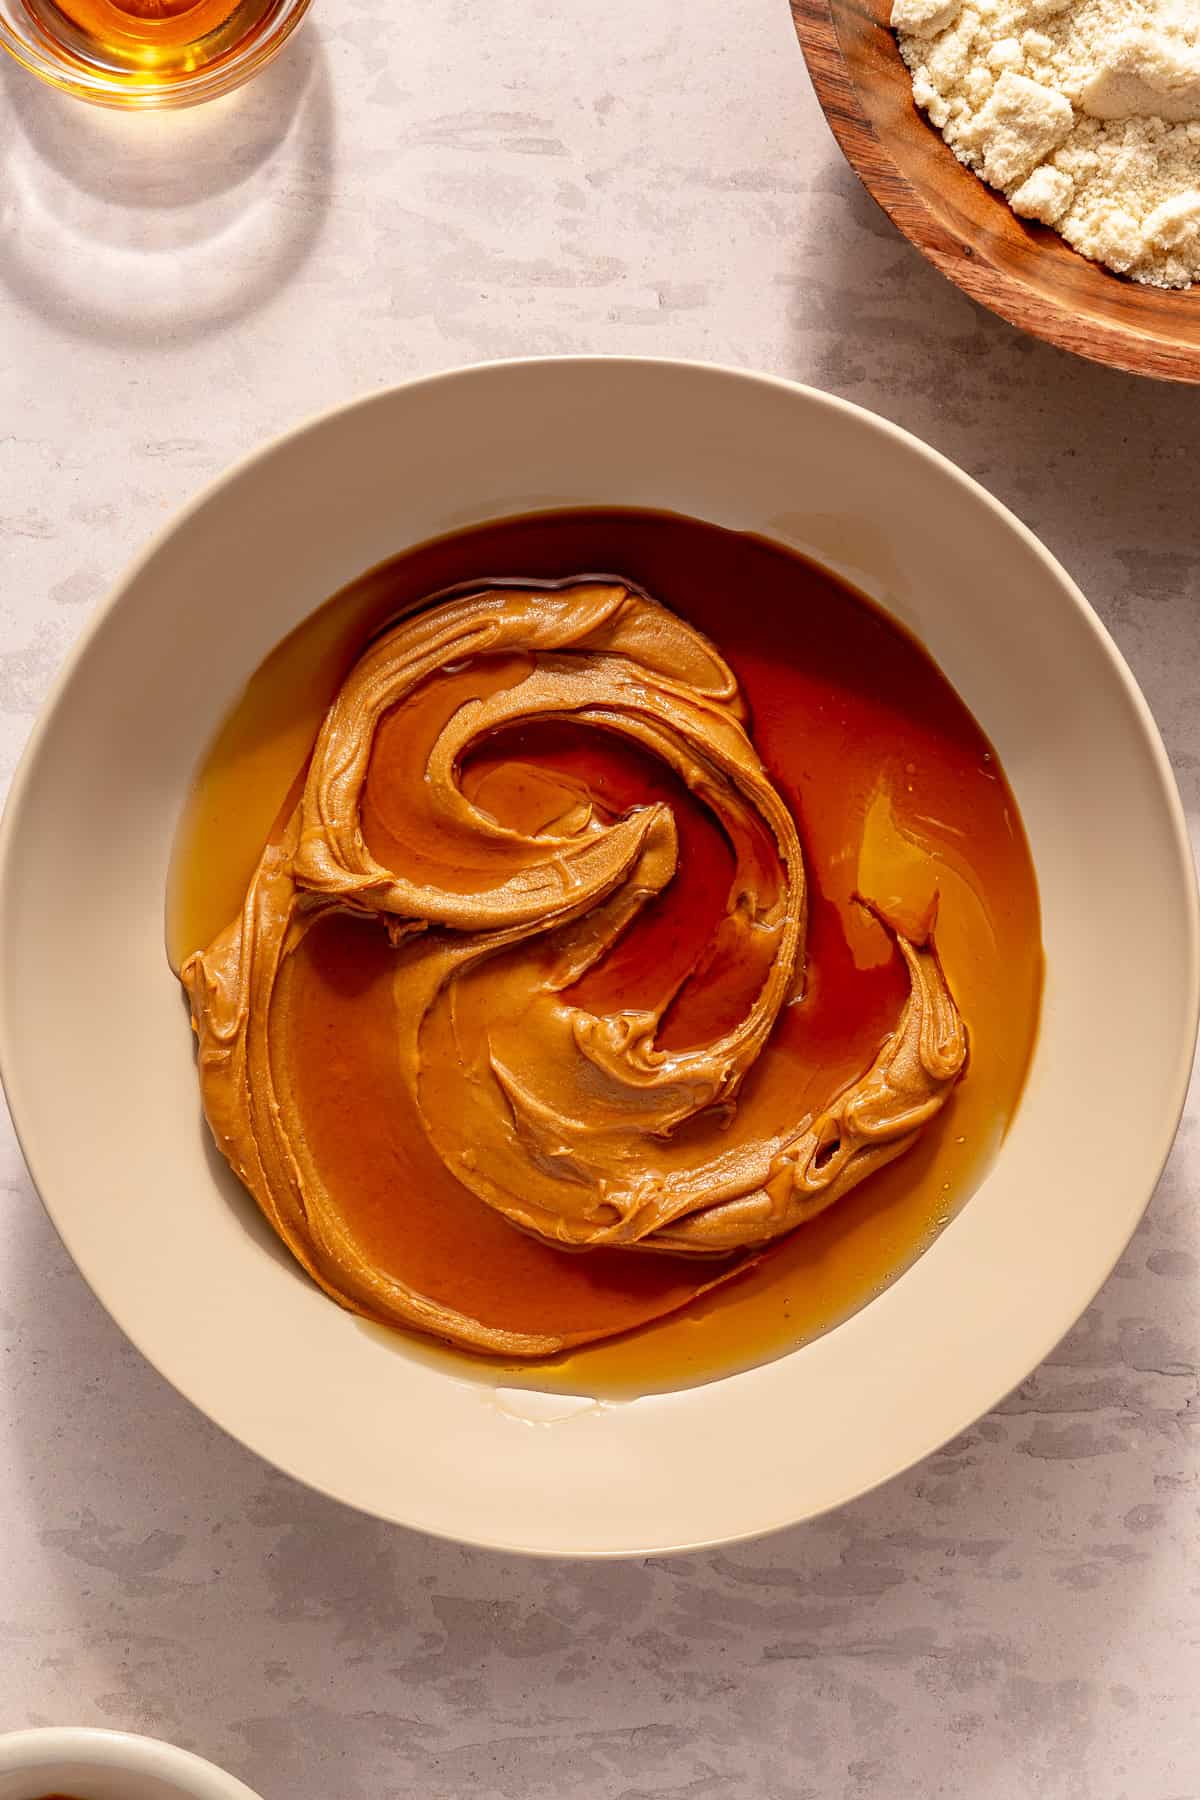
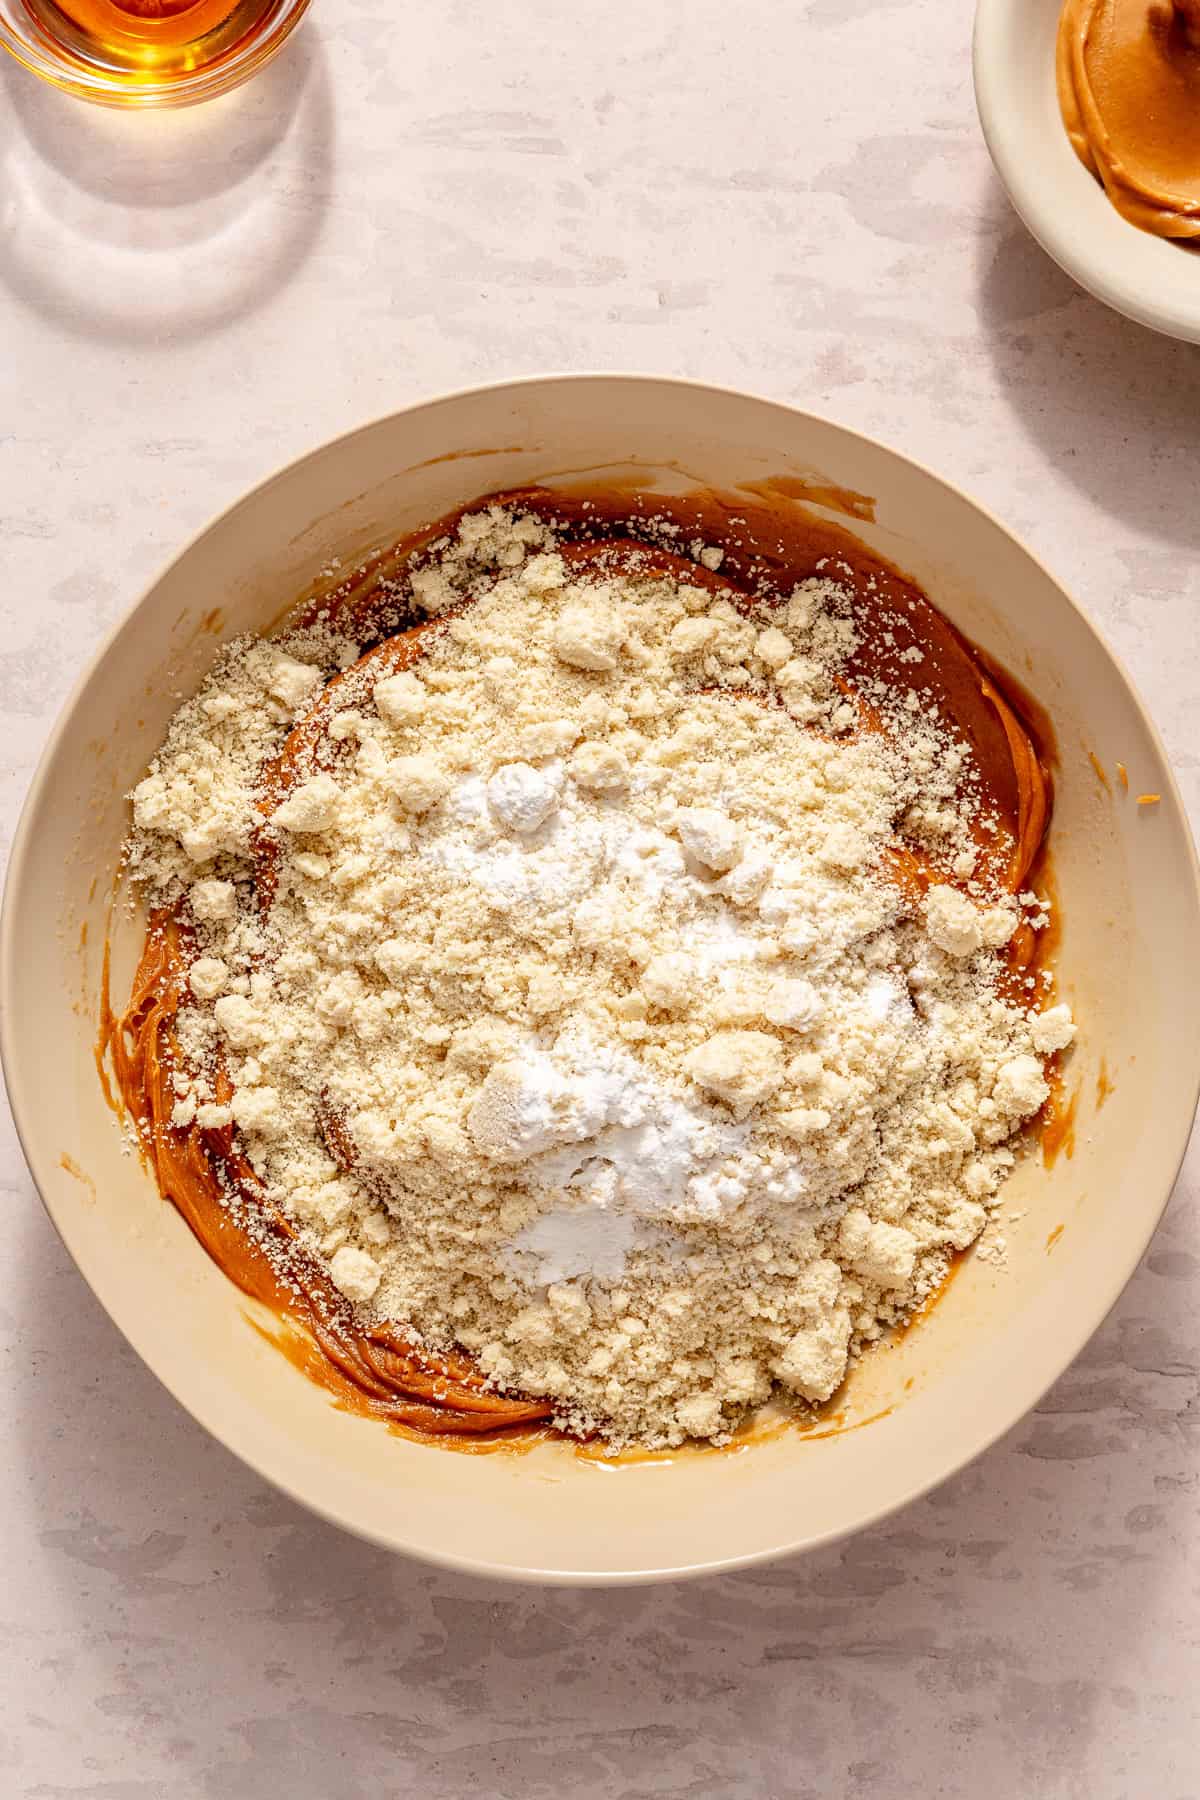
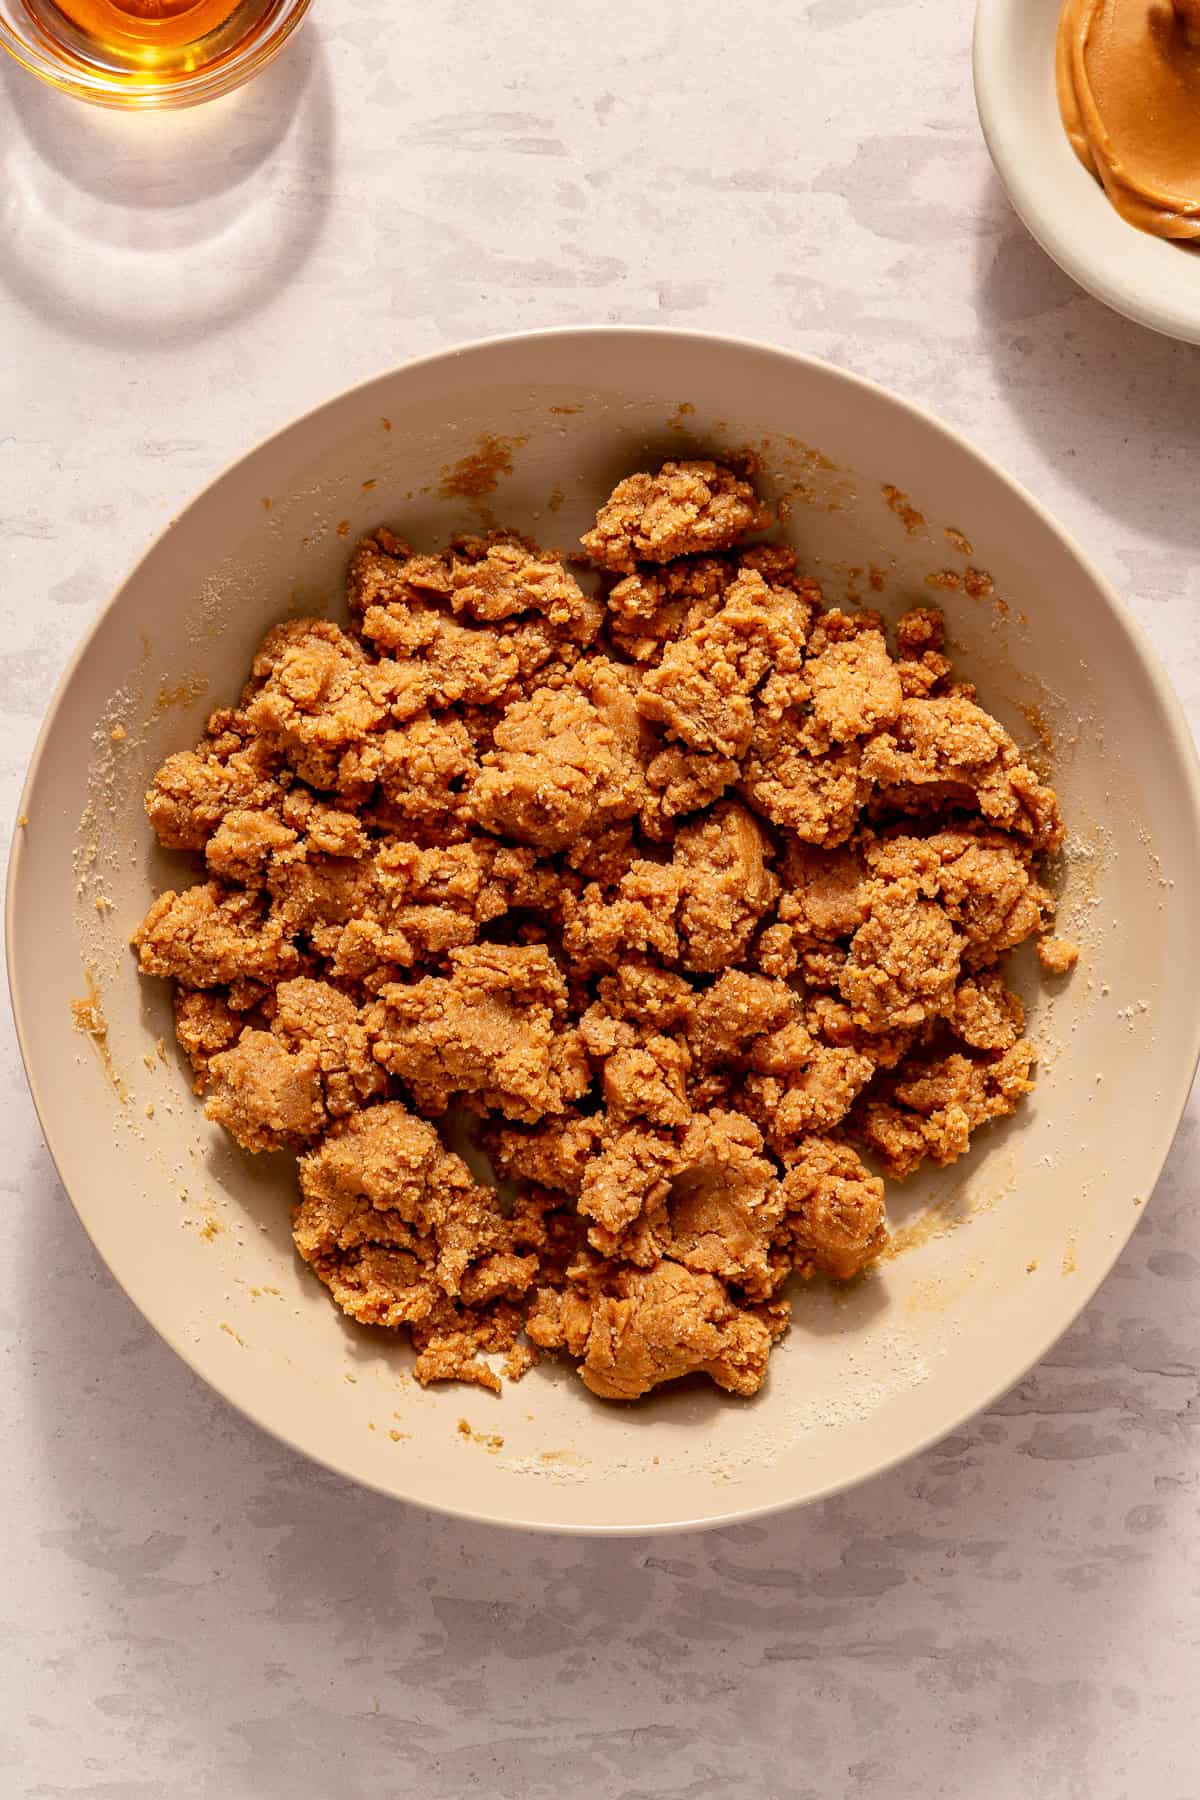
In a large bowl, stir together the peanut butter, maple syrup, and vanilla until smooth. Add the almond flour and baking powder, and stir to combine, pressing out any clumps of flour.
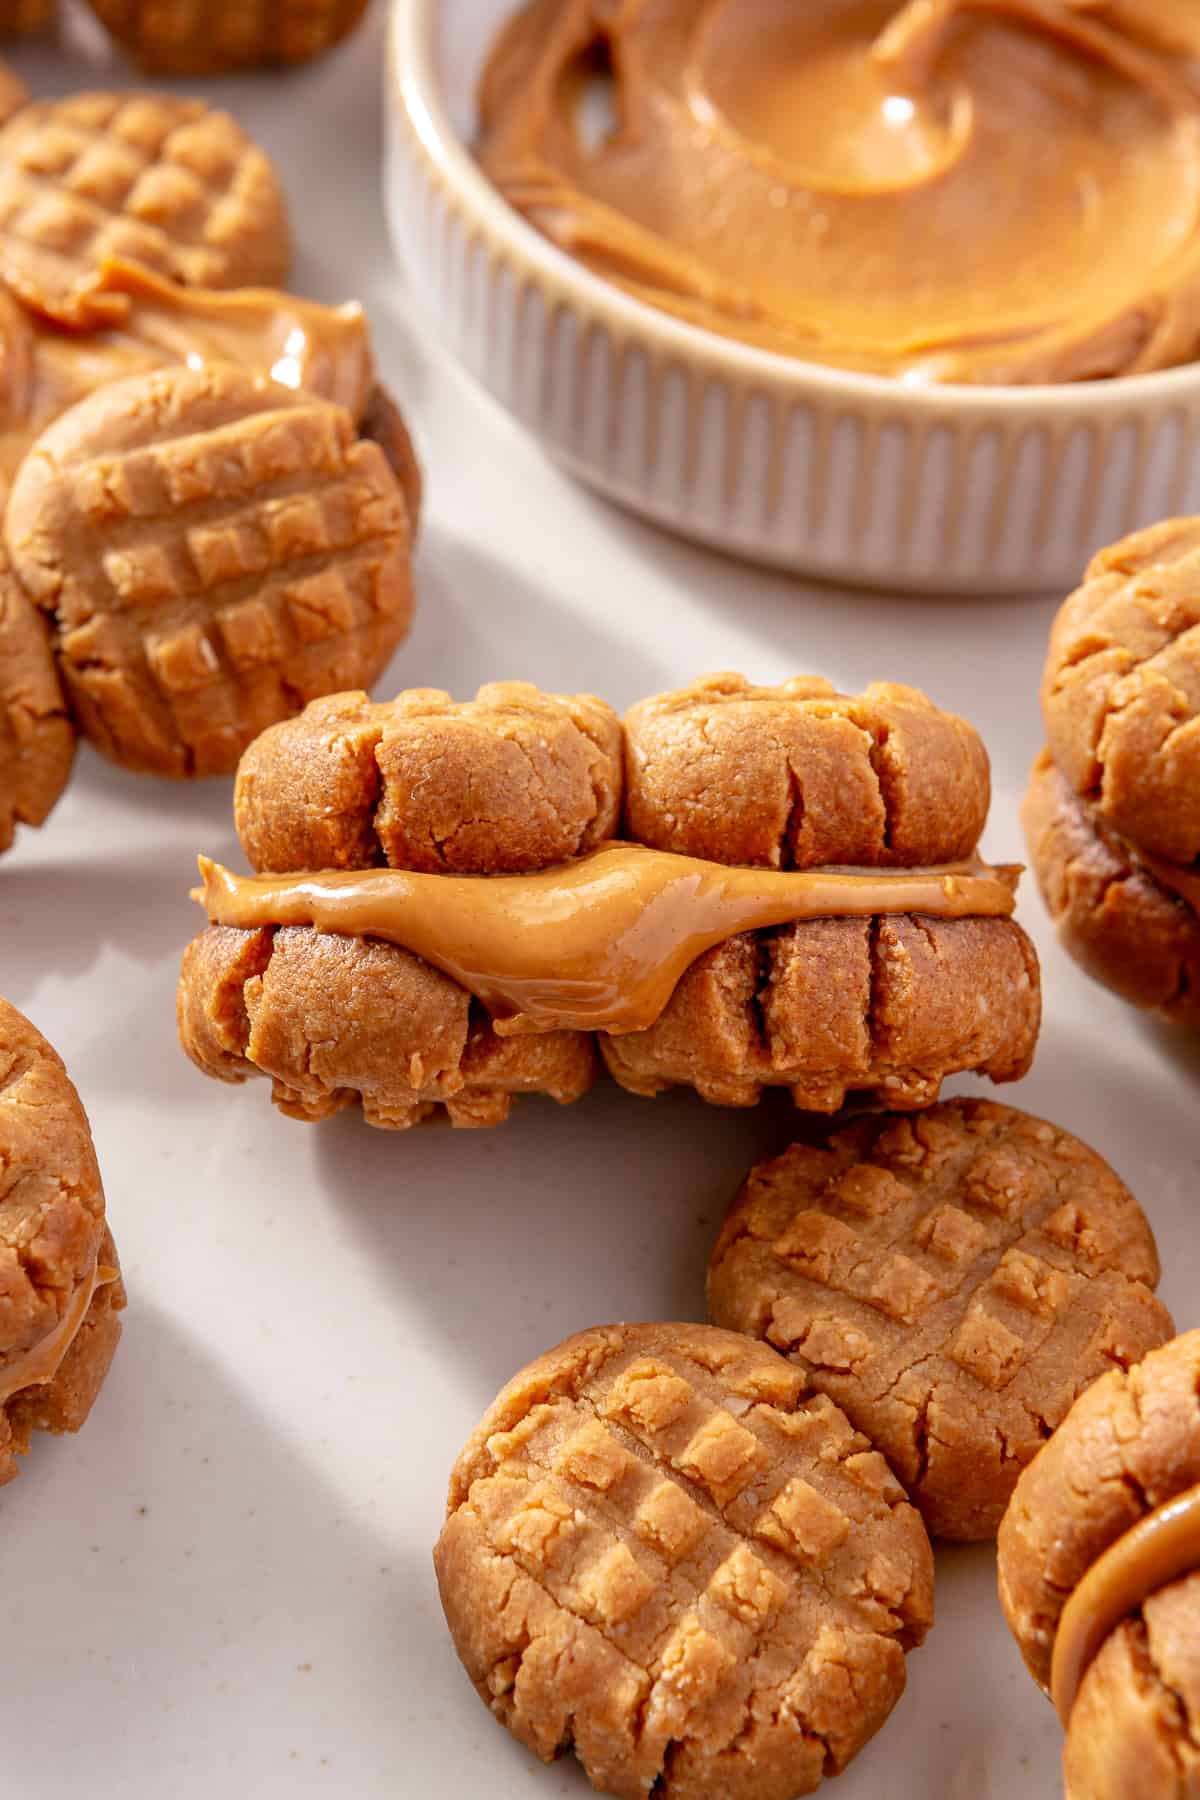
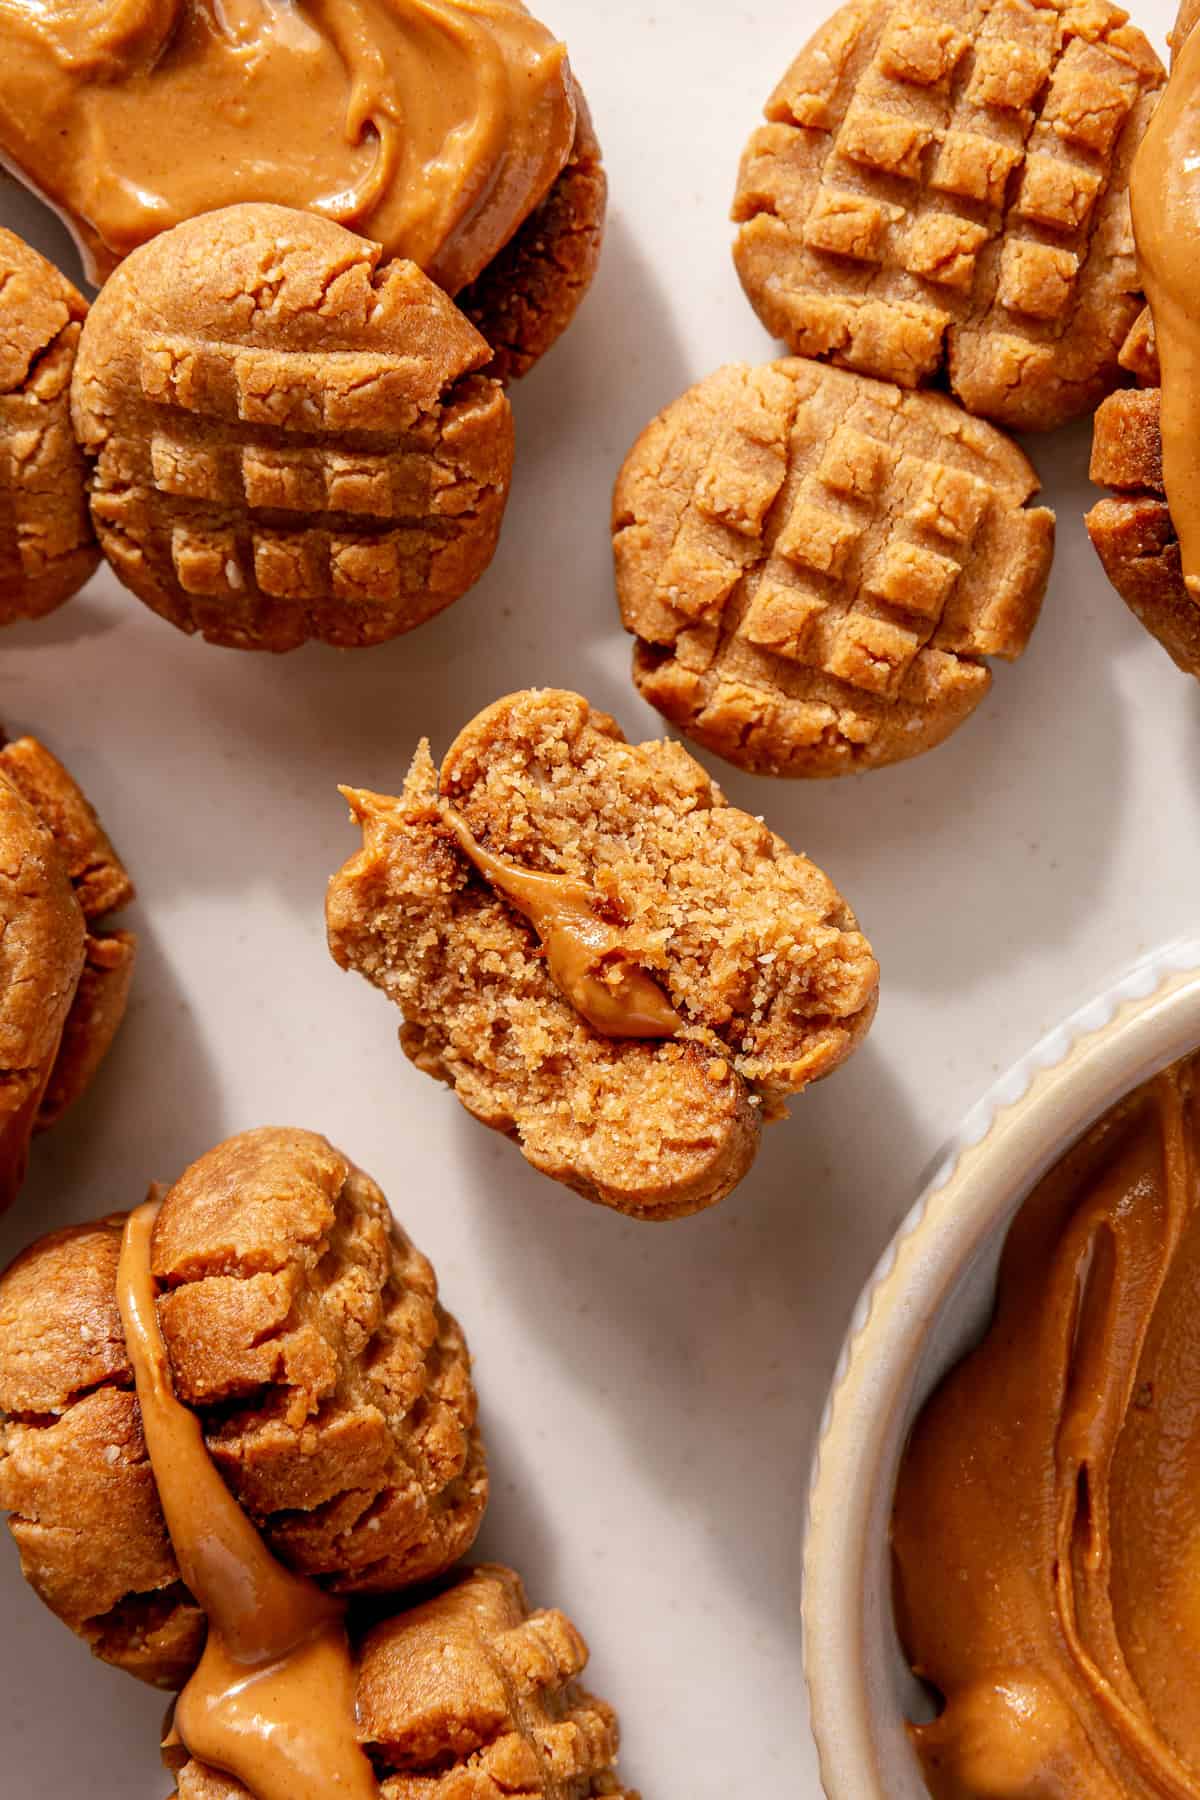
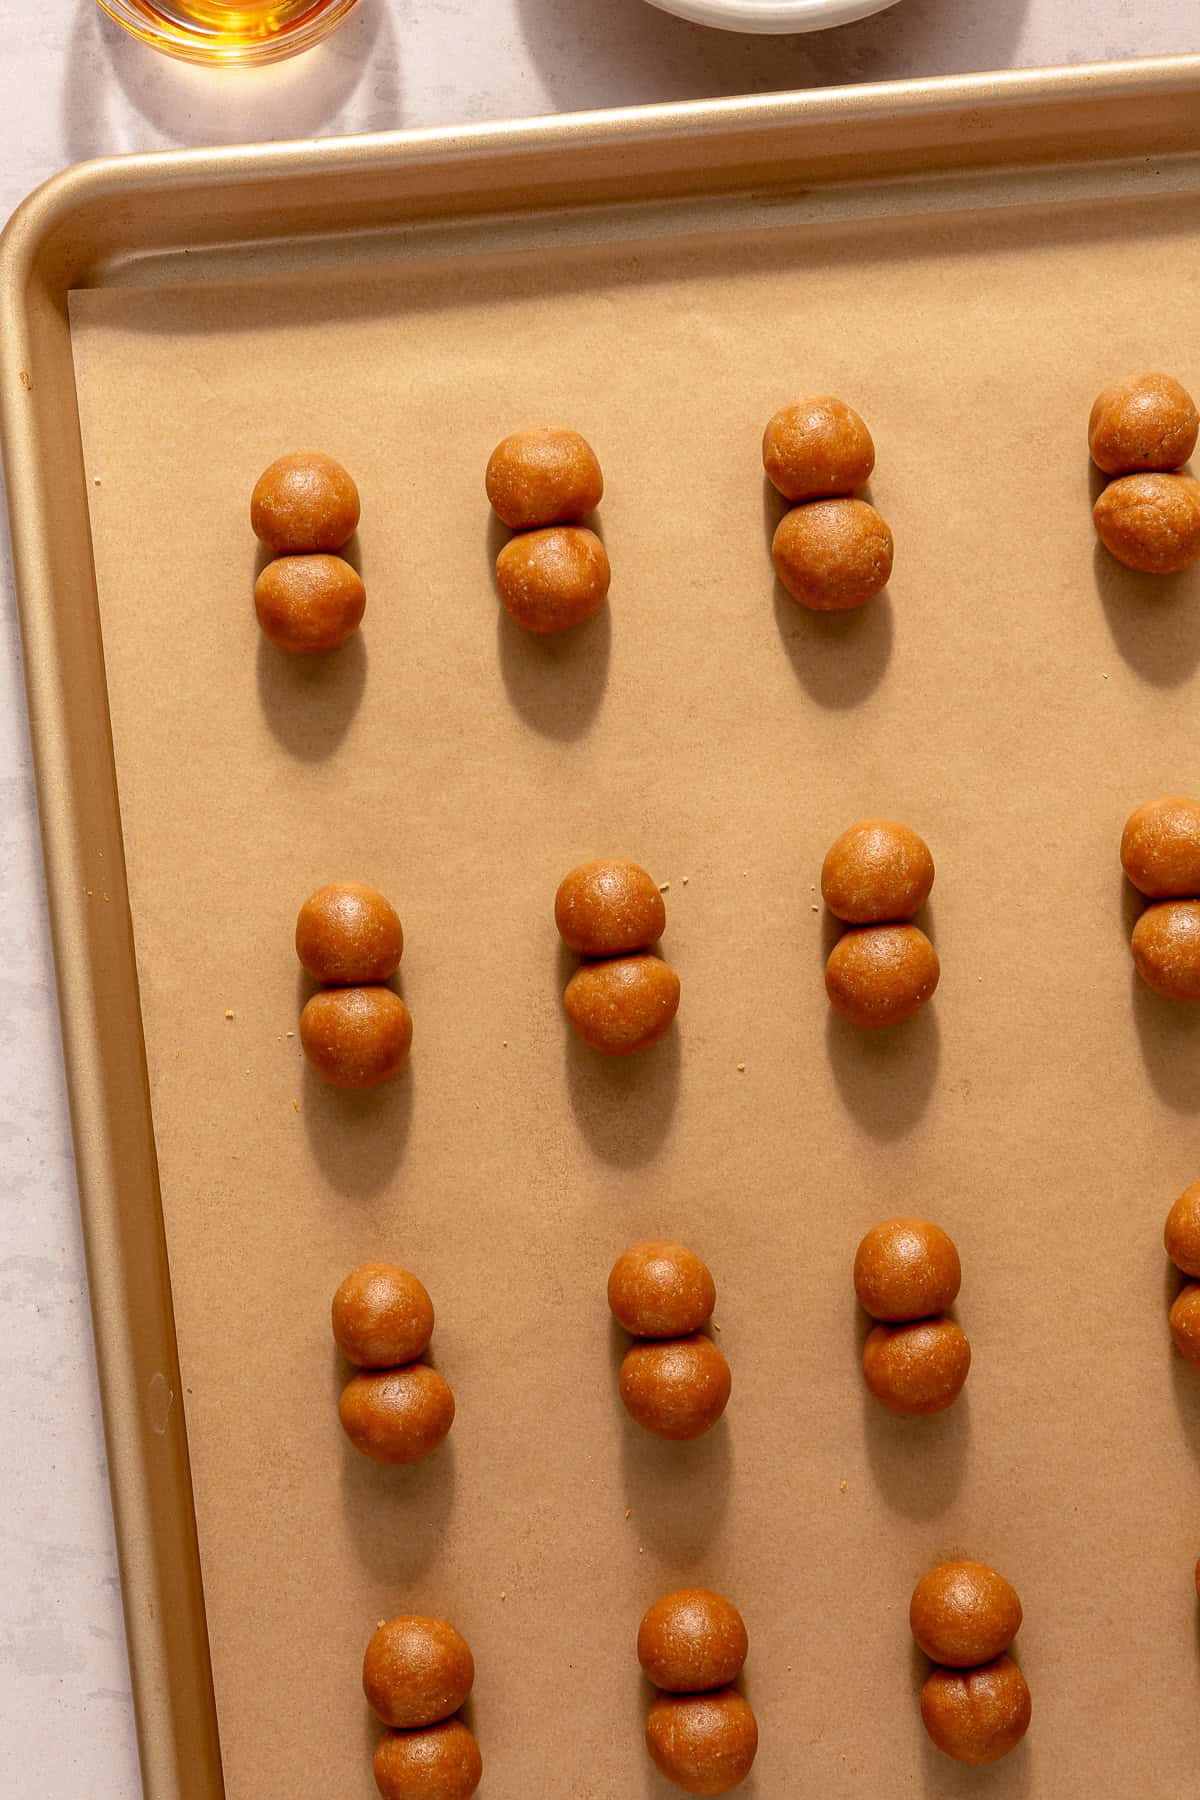
Using your hands, roll the dough into ½ – 1-inch balls. Arrange them on the prepared baking sheet in pairs, placing the two tightly next to each other (but leaving space between the pairs). You want the dough balls in each pair to slightly overlap so the two cookies bake together to make a peanut shape.
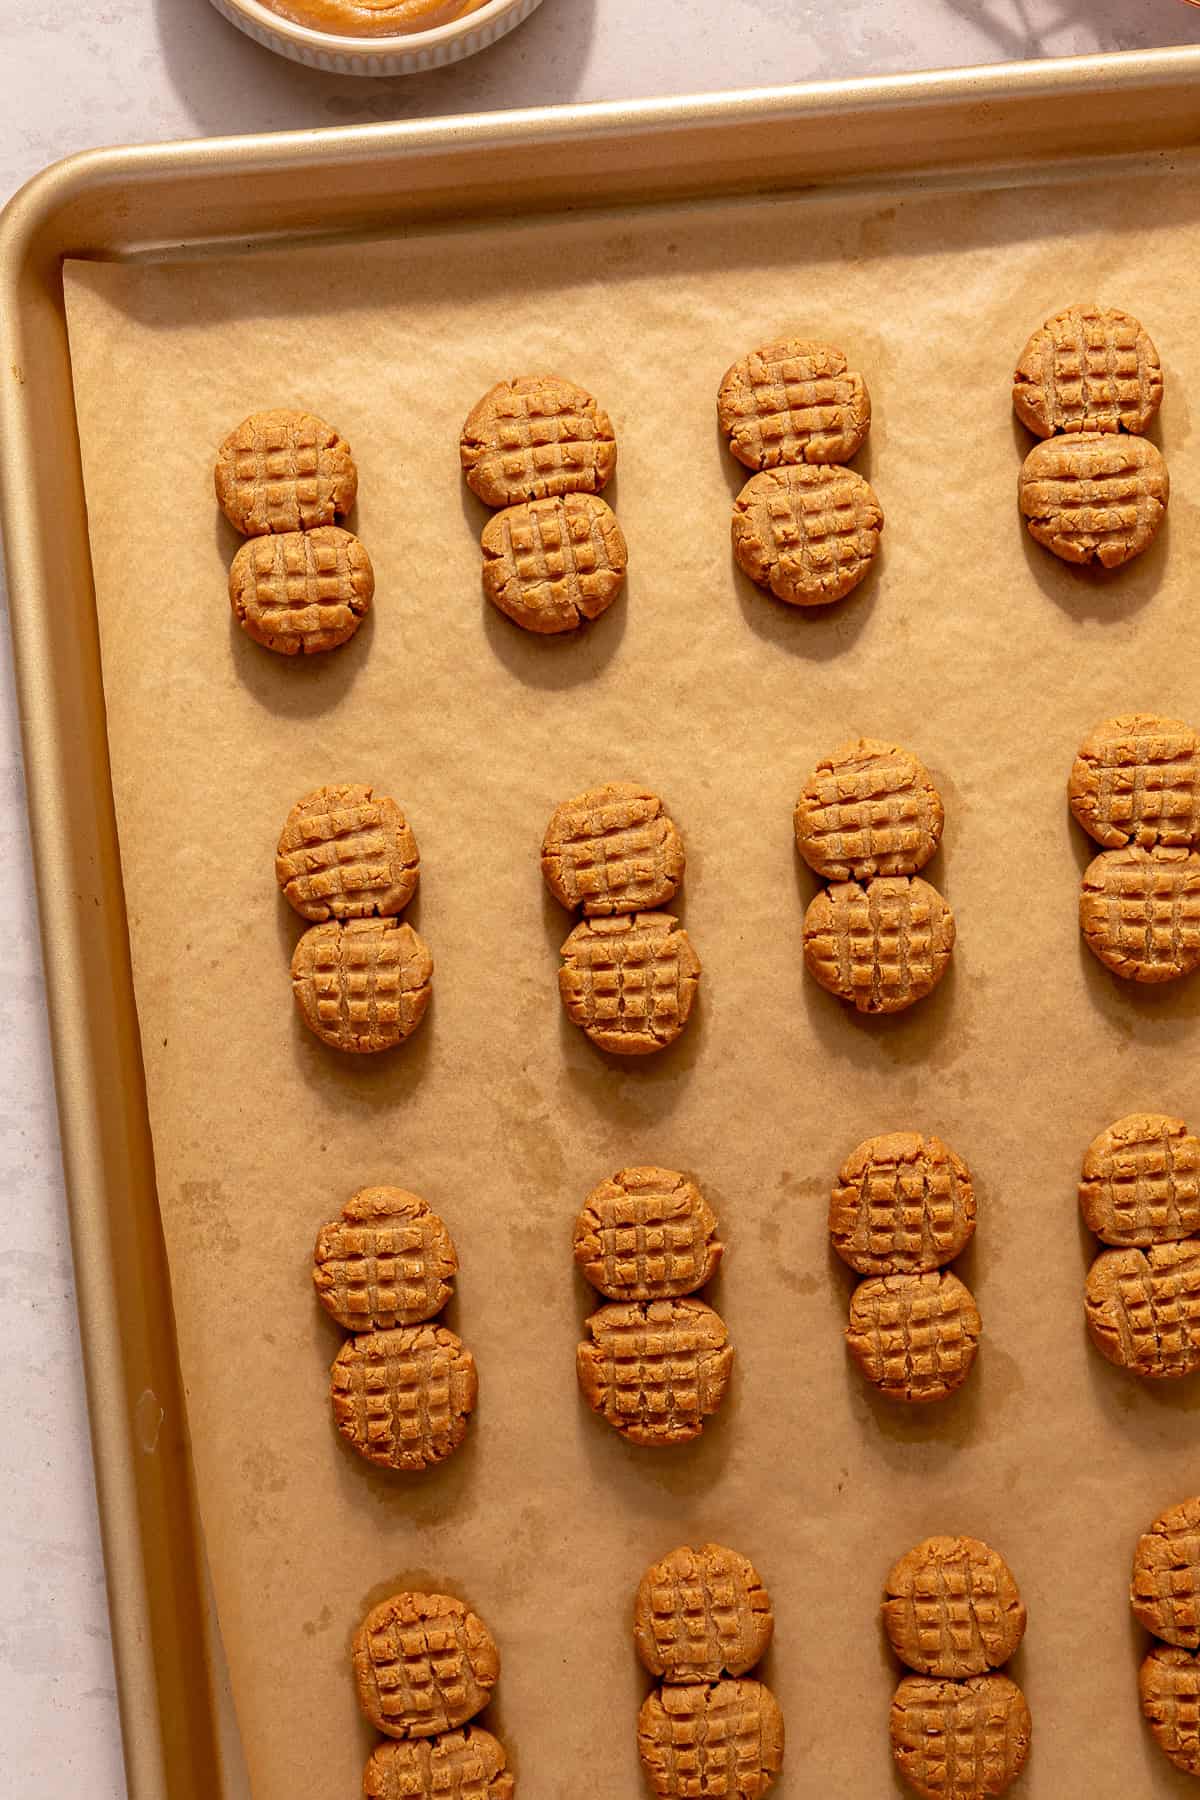
Use a fork to gently press down on each ball in one direction, then 90 degrees in the other direction, forming crisscross lines.
Tip: if needed to prevent the fork from sticking to the dough, try running it under water, or dunking it in a small amount of coconut oil, before you press down each time.
Bake the cookies for 10-14 minutes, until they’re just beginning to turn golden brown at the edges.
Transfer the baking sheet to a cooling rack, and allow the cookies to cool completely, at least 10 minutes.

To Fill, Assemble, and Store:
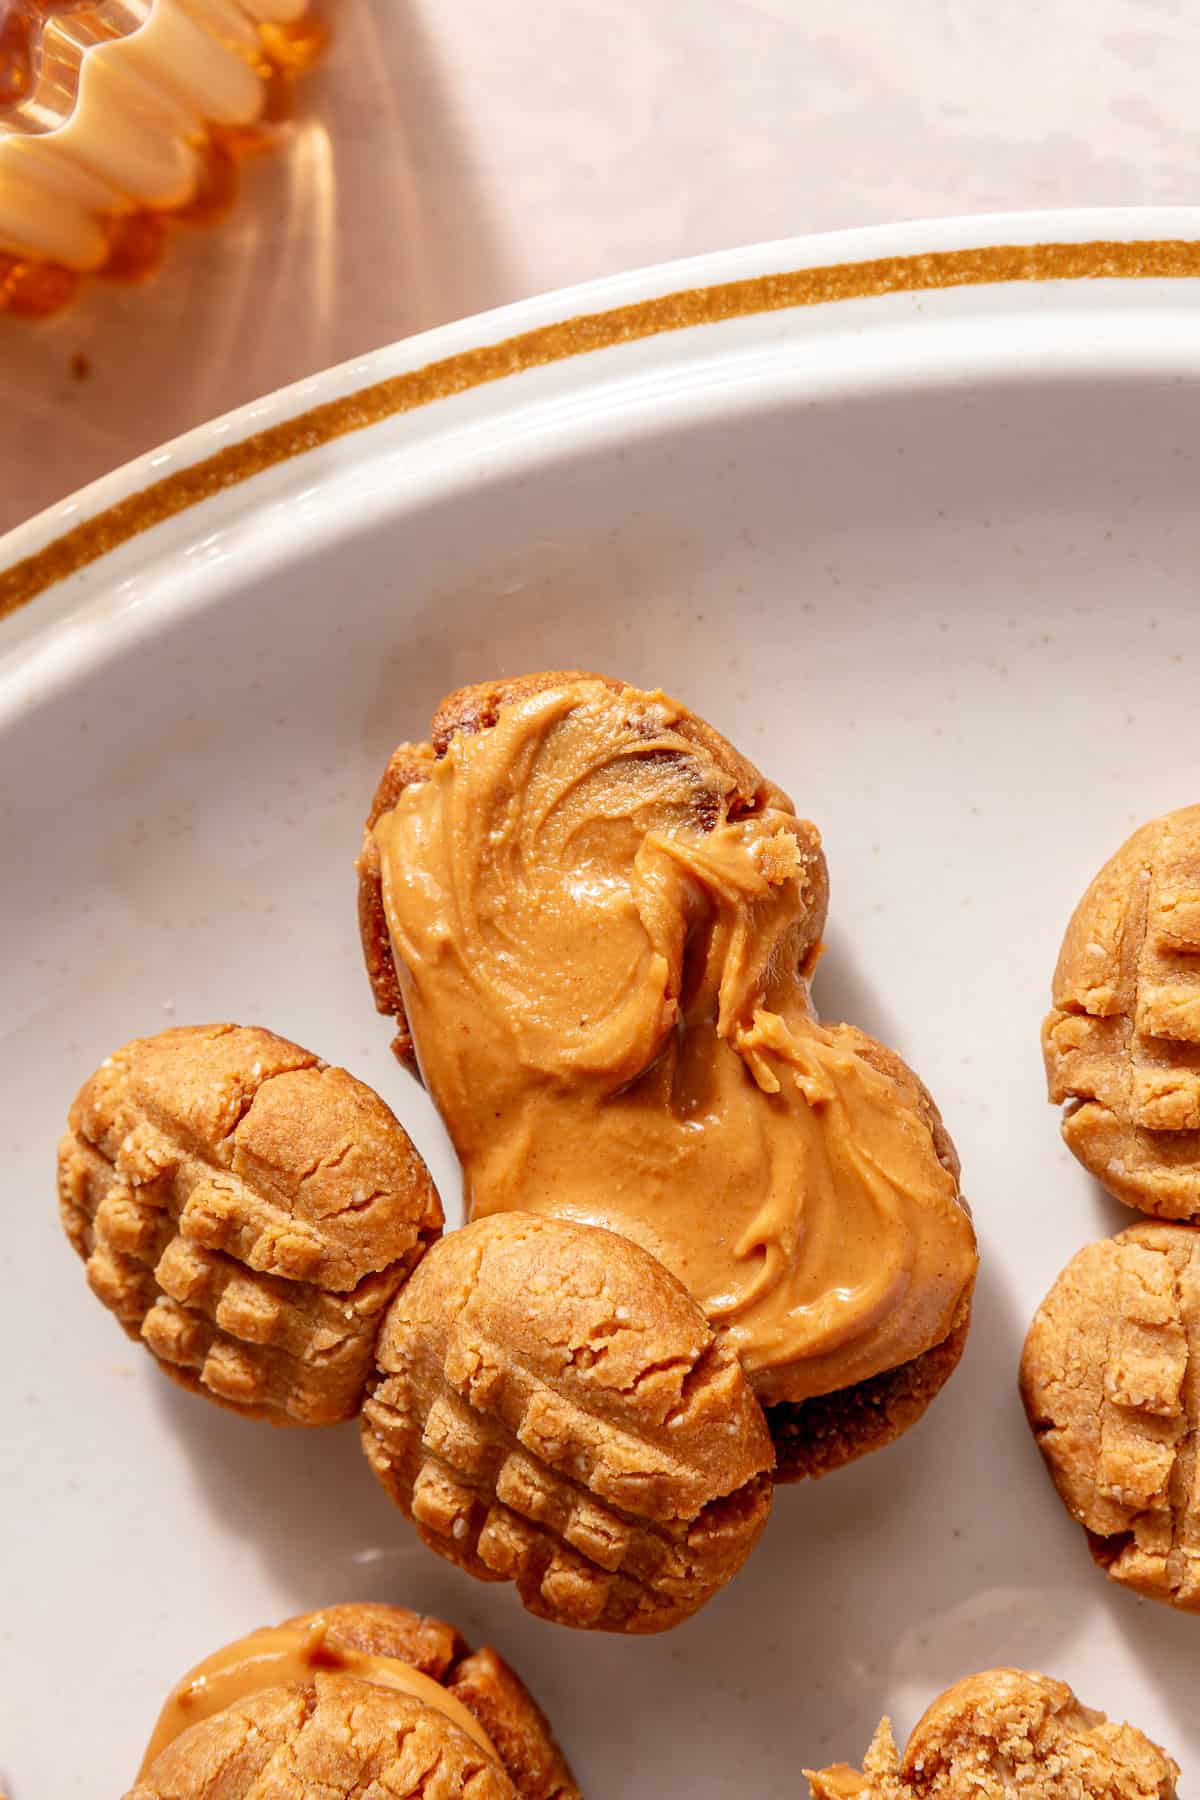
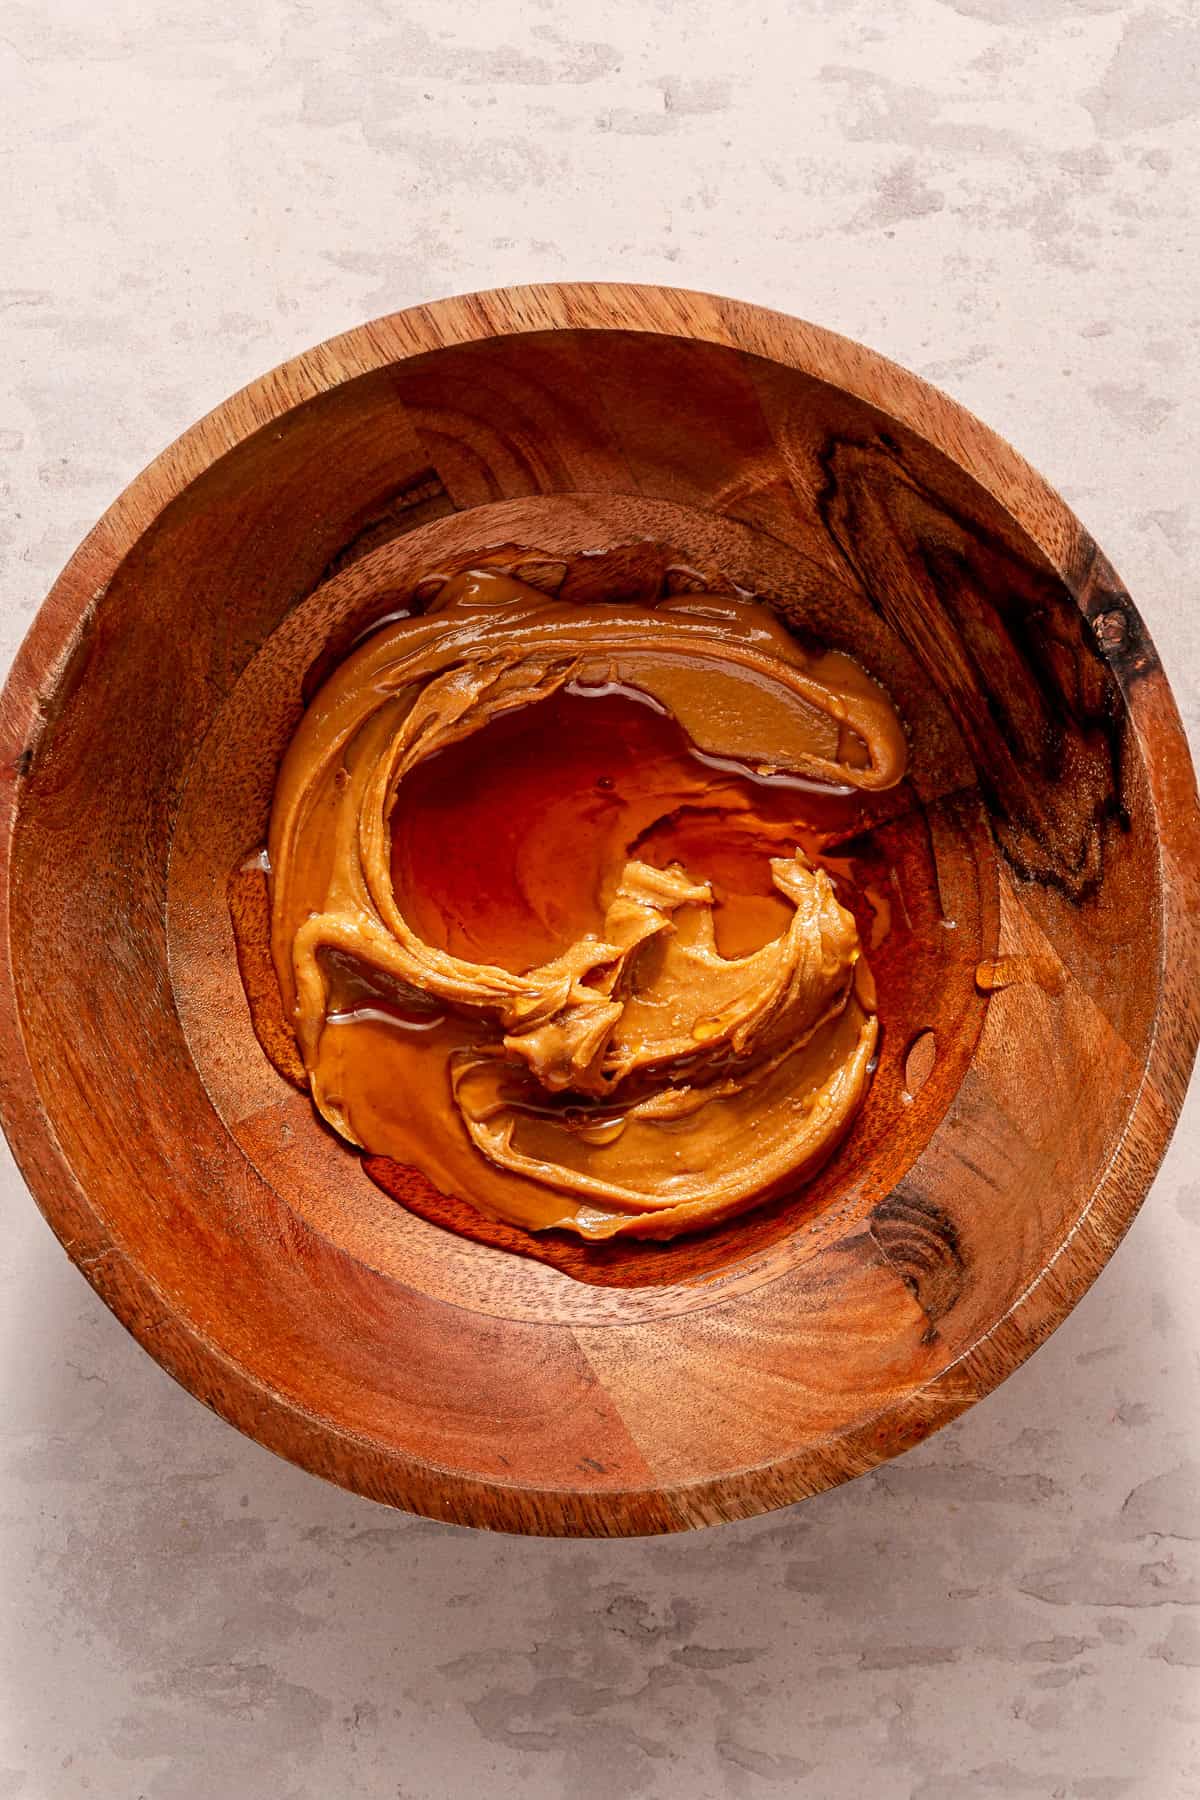
In a medium-sized bowl, whisk together the peanut butter and maple syrup until smooth.
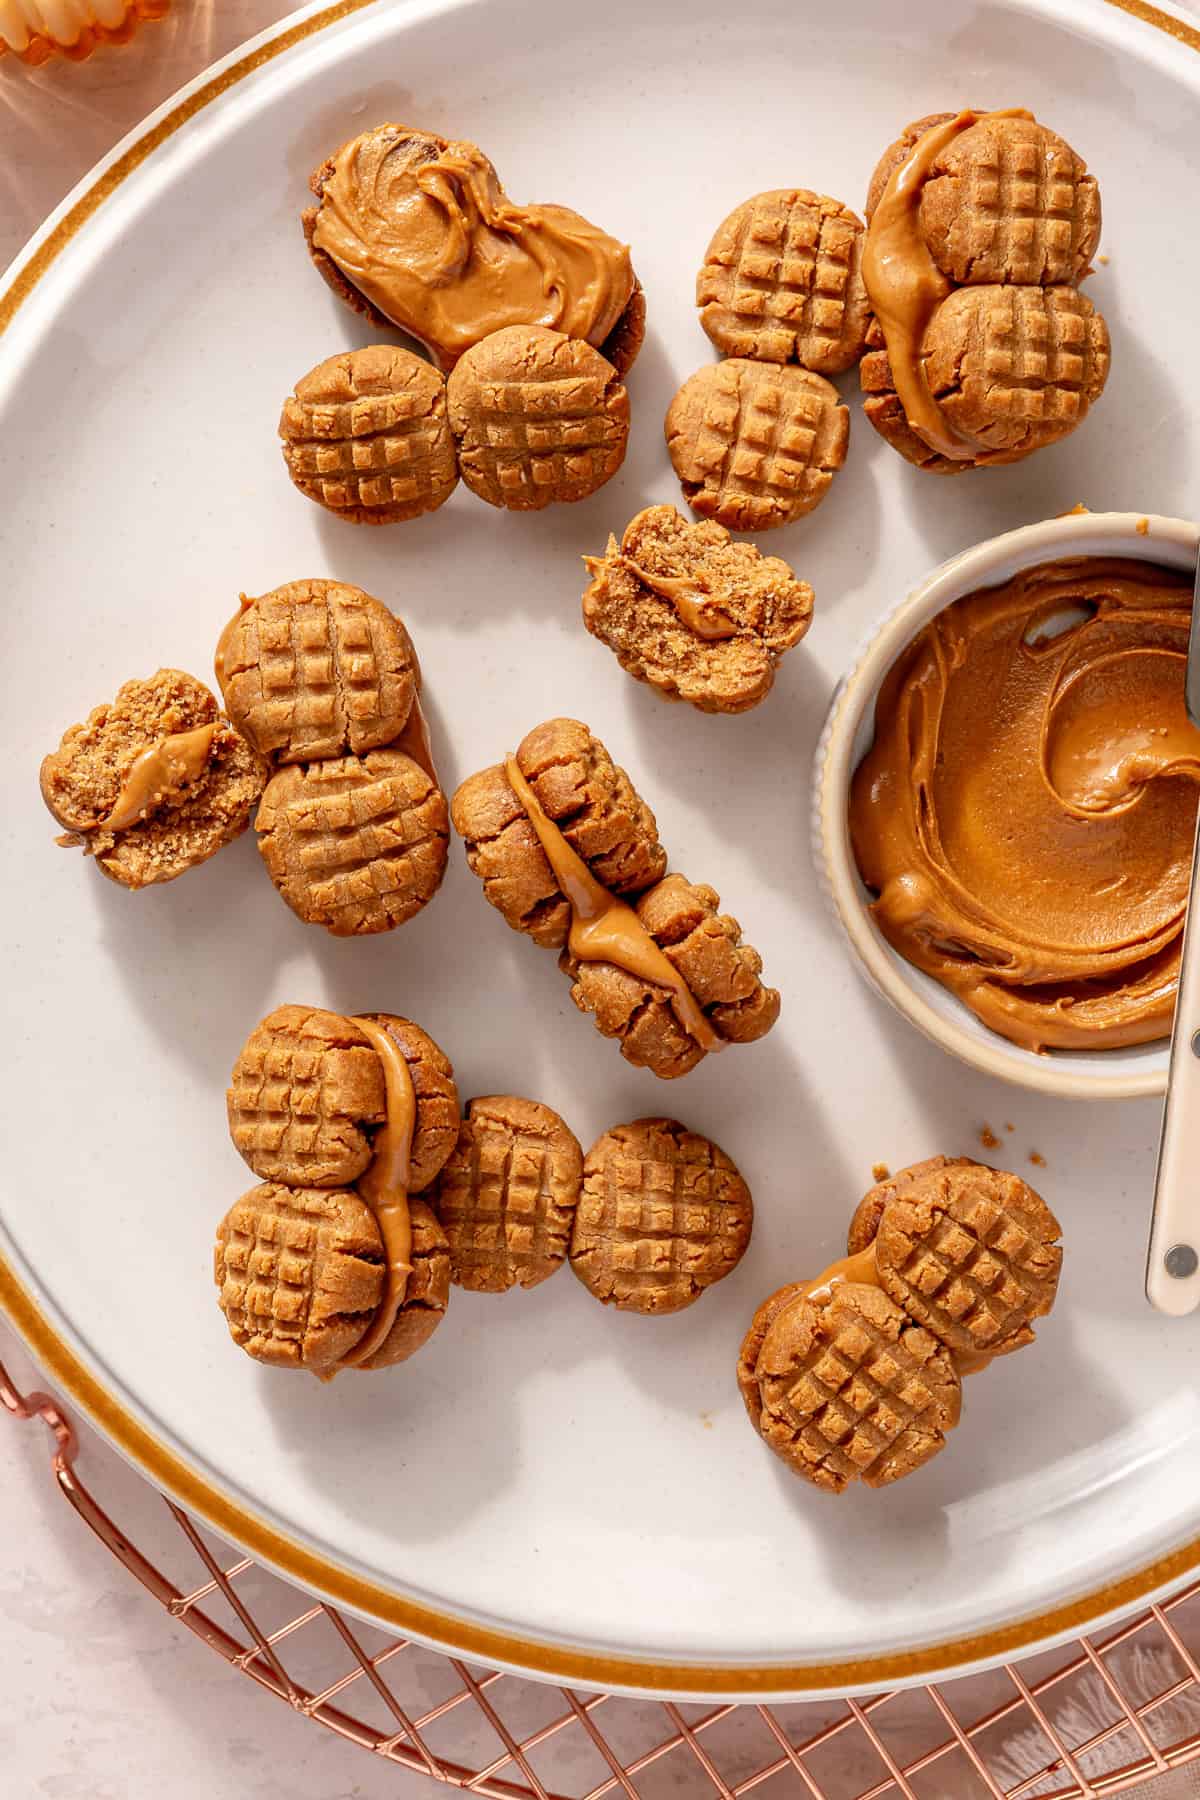
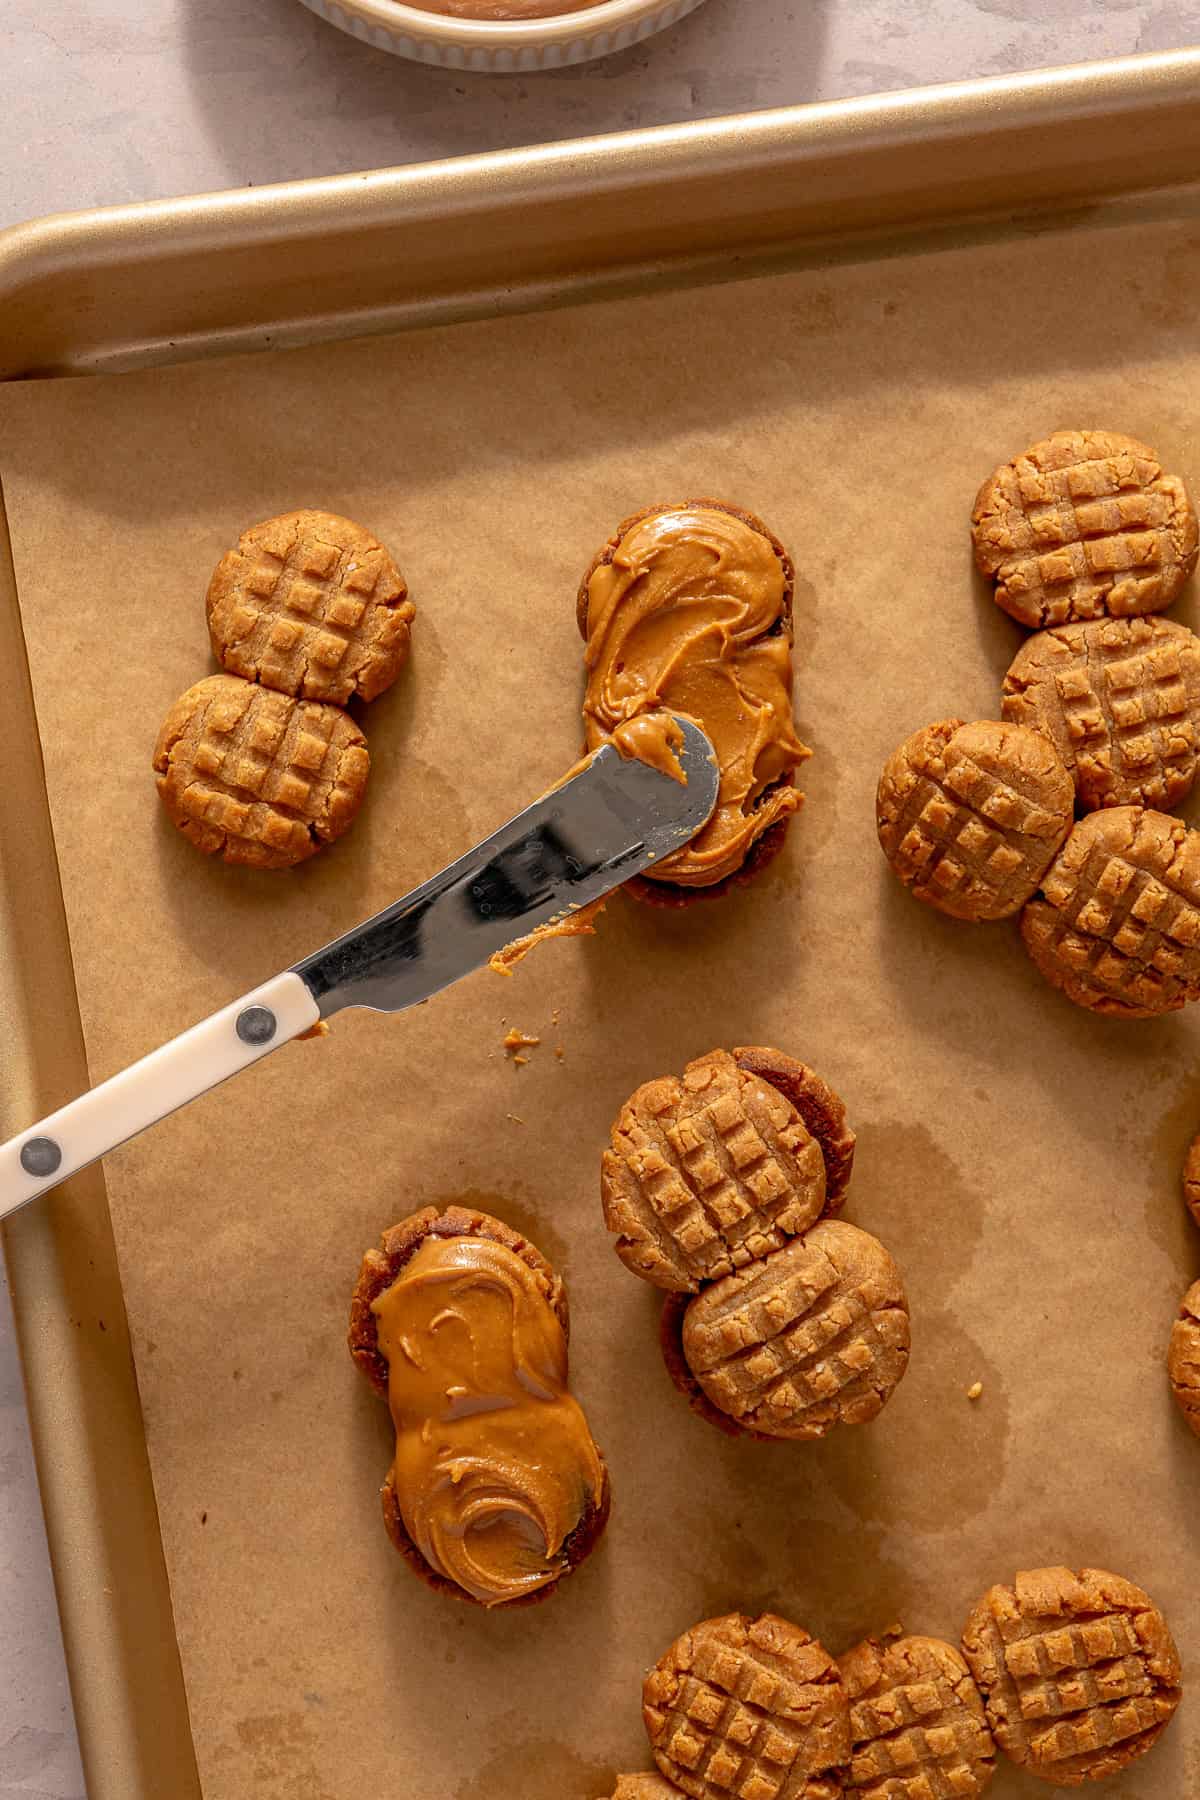
Turn one of the baked cookie pairs upside down. Spread about 1 tablespoon of the filling on the bottom of that pair, then press another cookie pair on top (the filling doesn’t have to spread all the way to the edges). Repeat with the remaining filling and cookies.
Serve immediately, or keep in an airtight container at room temperature for up to 5 days. Enjoy!

What I Used To Make This Recipe

RECIPE SUBSTITUTIONS & QUESTIONS
If any nut allergies or you simply prefer to swap the flour, try substituting ½ cup coconut flour, or gluten-free flour for the almond flour. You’ll need less of these subs because they’re denser than almond flour.
You could also use any nut or seed butter instead of peanut butter. Almond butter, cashew butter, sun butter – really anything should work so long as it’s one you like! Also, my tip when shopping for nut butters: look for ones using only 1-2 ingredients (nut of choice and salt).
ARE HOMEMADE NUTTER BUTTERS HEALTHY?
When compared to the store-bought version, yes, homemade nutter butter cookies will be better for you since they usually use less ingredients, preservatives and high-inflammatory oils.
It still depends on the recipe you follow though, as some homemade versions may call for different sugars and flours. However, I can confirm that these Peanut Butter-Lover’s Nutter Butters recipe are gluten-free, dairy-free, and refined sugar-free, using only 5 ingredients.
CAN YOU MAKE YOUR OWN, HOMEMADE PEANUT BUTTER?
Yes! You definitely can make your own peanut butter (or any nut butter) at home. It’s easy, and just takes a little patience using a food processor or high-speed blender to blend up your peanuts (or nut of choice) with a little bit of salt, if preferred.

MORE, EASY-TO-MAKE, BETTER-FOR-YOU DESSERTS:
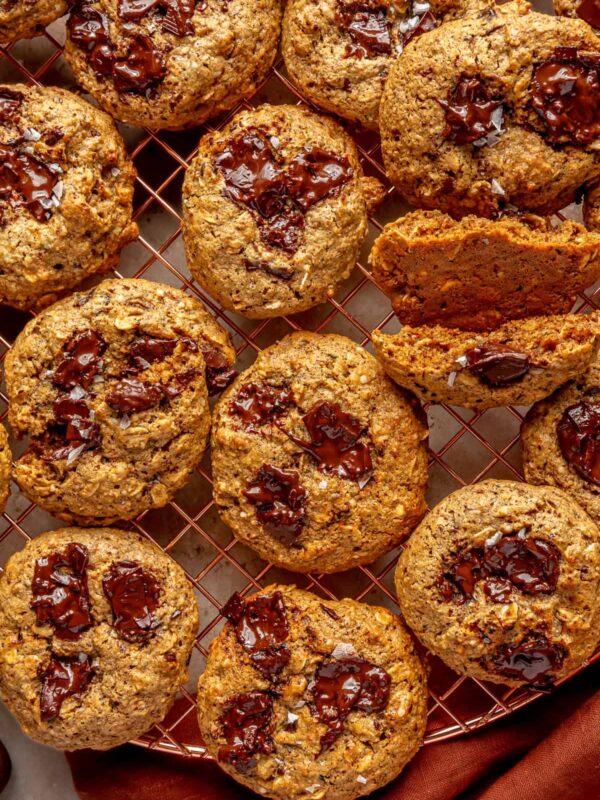
Tahini Chocolate Chunk Cookies

Peanut Butter-Lover’s Nutter Butters

Ingredients
Cookies
- 1/2 cup unsweetened creamy peanut butter
- 1/4 cup maple syrup
- 1 teaspoon vanilla extract
- 2/3 cup almond flour
- 1/2 teaspoon baking powder
Filling
- 1/4 cup unsweetened creamy peanut butter
- 1 tablespoon maple syrup
Instructions
Cookies
- Preheat oven to 350°F. Line a baking sheet with parchment paper and set aside.
- In a large bowl, stir together the peanut butter, maple syrup, and vanilla until smooth. Add the almond flour and baking powder, and stir to combine, pressing out any clumps of flour.
- Using your hands, roll the dough into ½ – 1-inch balls. Arrange them on the prepared baking sheet in pairs, placing the two tightly next to each other (but leaving space between the pairs). You want the dough balls in each pair to slightly overlap so the two cookies bake together to make a peanut shape.
- Use a fork to gently press down on each ball in one direction, then 90 degrees in the other direction, forming crisscross lines.Tip: if needed to prevent the fork from sticking to the dough, try running it under water, or dunking it in a small amount of coconut oil, before you press down each time.
- Bake the cookies for 10-14 minutes, until they're just beginning to turn golden brown at the edges.
- Transfer the baking sheet to a cooling rack, and allow the cookies to cool completely, at least 10 minutes.
To Fill, Assemble, and Store
- In a medium-sized bowl, whisk together the peanut butter and maple syrup until smooth.
- Turn one of the baked cookie pairs upside down. Spread about 1 tablespoon of the filling on the bottom of that pair, then press another cookie pair on top (the filling doesn't have to spread all the way to the edges). Repeat with the remaining filling and cookies.
- Serve immediately, or keep in an airtight container at room temperature for up to 5 days.


Can you freeze these??
I honestly don’t think there’s been a day when I haven’t had these since discovering this recipe post. I can’t do cane sugar and do not like the sickly sweet taste from generous amounts of coconut sugar or maple sugar in recipes; this sweet treat is the perfect amount of sweet! I even have reduced this to 1/8 c of maple syrup and plenty sweet still! Please create more *very* low sugar baked goods! Happy New Year to you!!!!!!!
Have these stashed 24/7 because I can’t get enough!
OBSESSED😍😍
Just used this recipe yet again and baked up the cookies separately rather than scoring them together. Sandwiched a layer of a quick vegan chocolate ganache & a layer of a simple vegan peanut butter mousse/whip between two rounds for THE PERFECT petite sandwich cookies for Christmas. Cheers!!
Pro tips- make sure you roll these with a touch of coconut oil on your hands & be sure to offer the parchment some as well before placing the shaped cookies atop. They should feel like taffy- sticky with no cracks- before placing on parchment & baking. If they appear to be tough or show any cracks before baking they will certainly be dry & crumbly which you DO NOT want! You will not need the full amount of almond flour here, just add gradually until the dough is able to take form and stay into ball-shape. DO NOT over-stir the wet ingredients! In fact, it’s best to place all wet ingredients in one bowl and begin slowly adding your almond flour & baking powder before you even begin to stir them alone. These are insanely addictive- the filling especially will have you swallowing the whole mix and having to make more for your lonely remaining cookies! So GOOD!!
So good. Originally made these for a friend, but I was so jealous that I didn’t make any for myself! To die for and so so cute.
So good! I found them hard to roll so I made it like a cookie skillet and added some chocolate chips on top. My brothers loved them too!
Delicious, so glad we finally tried them. What a treat!
This looks amazing! I’m allergic to almonds. How can I substitute coconut flour instead?
Thank for your help!