You guys made my Healthy Twix Bars into mini cups and none of our lives will ever be the same. I obviously had to recreate, and now we have my Bite-Sized Twix Cups.
As if we all weren’t already obsessed with the OG Twix Bars (they’ve consistently been one of my most popular recipes), these are the bite-sized version and I’m dying. Shoutout to @bripetrous who was my inspo for this one. I honestly can’t get over the genius that is our Good Eats fam!

BIG TWIX ENERGY, BUT BITE-SIZED
Most of you already know I have a deep love of re-creating classic sweets, treats and desserts with better-for-you ingredients. My original Healthy Twix Bars were basically an instant classic, and I couldn’t be prouder.
But these Bite-Sized Twix Cups? Brilliant.
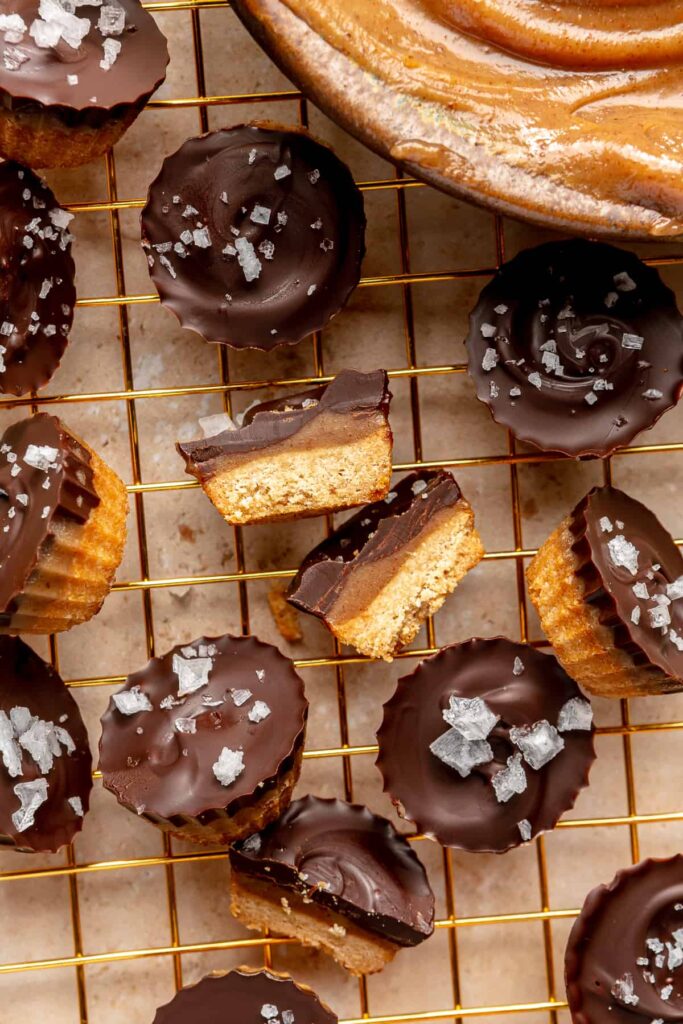
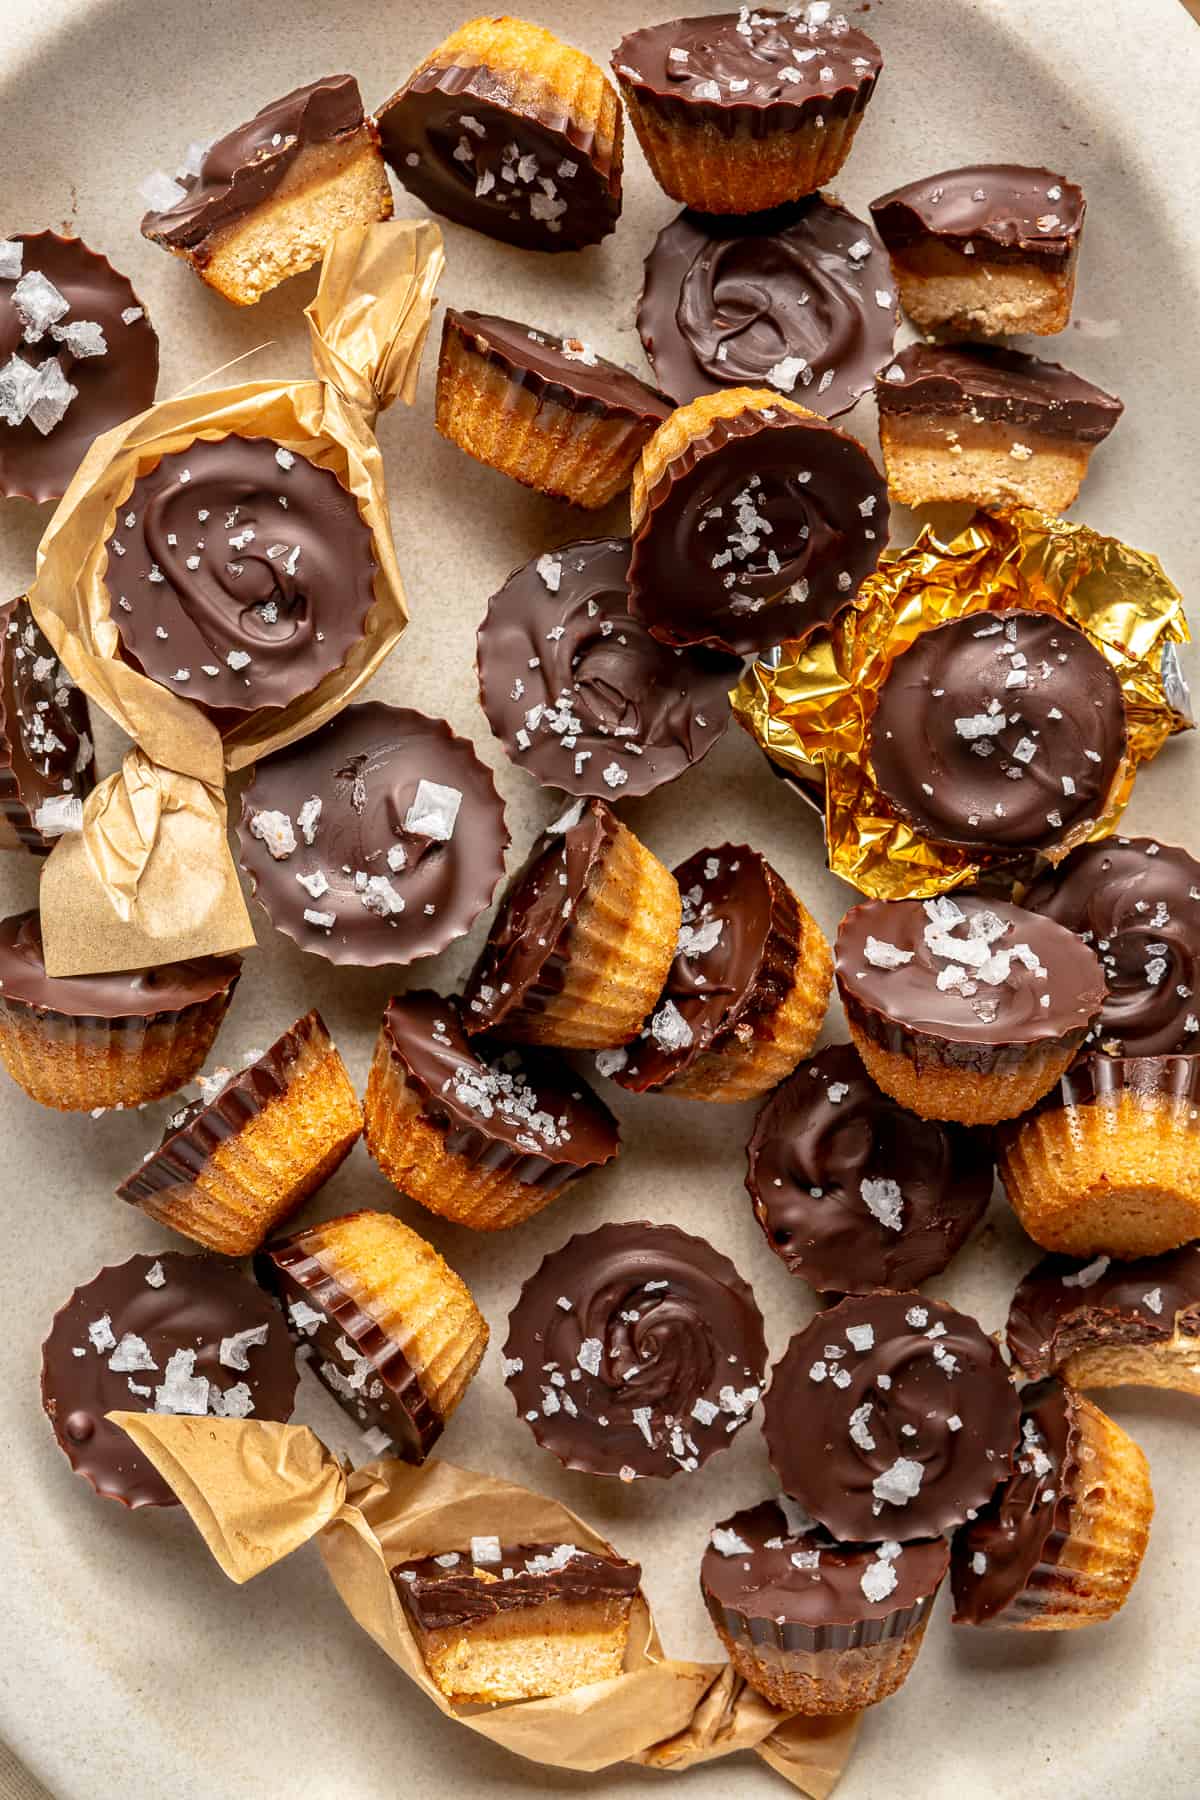
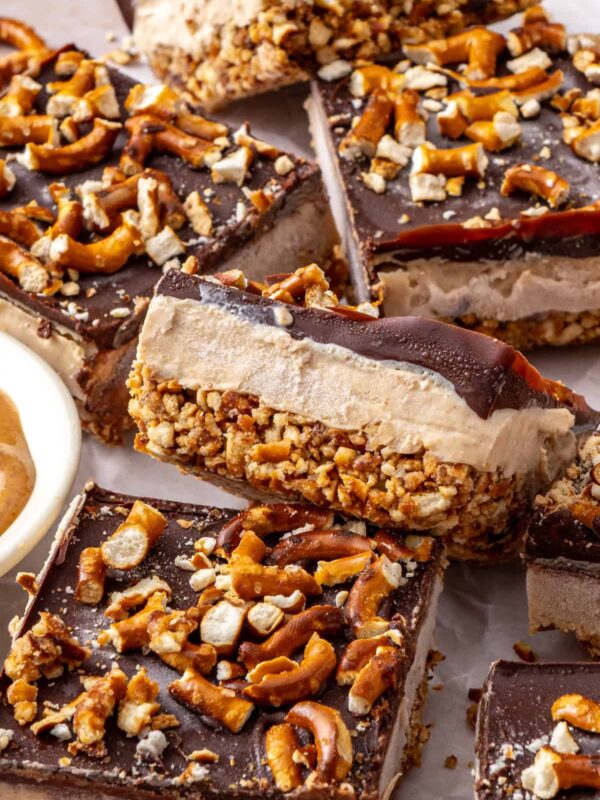
Just like the classic Twix bars, this mini version is made with three layers: a perfectly crunchy shortbread layer, a smooth and sweet caramel layer, and a velvety chocolate coating. Tell me you’re not drooling!
Add a sprinkle of flakey sea salt on top, and compared to the packaged version, they’re every bit as – scratch that, even more – delicious. It’s truly giving, as Bridge said, ‘big Twix energy’, but bite-sized.
The only difference between these cuties and my original Twix bars is that I used a mini candy silicone mold (linked in my Amazon storefront) and divided up each layer in the mini cups.
Essentially, you just bake the shortbread layer for about 8 minutes, let it cool completely, add the caramel layer, freeze until hardened, then add the chocolate layer and finish with a sprinkle of flakey sea salt on top (an important step for that sweet and salty flavor!).
Don’t be intimidated by the 3-step process! I promise it’s easy to make and is beyond worth it.
A BETTER-FOR-YOU, CLASSIC CANDY BAR REMAKE
Have I mentioned these Bite-Sized Twix Cups are gluten-free, dairy-free and refined sugar-free? You’ll probably find that hard to believe as soon as you pop one (or two or three, no judgement here!) in your mouth.
Knowing that these are made with more wholesome ingredients – like nutrient and fiber-packed almond + coconut flours (both of which also promote blood sugar stabilization), and natural sweeteners like honey and maple syrup – is something I think we can all get behind.
I mean, what’s not to love about a better-for-you, bite-sized version of a classic candy bar we all know and love? The obsession is so real, this tried-and-true recipe (for the Twix Bars) of course earned a very worthy spot in my first cookbook, Rachael’s Good Eats.
Do yourself a favor and satisfy your candy craving with these homemade, Bite-Sized Twix Cups. You’re going to be obsessed!
Oh, and let me know what you think when you make them, and how long they last (lol) – because if you’re like Bridger and I, we’re having a hard time resisting!

INGREDIENTS YOU’LL NEED:
Shortbread Layer
- Coconut flour
- Almond flour
- Coconut oil, melted
- Honey (or sub maple syrup)
Caramel Layer
- Almond butter, creamy or crunchy (or your favorite nut or seed butter)
- Coconut oil
- Vanilla extract
- Maple syrup
- Sea salt
Chocolate Layer
- Dark chocolate bar (I use @evolvedchocolate Signature Dark Chocolate Bar, or sub chocolate chips)
- Coconut oil
- Flakey sea salt
Other
- Mini candy silicone mold (linked here and in my Amazon storefront)


HOW TO MAKE MY BITE-SIZED TWIX CUPS
Shortbread Layer
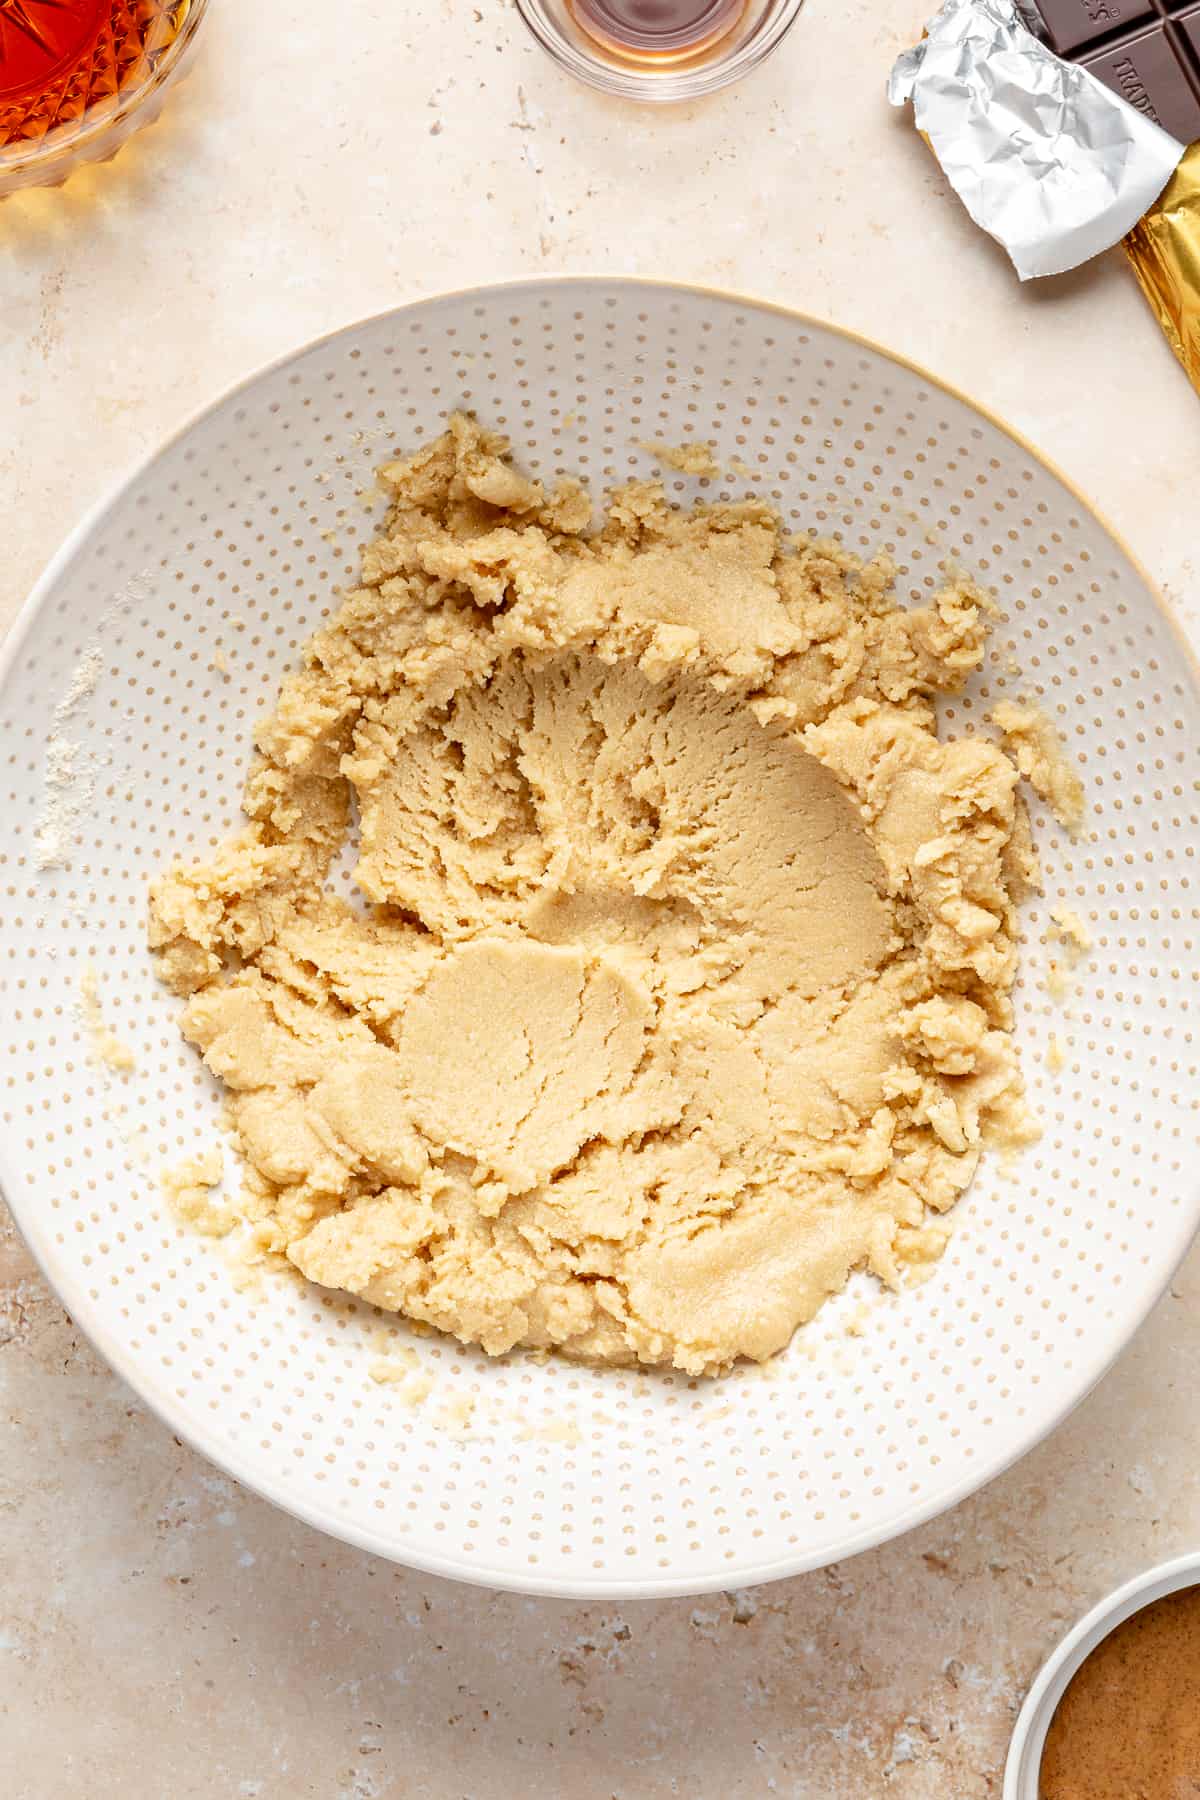
First, you’ll make the shortbread layer. Preheat the oven to 350 degrees Fahrenheit. In a large bowl, combine the coconut + almond flours with melted coconut oil and warmed honey (or maple syrup). Use a silicone spatula to mix all of the shortbread ingredients together, making sure to stir out all of the crumbles of flours until thoroughly combined.
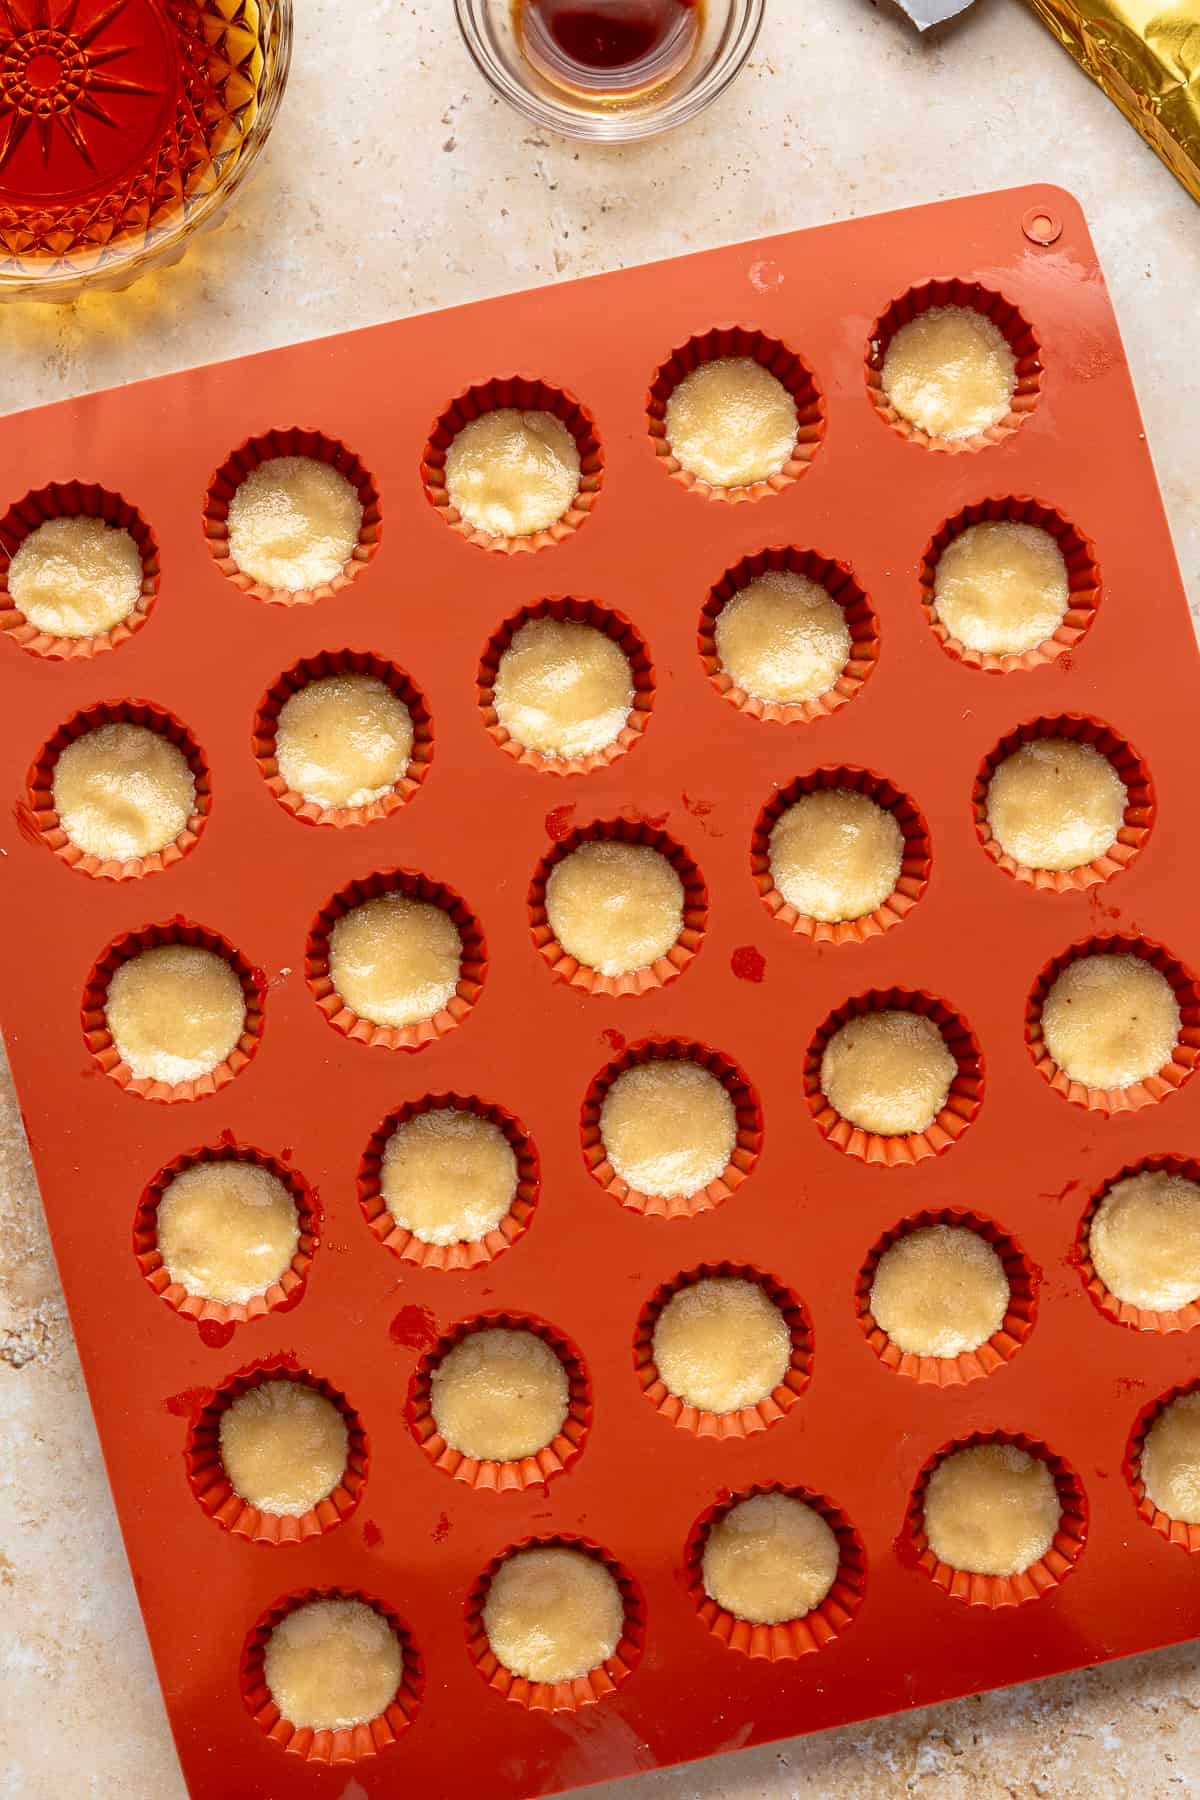
Using a small spoon, fill about 1/3 of each cup in the mini silicone mold with the shortbread mixture. Use your finger to slide the mixture off the spoon into each cup, and the back of the spoon to gently pack it down. If you find the shortbread mix starts to stick to your spoon, simply dip the spoon into melted coconut oil and continue to gently press down evenly into the base of each mini cup.
Bake for about 8 minutes, or until the shortbread starts to turn golden brown. Remove from oven once done, and set aside to cool completely.
Caramel Layer
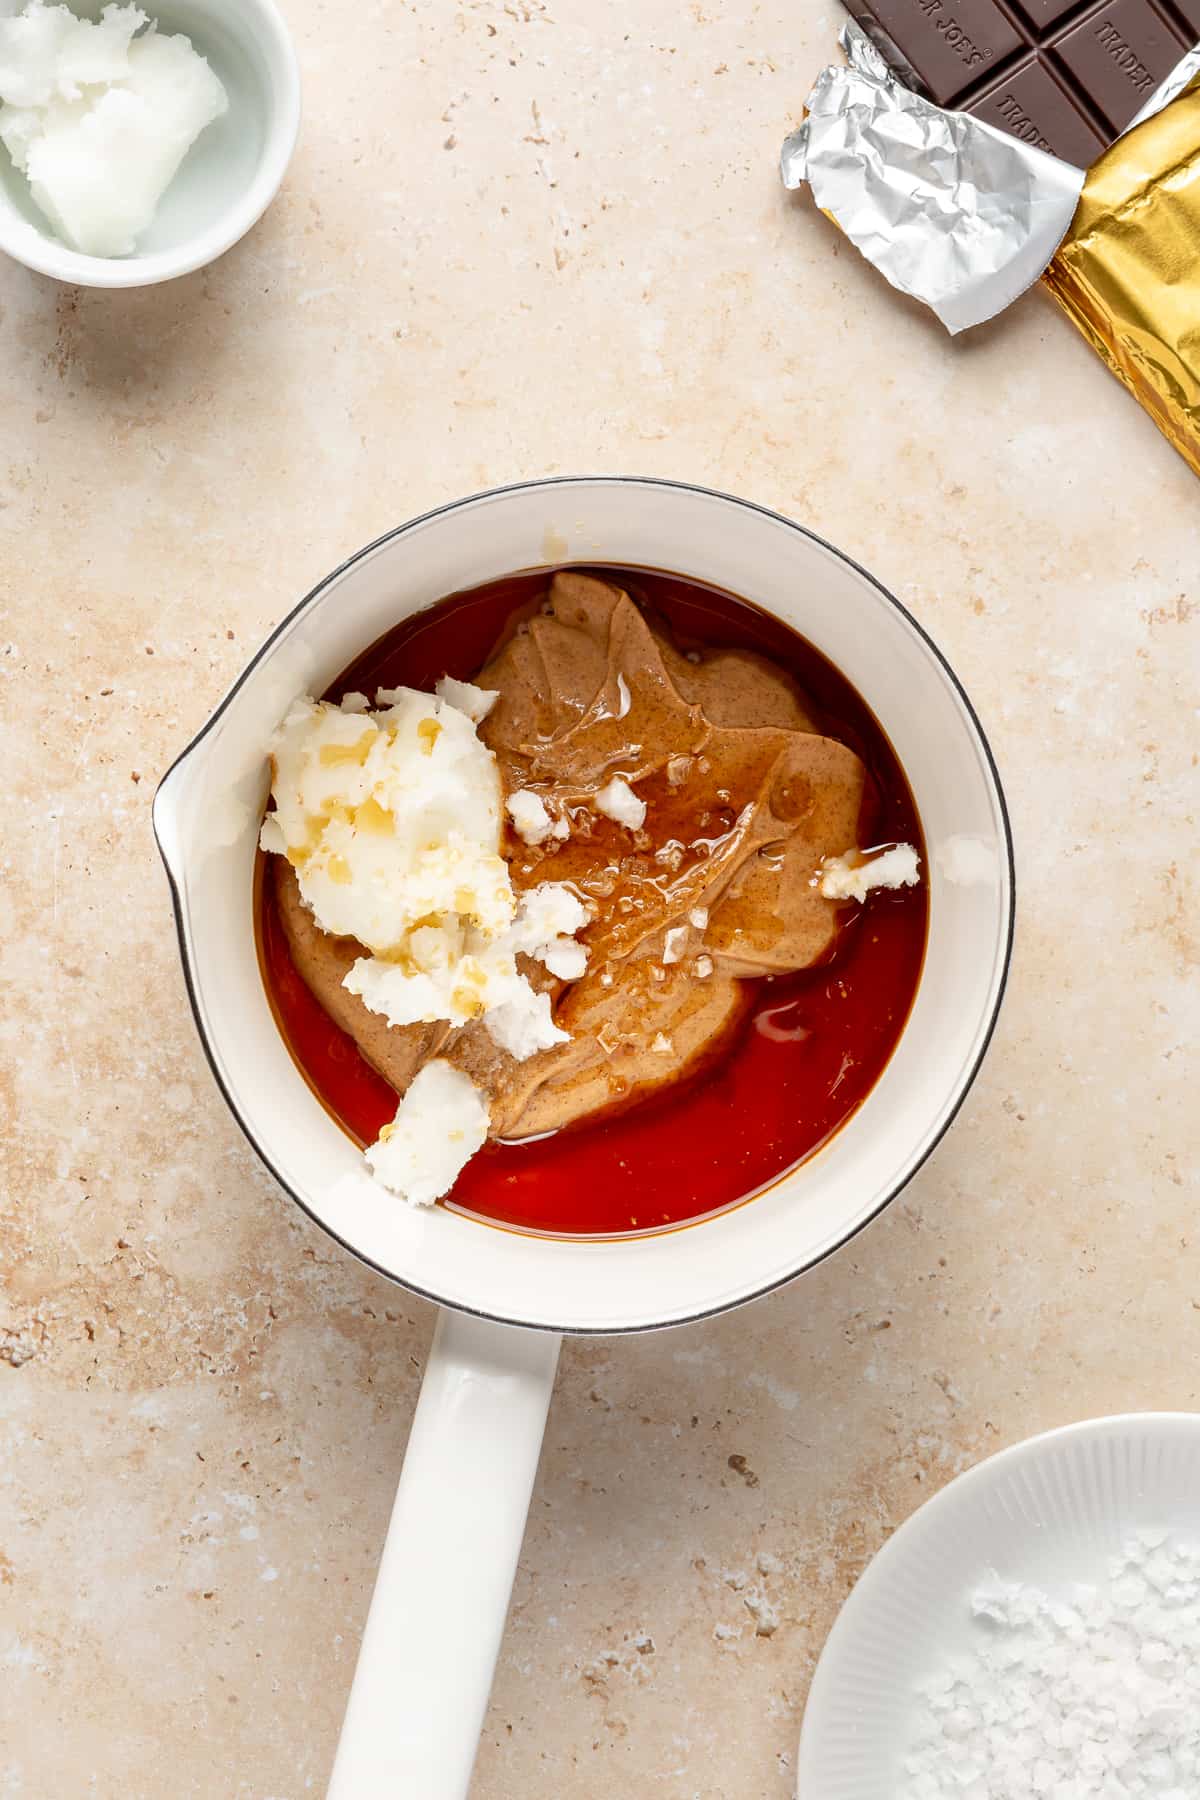
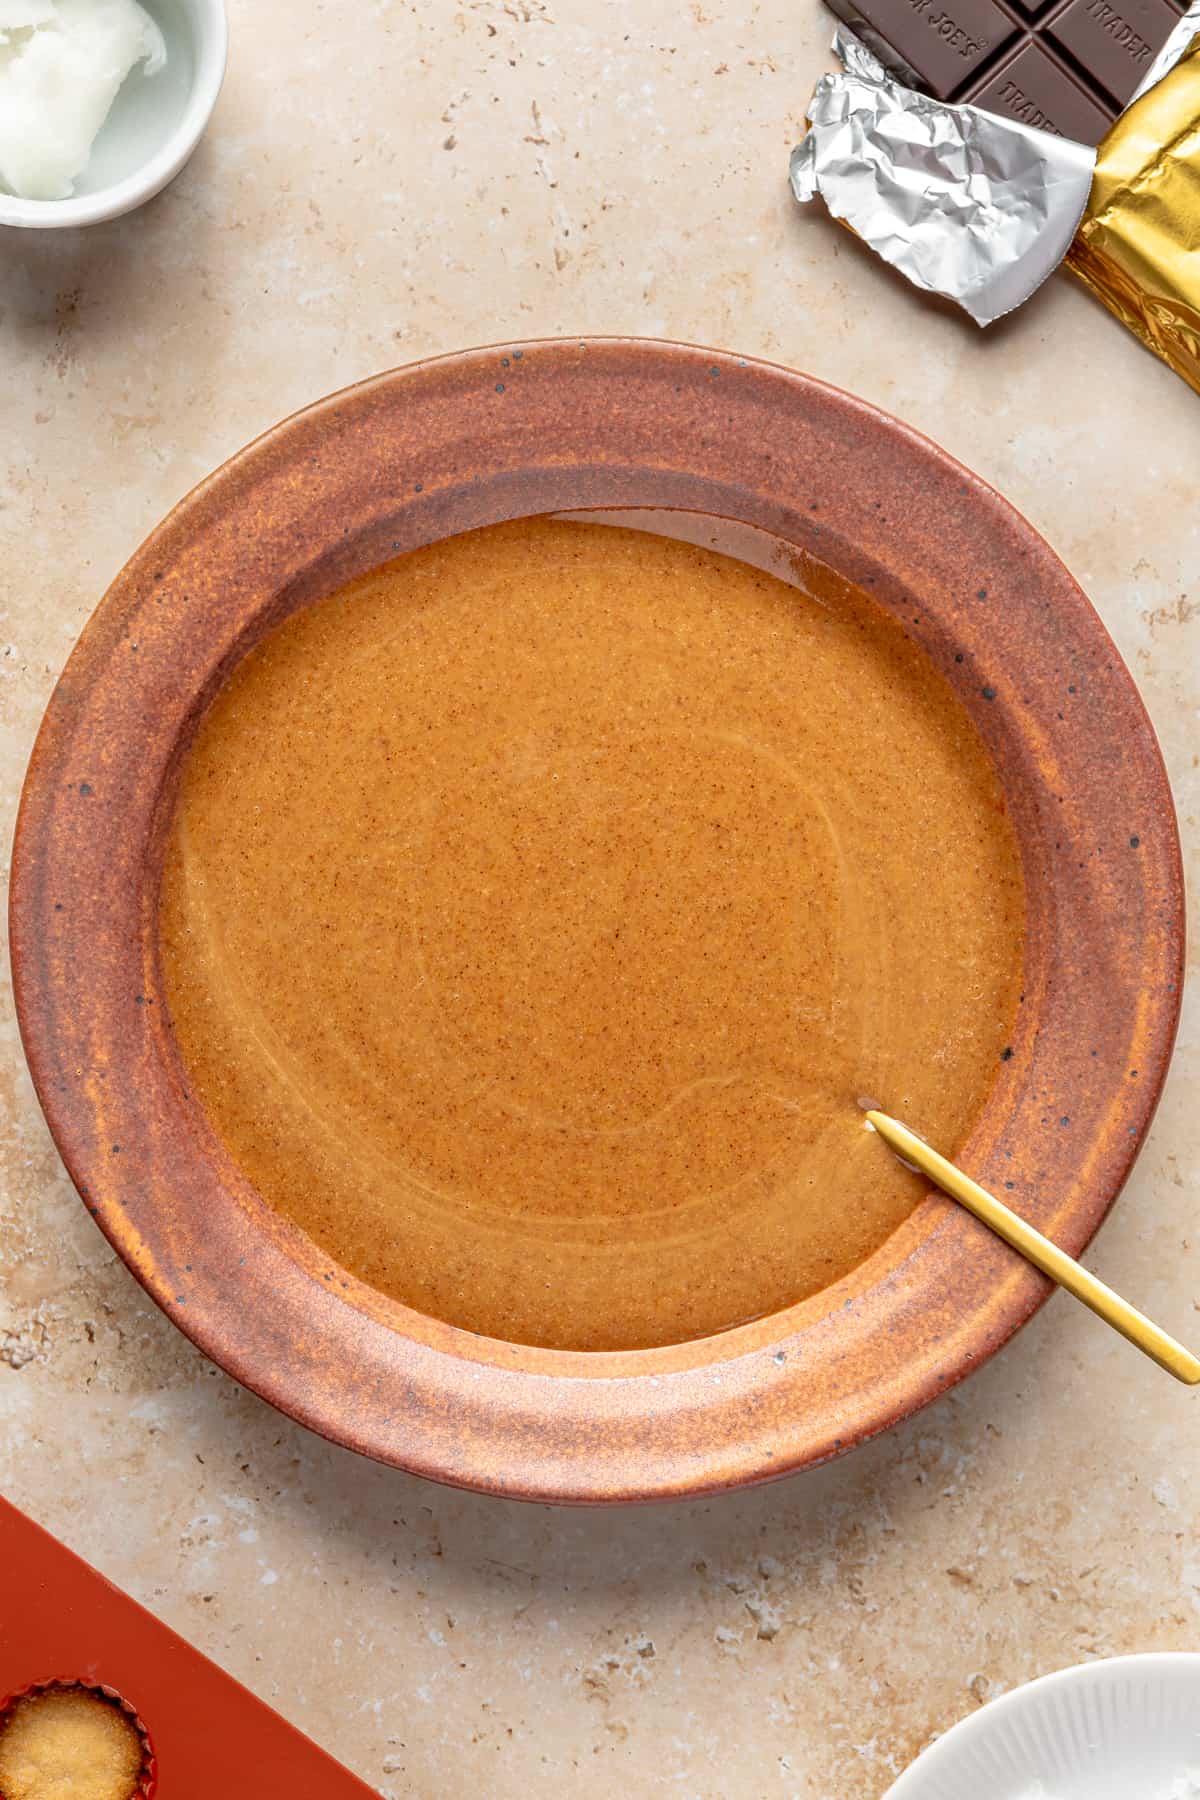
In a medium-sized saucepan, combine the almond butter (or nut or seed butter of choice), coconut oil, vanilla, maple syrup and sea salt over medium-low heat. Heat until completely liquified, whisking together, for about 2-3 minutes. Remove from the burner and let the mixture cool completely.
Chocolate Layer
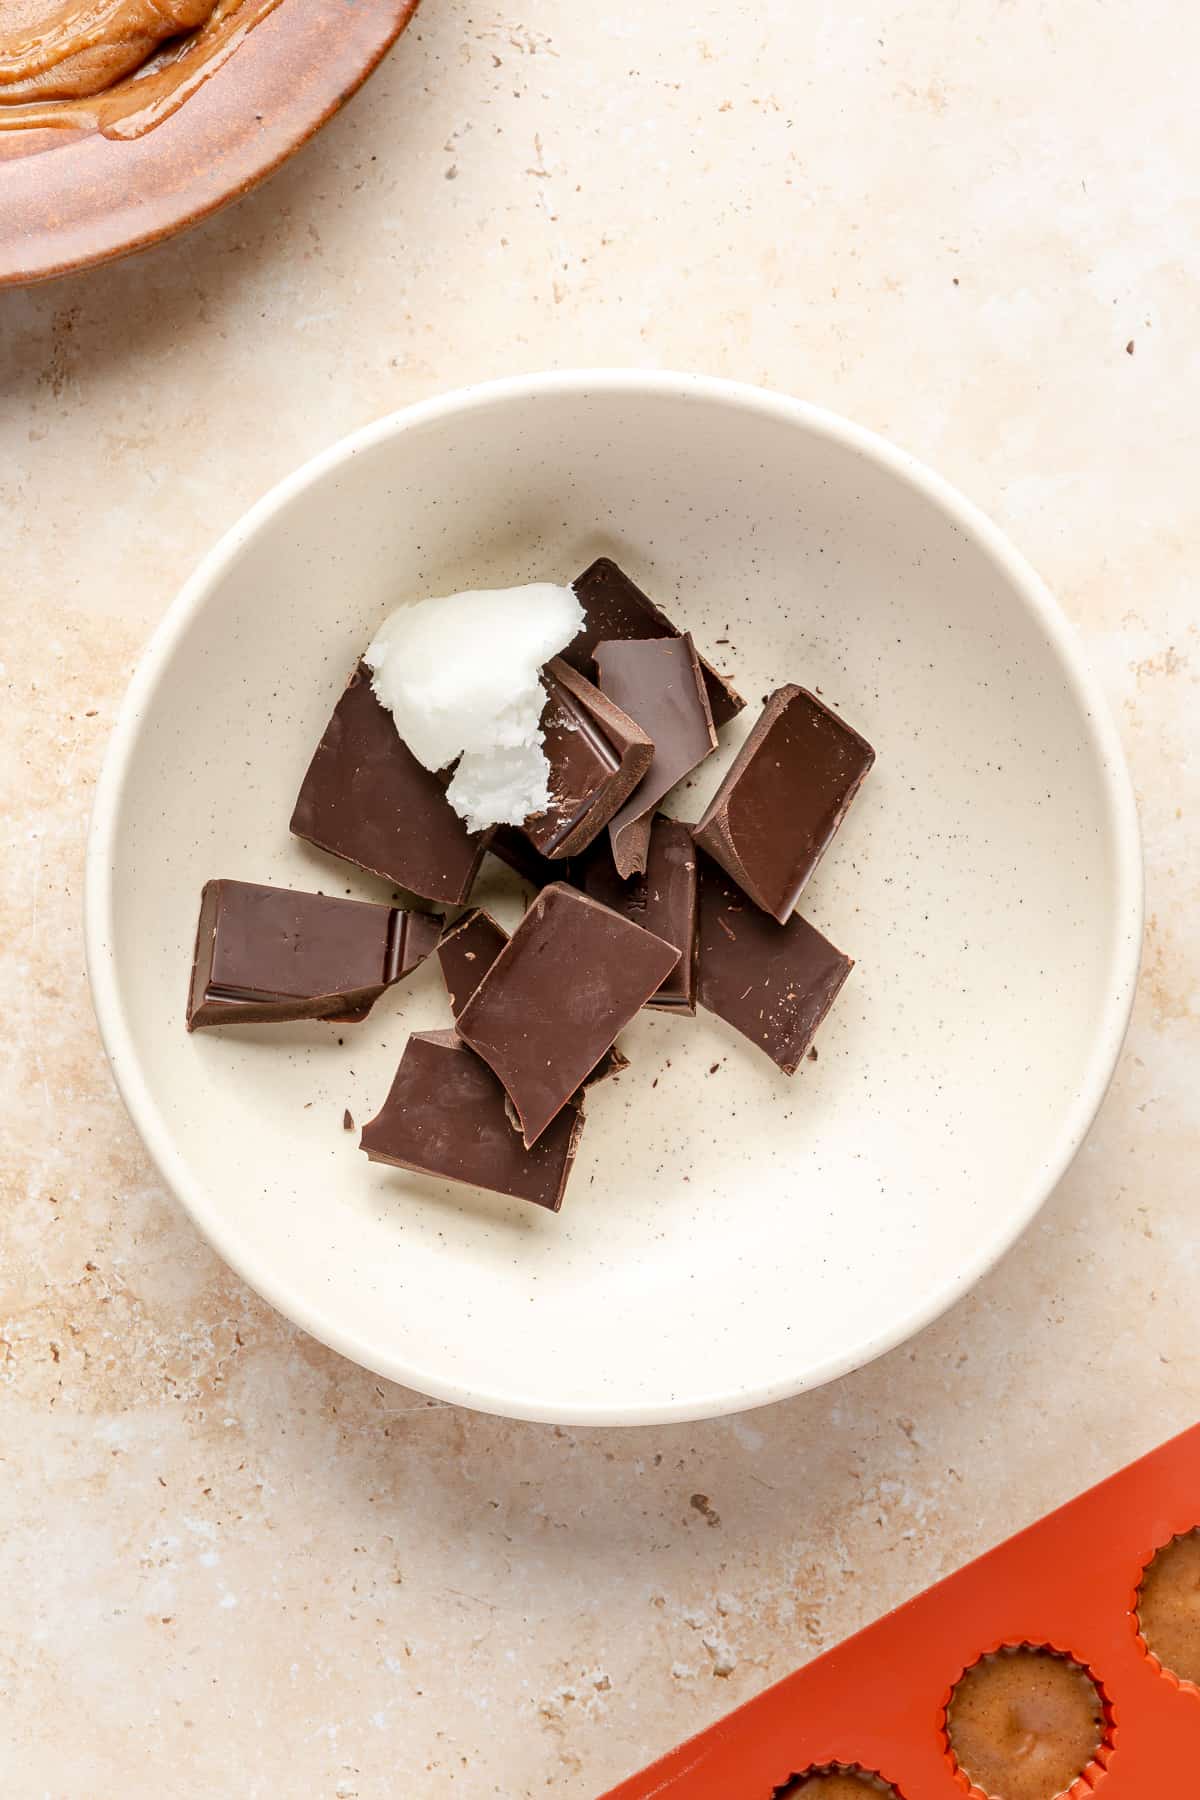
Break up your chocolate bar of choice (or chocolate chips) into a small bowl and add coconut oil. Warm in the microwave for 30 second intervals, stirring in between, until completely liquified. You could also heat the chocolate and coconut oil over the stove, if preferred.

Bite-Sized Twix Cups
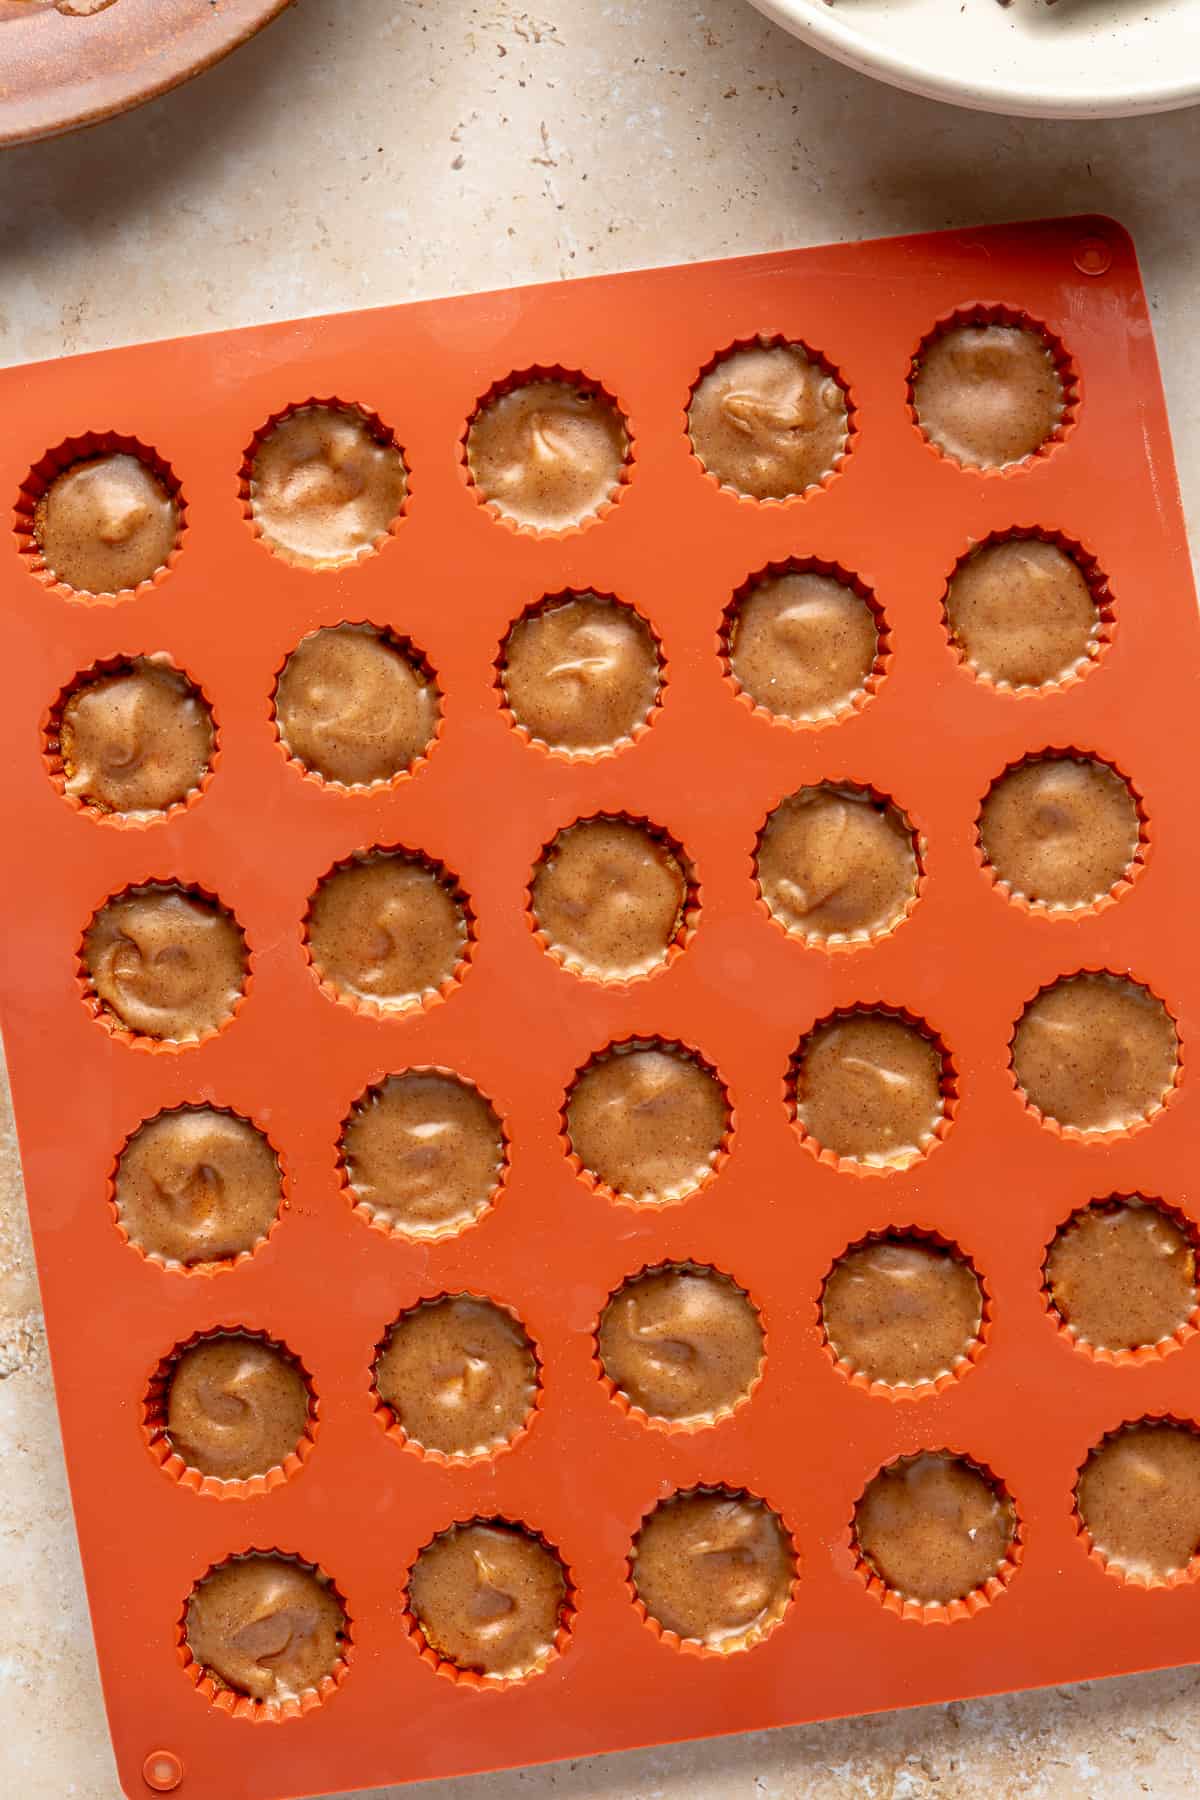
Now it’s time to put it all together. Once the shortbread and caramel layers have completely cooled, pour the caramel sauce over the shortbread base layer, spreading it out evenly, again filling about 1/3 of each mini cup. Set in the freezer until these two combined layers completely harden (about 1-2 hours).
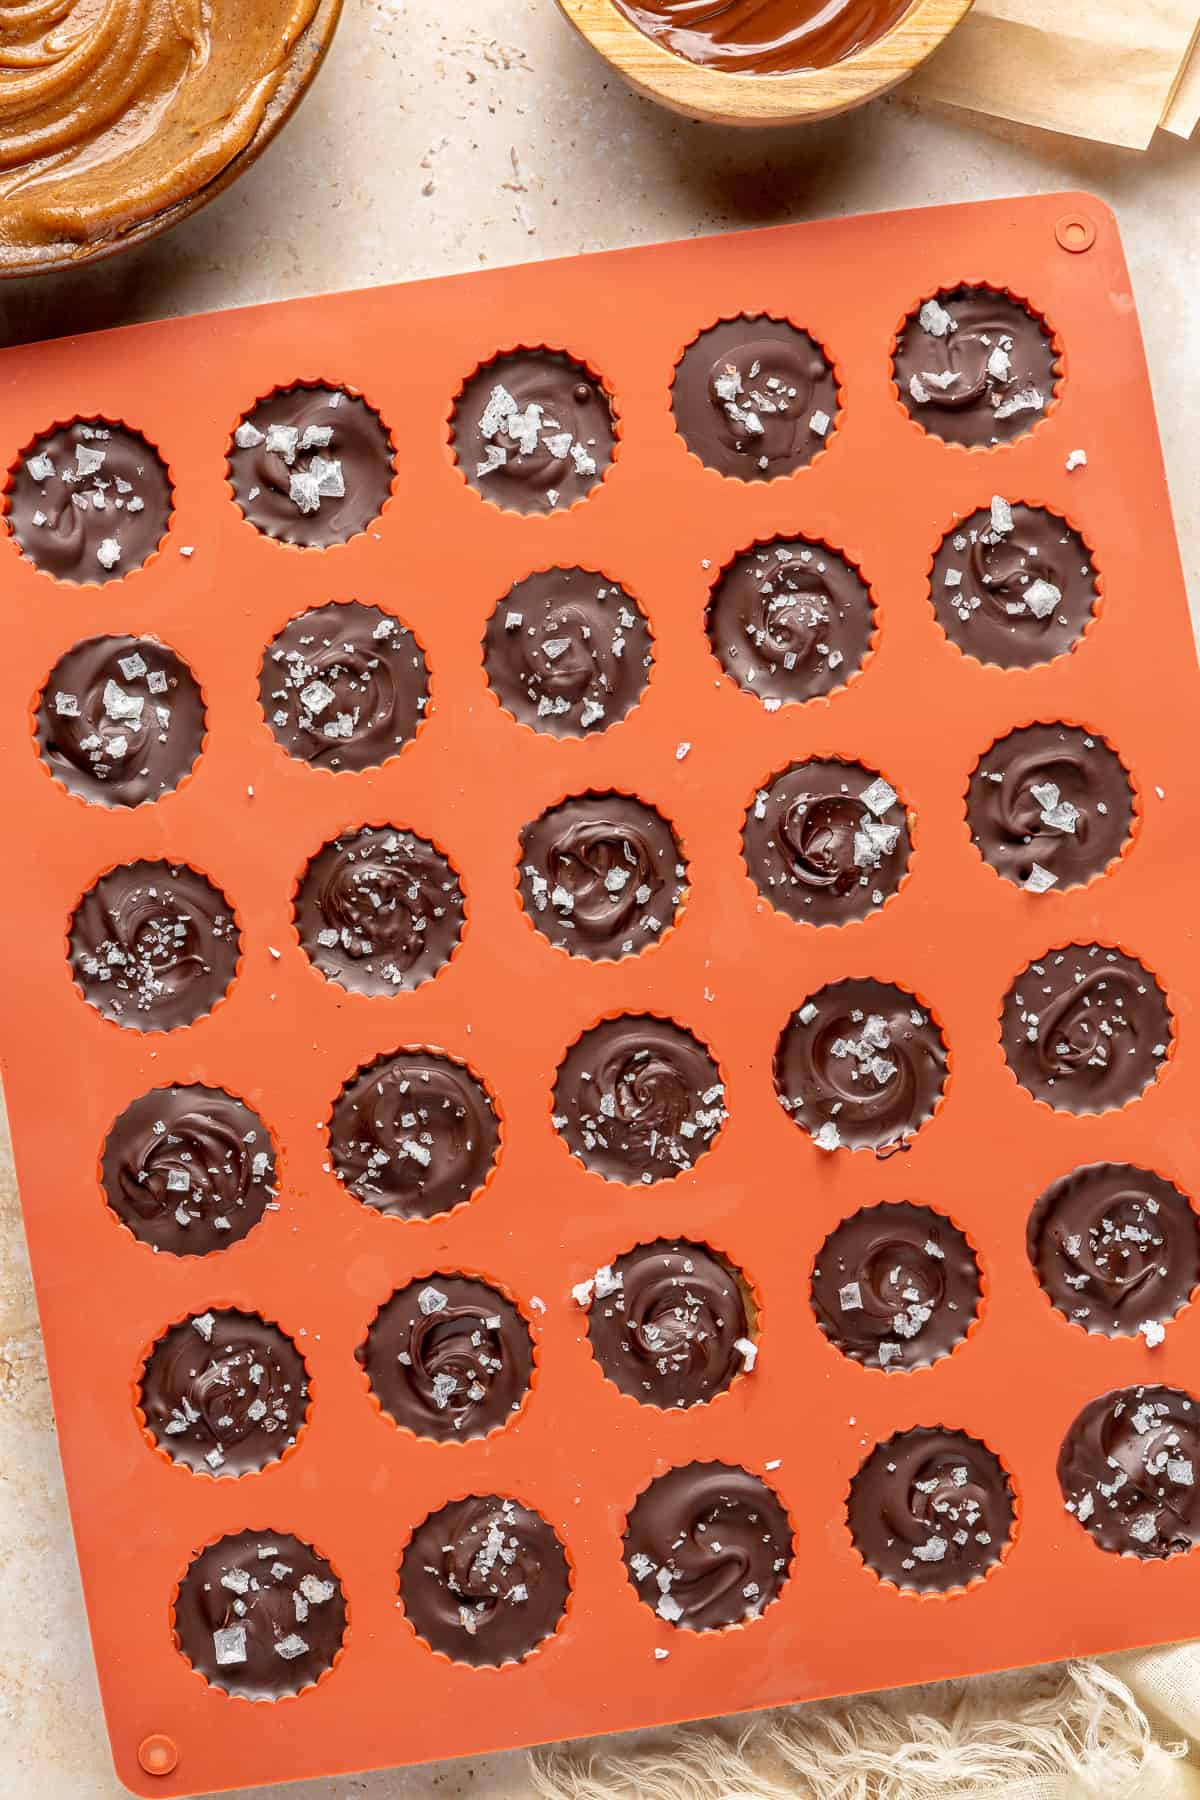
Once frozen, remove from the freezer (be sure to put back into the freezer to finish hardening if you find it’s still soft), and pour the melted chocolate over top to fill each cup in the silicone mold – again, spreading out evenly. Sprinkle flakey sea salt as the final touch and set in the fridge for 5-10 minutes to harden.
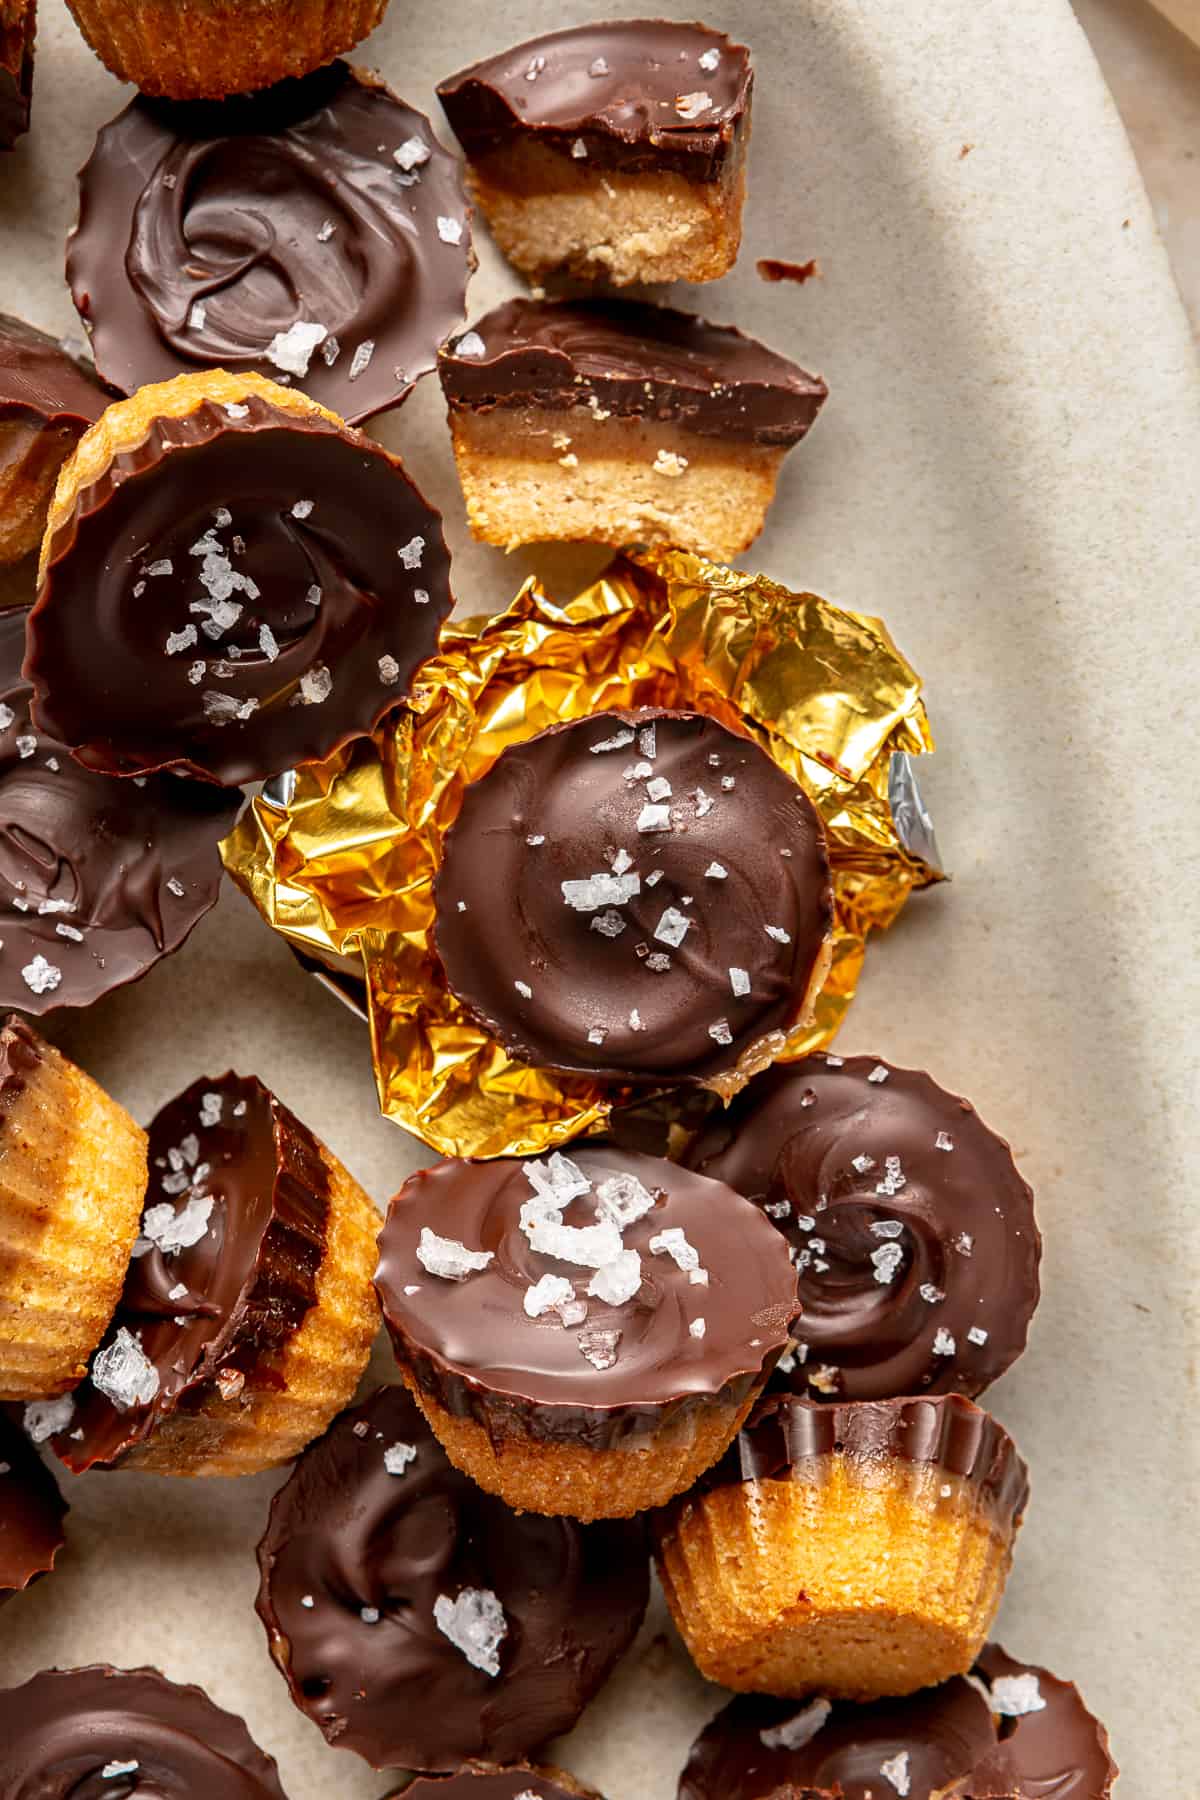
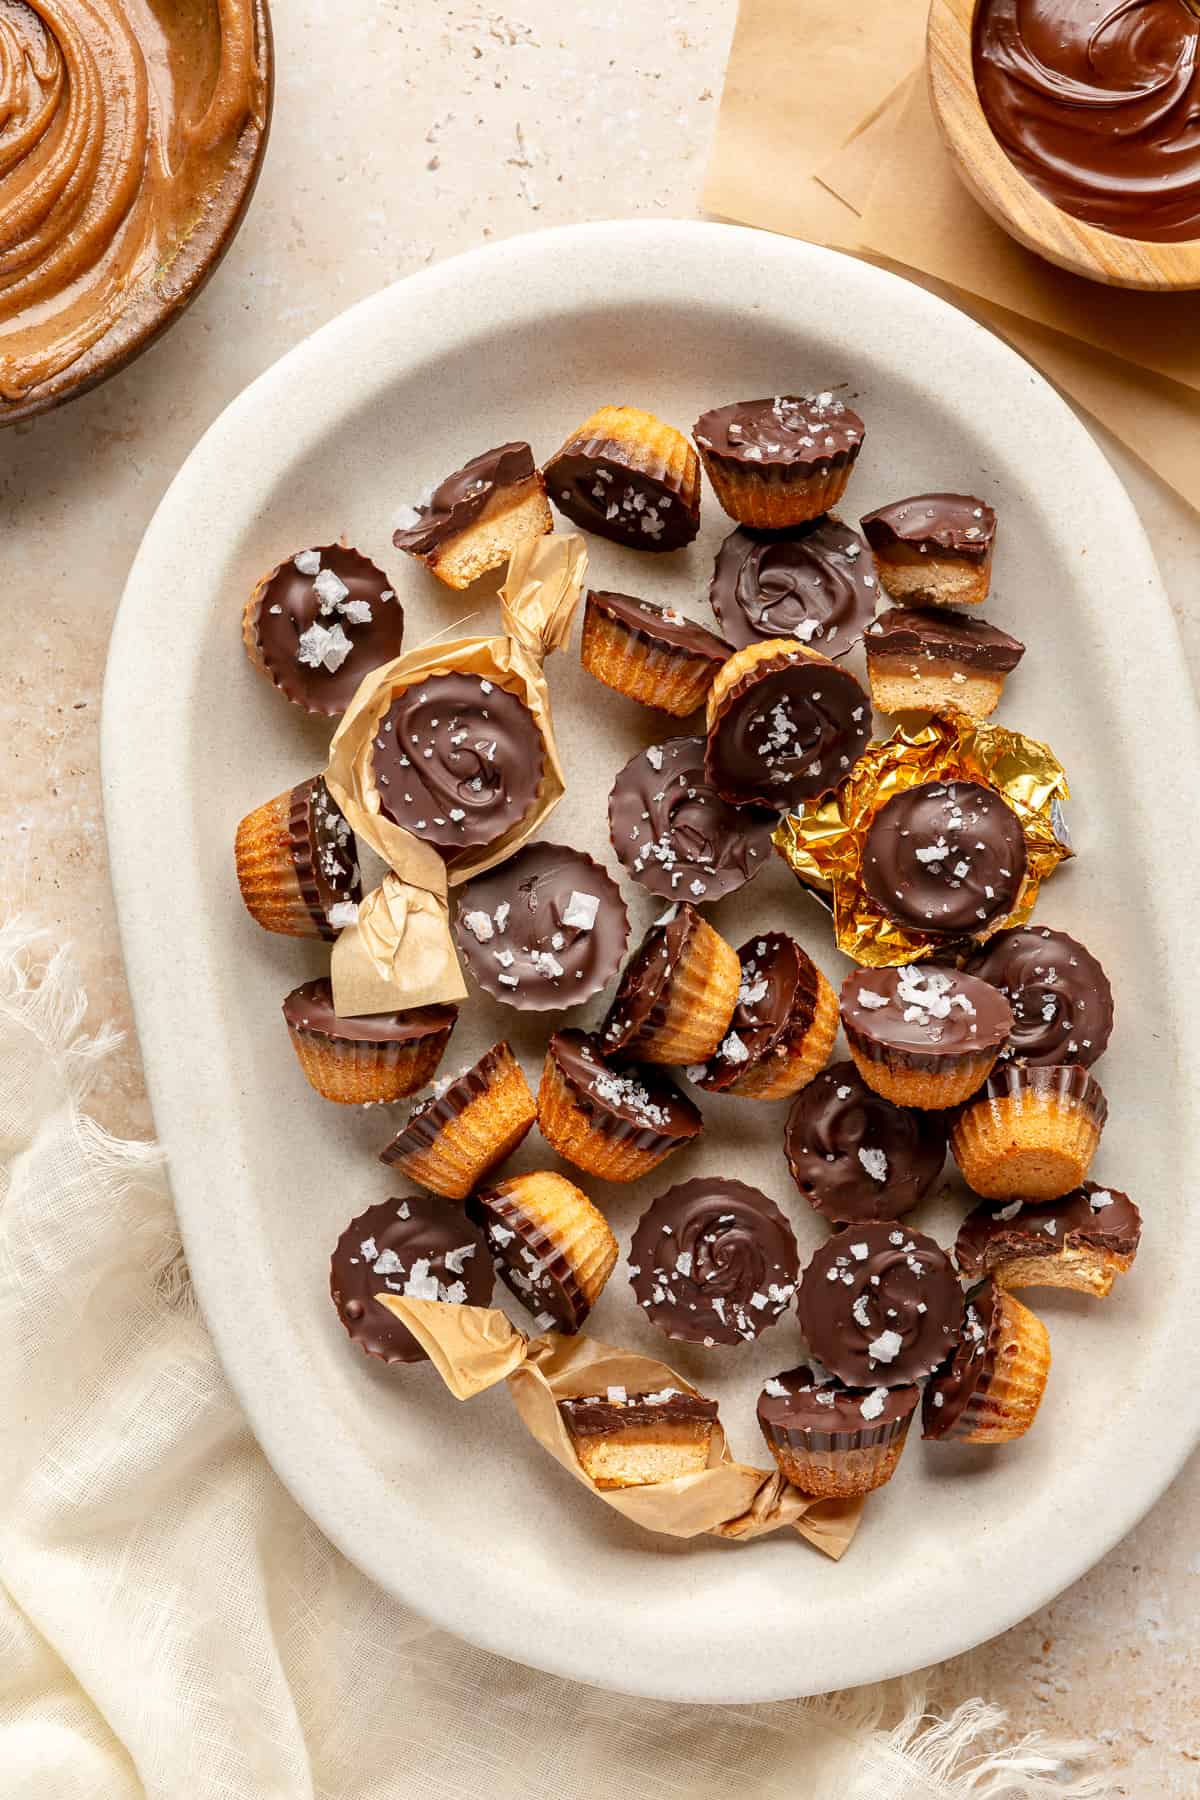
After everything has chilled together, remove the hardened bite-sized cups from the silicone mold by carefully popping them out from the bottom (they should pop out easily). Option to wrap individually in mini foil or parchment paper candy wrappers, or serve on a plate. Enjoy!
To Store
These Bite-Sized Twix Cups are best stored in an airtight container in the refrigerator for about one week and the freezer for about one month. If kept in the freezer, make sure to leave them out at room temp for a few minutes before serving so they soften up a bit.
SHOP THIS RECIPE:

RECIPE SUBSTITUTIONS & QUESTIONS
In the shortbread layer, feel free to swap maple syrup for honey. For the caramel layer, use whichever nut or seed butter you prefer (creamy or crunchy). And for the chocolate layer, instead of using a chocolate bar, you can sub 1/2 cup of chocolate chips. Also feel free to use melted butter or vegan butter instead of coconut oil. You got options!
If you’re reading this and have a Twix bar craving, but don’t have the mini candy silicone mold, then definitely give my OG Healthy Twix Bars or the Pumpkin Twix Bar variation a try (no silicone mold required)!
IS HOMEMADE CANDY BETTER FOR YOU?
In many ways, yes, homemade candy can be better for you than the store-bought versions. Homemade versions, like my Bite-Sized Twix Cups, tend to be made with more wholesome, better-for-you ingredients, which results in less sugar, fat and chemicals, and generally avoid inflammatory ingredients like seed or vegetable oils and refined sugar.
Even so, any dessert or candy is still a treat that, in my opinion, is best enjoyed in moderation. But let’s be honest – we all have those days where we need an extra pick-me-up, and that’s ok too!
DO YOU NEED TO ADD OIL WHEN MELTING CHOCOLATE?
This is a common question for most homemade candy bar/dessert recipes that involve melting chocolate. My take is this: while it’s not a total necessity, I prefer to and typically recommend adding coconut oil to chocolate, whether melting over the stove or microwaving. The coconut oil gives the chocolate a nice, silky shine and helps it to melt more smoothly (which makes it a perfect consistency for dipping, drizzling & coating). You could also use butter instead of the oil.
LOVE THESE BITE-SIZED TWIX CUPS? TRY MORE OF MY CLASSIC CANDY REMAKES AND SWEET TREATS:
Chocolate Tahini Cookie Skillet
Copycat Reese’s Peanut Butter Cups
Fudge Brownies (Gluten-free, Dairy-Free)
Homemade Nutter Butters (GF, DF, Refined Sugar-Free)

Click here to watch the reel I made of this recipe 🙂
Bite-Sized Twix Cups

Equipment
- mini candy silicone mold (linked above + in my Amazon Storefront)
- Mixing bowls
Ingredients
Shortbread Layer
- 1/2 cup coconut flour
- 1/2 cup almond flour
- 1/3 cup coconut oil, melted
- 3 tablespoons honey, warmed (or sub maple syrup)
Caramel Layer
- 1/2 cup almond butter, creamy or crunchy (or your favorite nut or seed butter)
- 1/4 cup coconut oil
- 1 teaspoon vanilla extract
- 1/4 cup maple syrup
- Pinch sea salt
Chocolate Layer
- One 2.5 oz dark chocolate bar, I use Evolved Chocolate Signature Dark Chocolate Bar, or sub 1/2 cup chocolate chips
- 1 tablespoon coconut oil
- 1/4 teaspoon flakey sea salt
Instructions
Shortbread Layer
- Preheat the oven to 350 degrees Fahrenheit. In a large bowl, combine the coconut + almond flours with melted coconut oil and warmed honey (or maple syrup). Use a silicone spatula to mix all of the shortbread ingredients together, making sure to stir out all of the crumbles of flours until thoroughly combined.
- Using a small spoon, fill about 1/3 of each cup in the mini silicone mold with the shortbread mixture. Use your finger to slide the mixture off the spoon into each cup, and the back of the spoon to gently pack it down. If you find the shortbread mix starts to stick to your spoon, simply dip the spoon into melted coconut oil and continue to gently press down evenly into the base of each mini cup.
- Bake for about 8 minutes, or until the shortbread starts to turn golden brown. Remove from oven once done, and set aside to cool completely.
Caramel Layer
- In a medium-sized saucepan, combine the almond butter (or nut or seed butter of choice), coconut oil, vanilla, maple syrup and sea salt over medium-low heat. Heat until completely liquified, whisking together, for about 2-3 minutes. Remove from the burner and let the mixture cool completely.
Chocolate Layer
- Break up your chocolate bar of choice (or chocolate chips) into a small bowl and add coconut oil. Warm in the microwave for 30 second intervals, stirring in between, until completely liquified. You could also heat the chocolate and coconut oil over the stove, if preferred.
Bite-Sized Twix Cups
- Now it’s time to put it all together. Once the shortbread and caramel layers have completely cooled, pour the caramel sauce over the shortbread base layer, spreading it out evenly, again filling about 1/3 of each mini cup. Set in the freezer until these two combined layers completely harden (about 1-2 hours).
- Once frozen, remove from the freezer (be sure to put back into the freezer to finish hardening if you find it’s still soft), and pour the melted chocolate over top to fill each cup in the silicone mold – again, spreading out evenly. Sprinkle flakey sea salt as the final touch and set in the fridge for 5-10 minutes to harden.
- After everything has chilled together, remove the hardened bite-sized cups from the silicone mold by carefully popping them out from the bottom (they should pop out easily). Option to wrap individually in mini foil or parchment paper candy wrappers, or serve on a plate. Enjoy!
To Store
- Store in an airtight container in the refrigerator for about one week and the freezer for about one month. If kept in the freezer, make sure to leave them out at room temp for a few minutes before serving so they soften up a bit.


Comments