CHARCUTERIE (SHärˈko͞odərē/) BOARDS. They’ve become a staple in our house for family events/gatherings, hang time with friends, football games, weekend snacks, and everything in between. Really leaning into my French roots with my skills this past year! It’s taken me a while to get the hang of them, but there’s something so therapeutic and satisfying about putting together one of these food boards. I get questions all the time on how to throw these together, but honestly it’s all about practice and getting more familiar with how all the pieces fit together. I thought I would share a handful of my quick tips below so you can make your own epic charcuterie board! Plus, it’s a sure fire way to impress your friends & fam!
THE BASICS – WHAT IS A CHARCUTERIE BOARD?
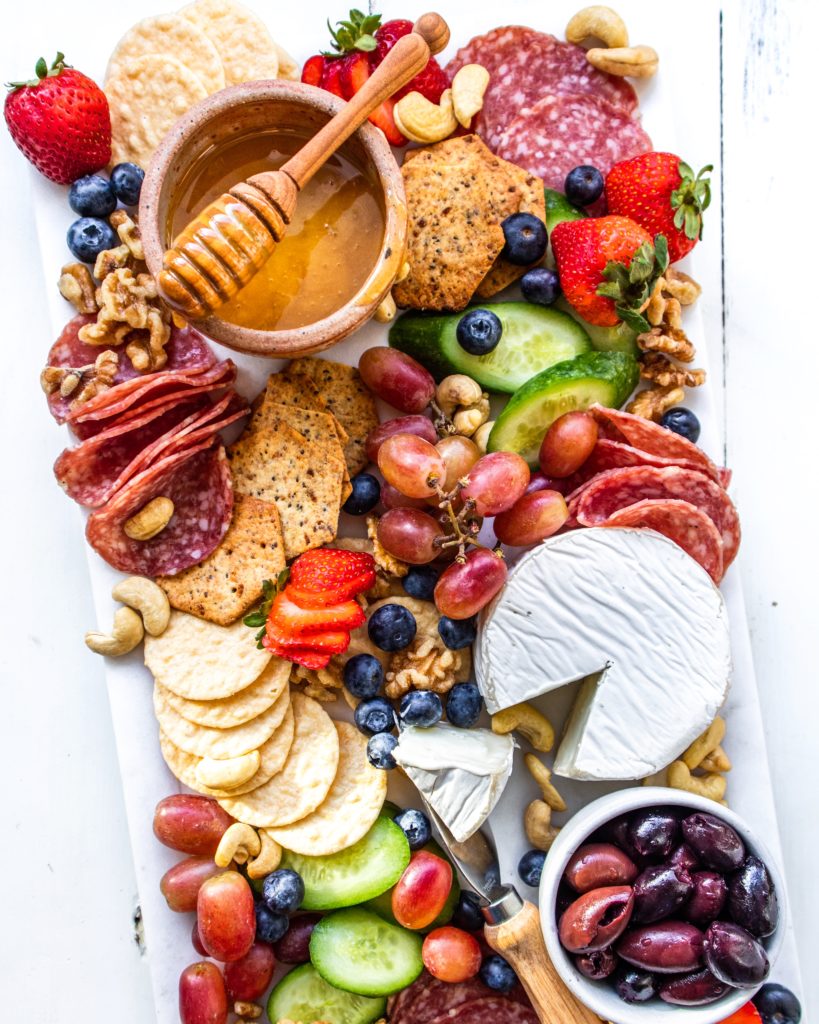
A charcuterie board is the arranging and preparing of cured meats, cheeses, and finger foods on a serving board or platter. When you can get it right, it’s a piece of art! A true charcuterie board has a balance of both savory and sweet flavors or options to choose from. This will also guarantee something for everyone.
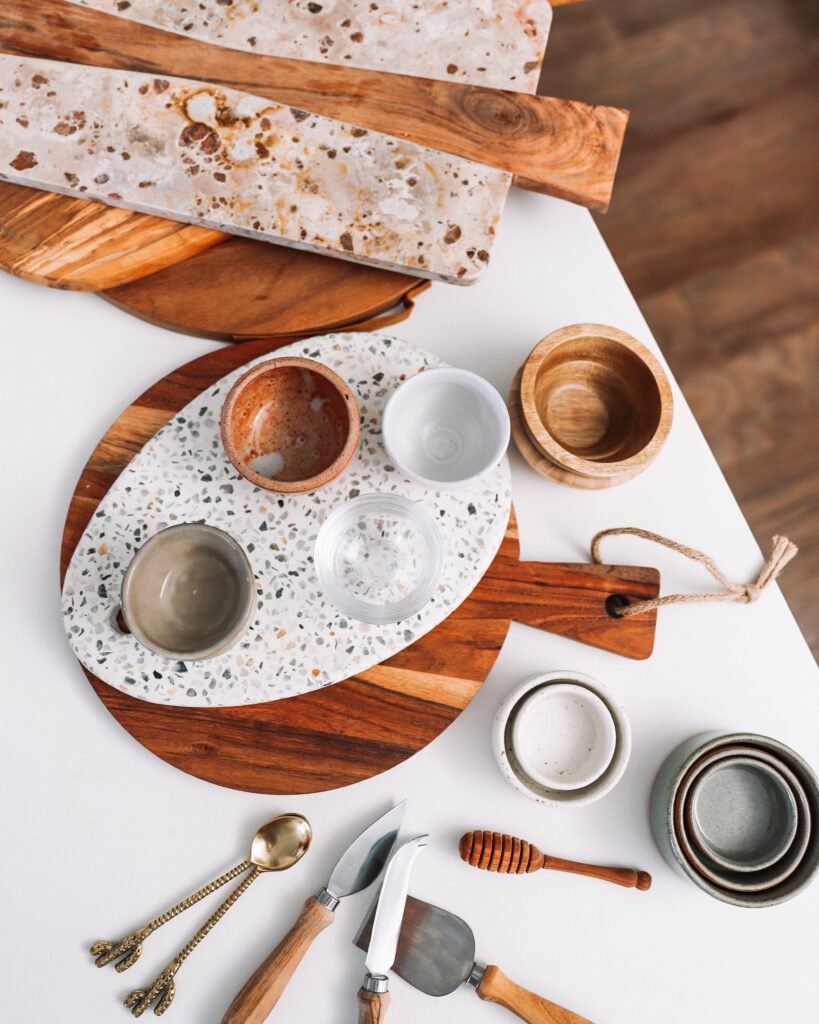
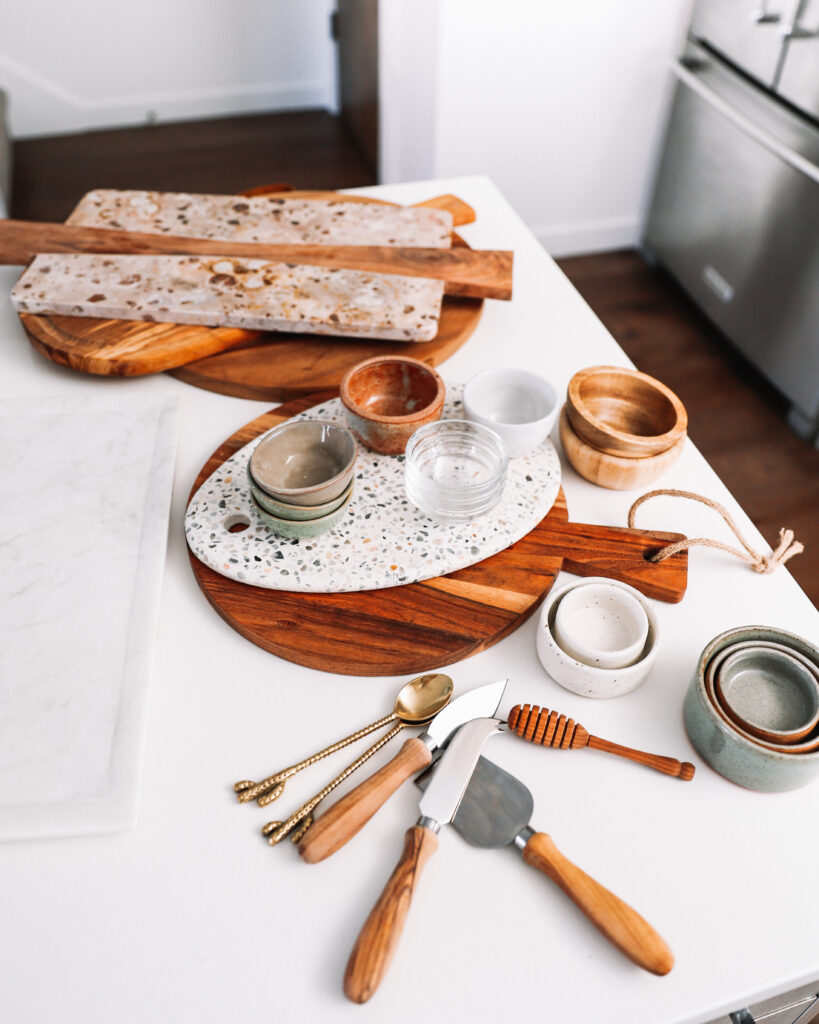
PICK YOUR BOARD + BOWLS + SERVING DISHES
Whether it’s a cutting board, plate, baking sheet, or serving tray, pick out your base! I have a handful that I love from specific serving boards to fancier marble trays. The shape of your board also plays a factor in how you will place your ingredients around the tray.
GATHER YOUR INGREDIENTS
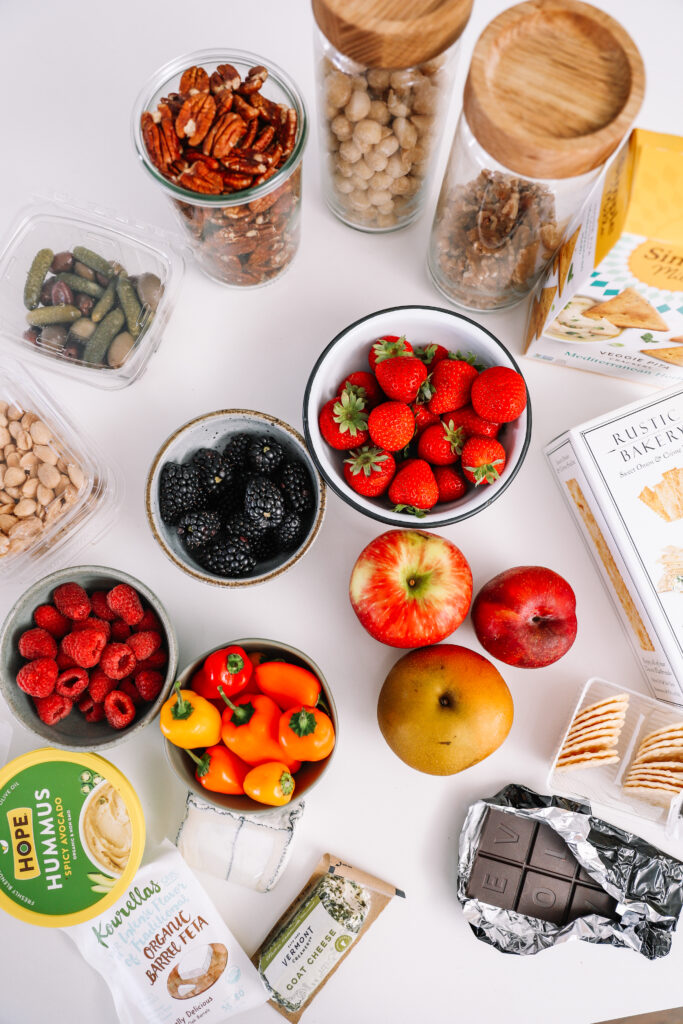
When it comes to ingredients, I love looking at a balanced board and keeping in mind everyone’s preferences. You can also determine the ingredients based on event type or theme, i.e. football– meat and cheese heavy, summertime board– fresh fruit galore, vegan-friendly– dairy-free cheese options, weekend brunch– pancakes, bacon, fruit.
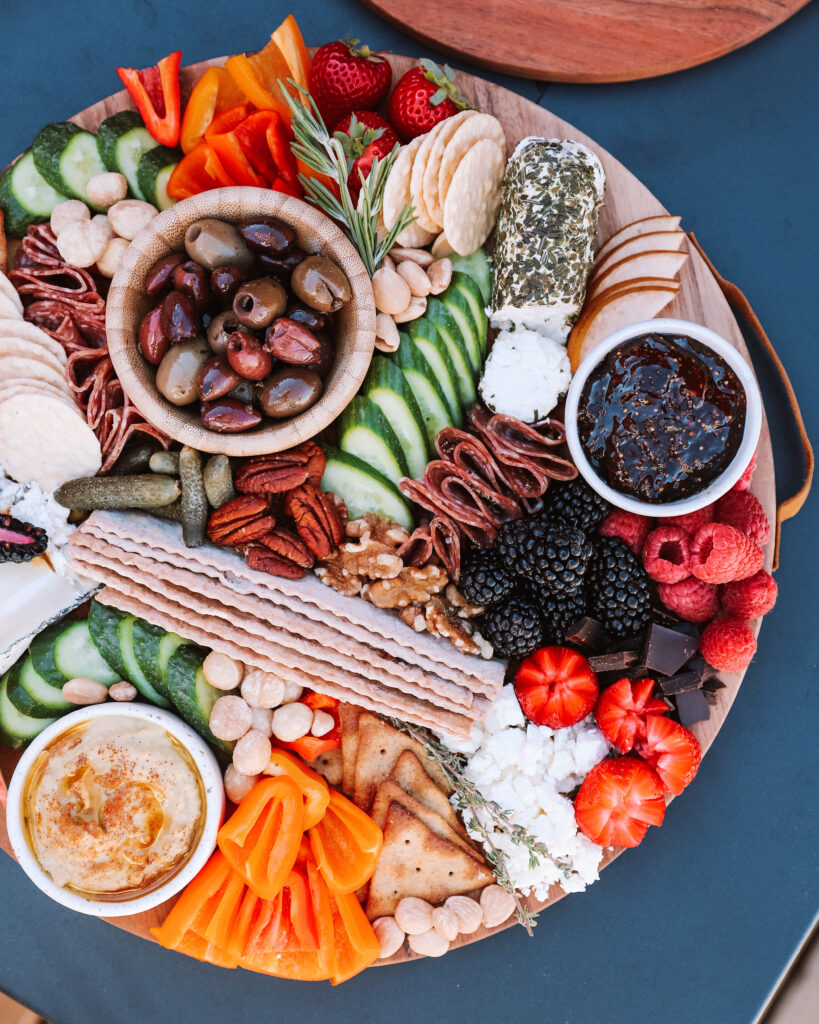
For my typical board, I prefer having staples like fresh cut veggies, fruit, goat cheese, olives, nuts, gluten-free crackers and dips like hummus and/or fig jam. Adding some different elements like fresh flowers, dried fruit, dried herbs and cheese knives can make a huge difference in overall aesthetic. Always think about the small details when you’re curating your board.
Some extras can include:
Jams
Mini pickles
Sliced baguette
Prosciutto
Pepperoni
CHEESE
Let’s break down the OG’s a little bit here. I’m lactose intolerant, specifically to cow’s milk, but have found that I can digest goat’s milk much easier. Fun fact: Goat milk contains less lactose and A2 casein, which is less inflammatory and may cause less intolerance when you compare it with cow’s milk (contains the protein, A1 casein). That’s why a lot of people are still able to consume goat milk when they’re lactose intolerant.
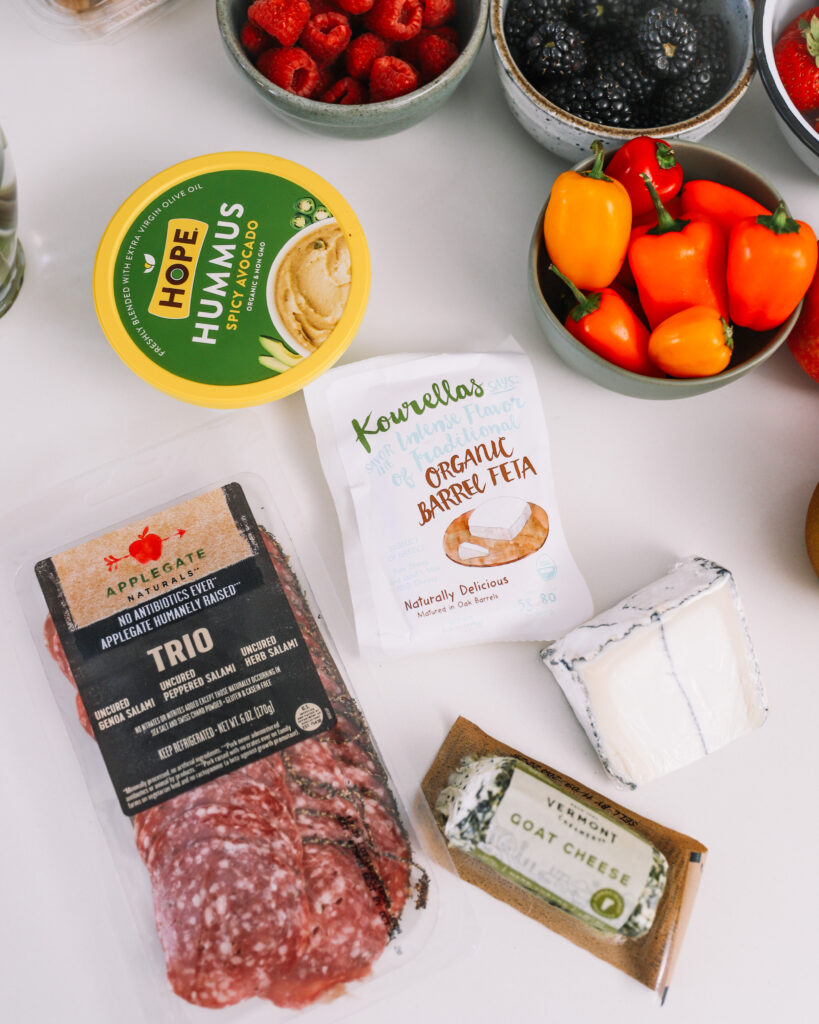
My absolute favorites include Humboldt Fog (far right, center, with the grey line down the middle), Vermont herb goat cheese (bottom) and brie goat cheese. The top cheese is an organic feta I tried for the first time and it was delish! As for meats, I try my best to find sustainable options or those without antibiotics, and Applegate Naturals tends to be my choice. Hope Hummus Spicy Avocado is on every single one of my boards, no question lol. It’s not actually spicy and the ingredients include extra virgin olive oil so it’s a winner in my book!

CRACKERS + NUTS
Crackers are obviously a requirement on a charcuterie board.
We love:
Simple Mills
Brown rice crackers
Hu Kitchen
Rustic Bakery organic sourdough rosemary flavor (the long crackers on the board above)
Raincoast Crisps– Bridger loves adding fig jam and fresh fruit to these
Make sure to have a variety of nuts on board for a boost of healthy fats and antioxidants. It’s best to go for raw, dry roasted (without vegetable oil), and salted as opposed to most store-bought charcuterie boards with seasoned/glazed nuts and seeds.
Walnuts
Pecans
Macadamia nuts
Marcona almonds
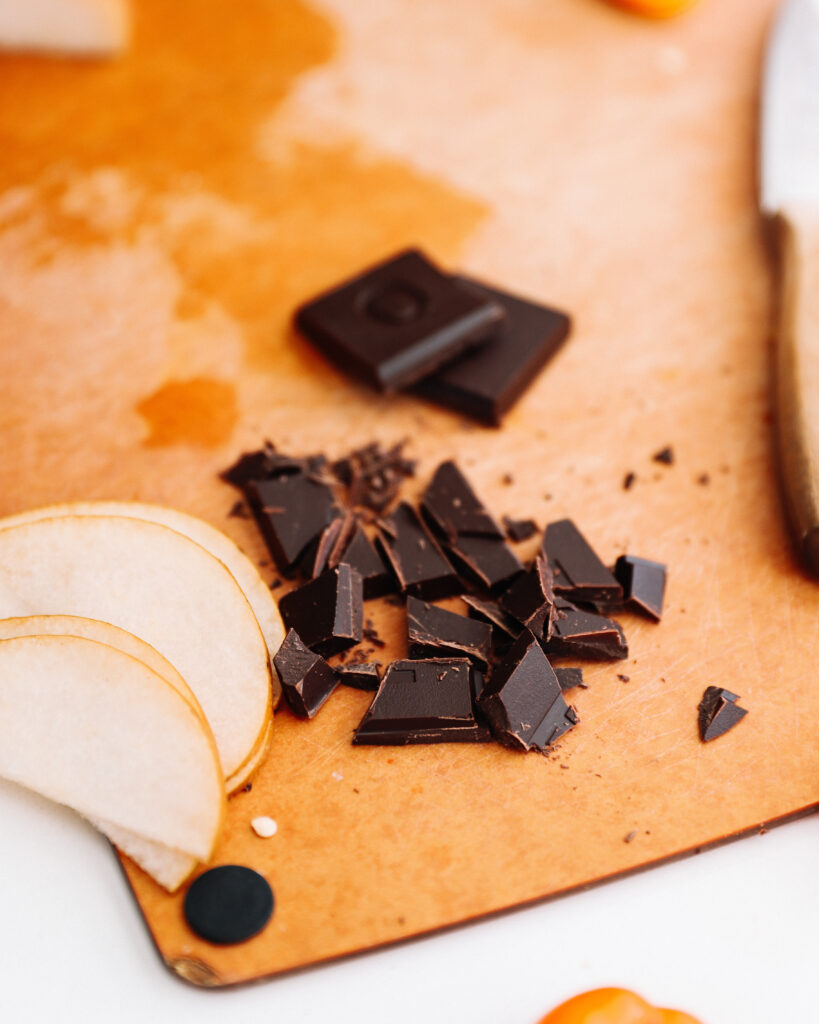
DESSERT SECTION
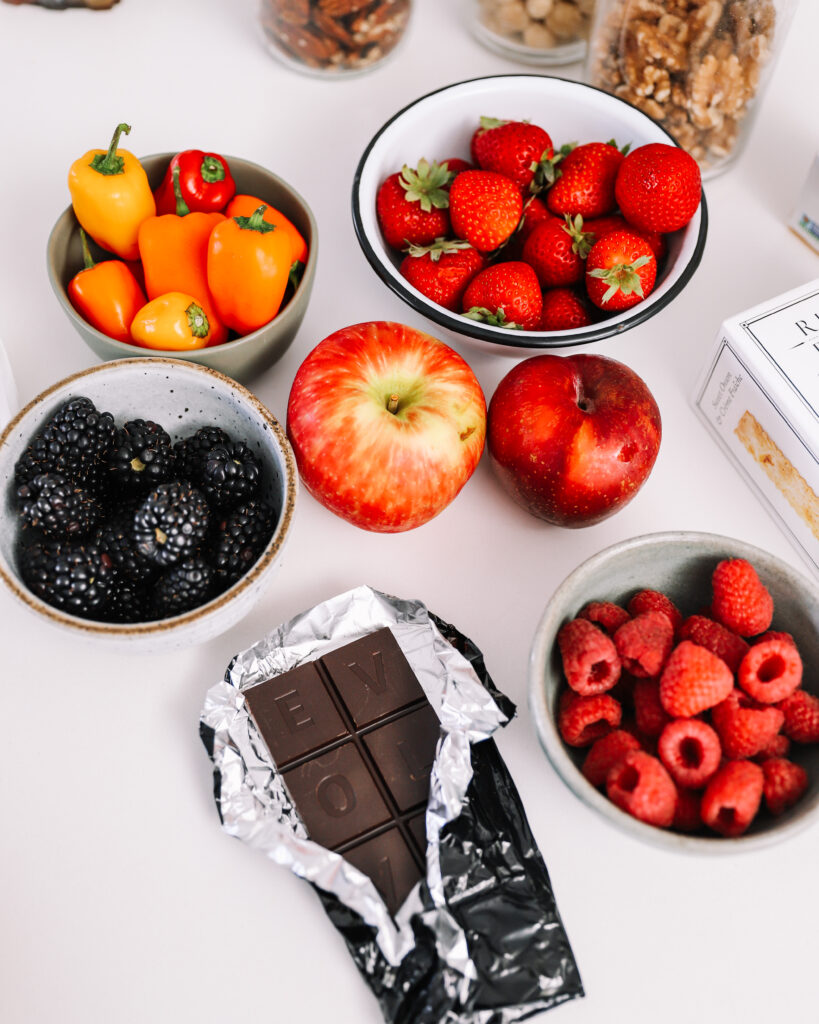
Fresh berries and dark chocolate is always a crowd pleaser if you ask me. It’s the perfect way to finish off a good food board!
Organic berries
Honeycrisp apple
Asian Pear
Stone fruit
Dark Chocolate– Evolved Eating signature dark is my favorite
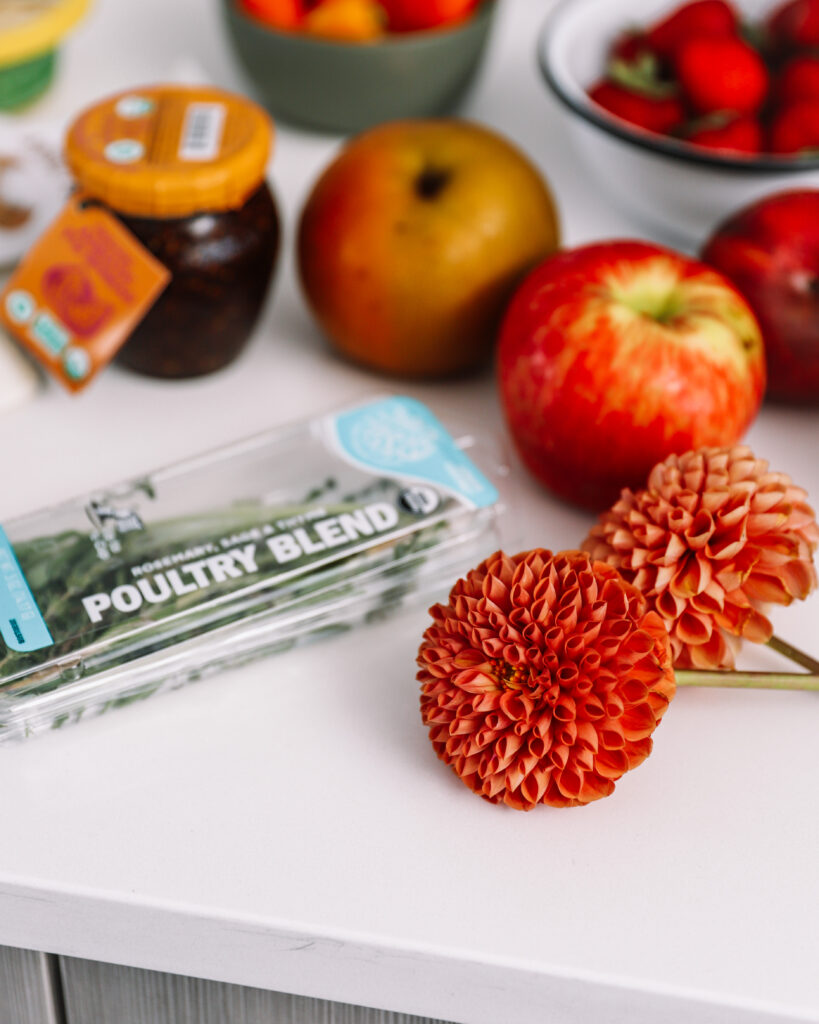
DECORATIONS/DETAILS
Like I mentioned before, subtle details can truly help pull off the most epic board.
Fresh flowers– I used Dahlias above
Fresh herbs– an easy way to do it is to grab a Poultry Blend from the store and use dried rosemary, thyme, etc.
Toothpicks
LET’S PUT IT TOGETHER
First things first, I prefer starting with your small bowls/dip dishes and holders. Make sure you have an ODD number to spread out across your board or tray– even numbers are too symmetrical and things don’t mesh, so always try to stick with your odd numbers.
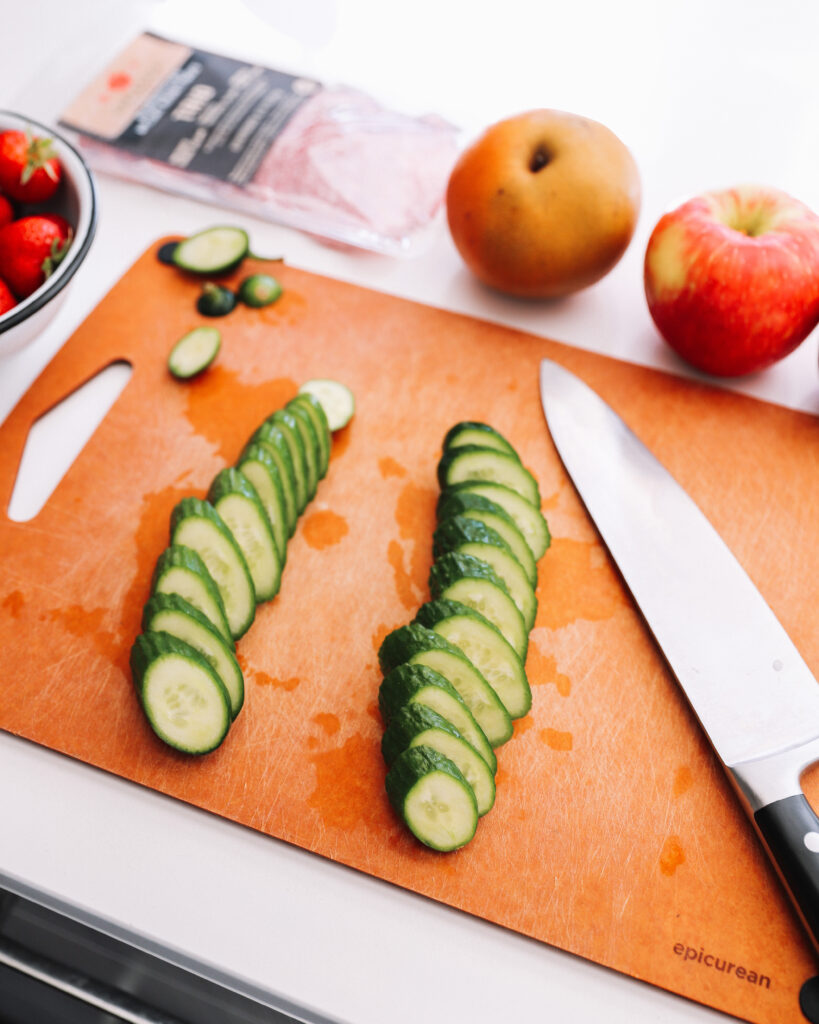
Next, set up your cutting station. This should obviously be separate from your tray to keep things clean and organized. Get creative with how you slice! Diagonal, super thin, more thick, experiment with what you have to find what works.
Time to place all your ingredients: Once your smaller dips/bowls are set (you can still move them around later on, but see if you can keep them in the same place throughout), grab one thing and start placing. In the end, you want it to look pretty evenly balanced, with ingredients and colors spaced out from one another. For example, with this board, I started with sliced cucumber and spaced it out in three separate areas on the board. Next, I grabbed sliced baby bell peppers and spaced them out, followed by other larger items like crackers and cheeses. The idea is to not have any blank or empty holes on the board where you can see the base. This is a simple fix towards the end by adding your nuts, decorations, cheese knives, etc. Make sure to pay attention to how ingredients are positioned throughout the board. For instance, you don’t want all the crackers on the entire tray facing one way. Switch it up to give it more dimension!
Don’t forget about the details! Pouring a drizzle of extra virgin olive oil over the top of your hummus bowl, followed by a few shakes of paprika or cumin. Slicing the end off a log of cheese, cutting a blackberry in half and placing it on top of goat cheese with honey drizzled over the top, slicing your strawberries like flowers… the ideas are endless and it’s always a great touch to your board.
It may take a while to make the board your first couple go arounds, so a good tip would be to keep the necessary items chilled in the fridge until you absolutely need them. For instance, keep the cheeses refrigerated until they go on the board so they’re ready to go once you serve!
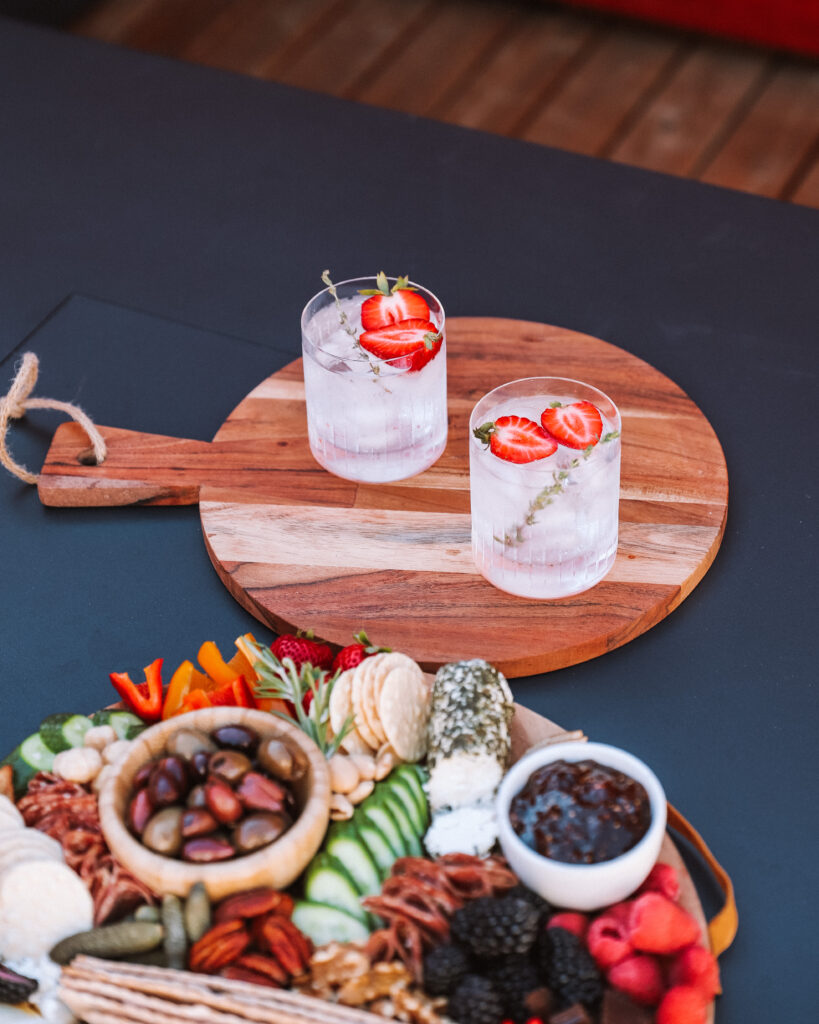
Throw in a couple iced seltzer’s with fresh strawberries and dried thyme & you’re golden! Hope this was helpful 🙂 Tag me on Instagram (@rachaelsgoodeats) in your charcuterie board pics, I can’t wait to see!
SHOP MY FAVORITES TO MAKE AN EPIC BOARD

xx Rachael


Comments