
OK, who remembers going to the movie theater and grabbing one or two boxes of those candy chocolate covered cookie dough bites… I hope I’m not the only one. Anyways, I woke up the other day dreaming about them and I knew I had to create. I thought since my OG Cashew Chocolate Chip Cookie Skillet is such a winner– I’m not kidding, I never make any other kind of chocolate chip cookie because these hit the spot every. single. time.– I’d do a spin-off recipe for these little gems.
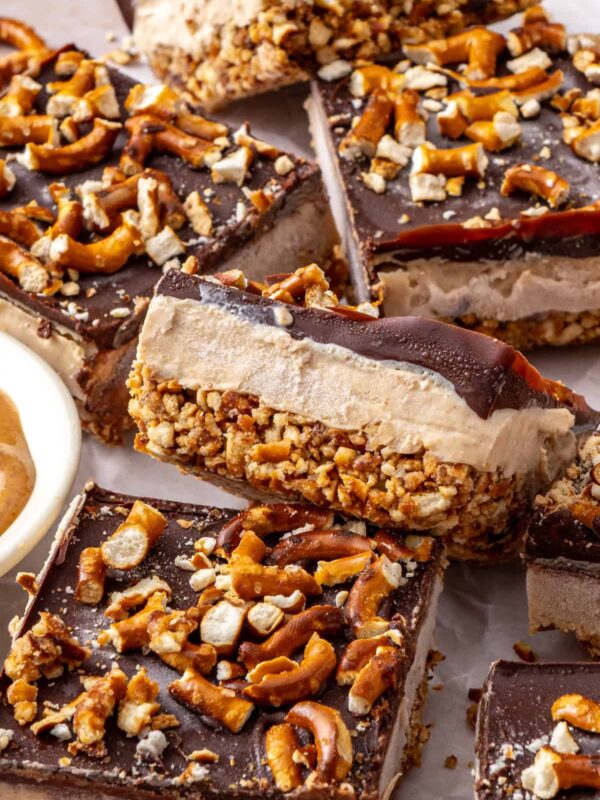
I’ll save you the trouble of reading any further, they turned out INCREDIBLE. Super doughy on the inside with some surprise chocolate chips, and covered with a thin layer of dark chocolate on the outside. I basically used all the same ingredients as my original cookie recipe, except I removed the egg and the baking soda, which make it perfectly fine to eat raw! Plus, it’s completely vegan, gluten-free and dairy free 🙂

The only trick I have is to make sure the dough consistency is solid enough to roll in a ball. If it’s falling apart, I would add 1 tbsp at a time of more almond flour to the mixing bowl in order to get it just right. If you want to sub another flour like coconut flour, I would try using 3/4 cup instead of 1 cup, as it’s more dense that almond flour. Then adjust, if needed.
The flakey sea salt is a game changer on top! Something I wouldn’t have appreciated back in my childhood days tossing the cookie dough bites back quicker than I could count. I love this kind best!
I know you will love this recipe!
Salted Cookie Dough Bites

Ingredients
- 1/3 cup cashew butter (or sub any nut/seed butter)
- 2 tbsp melted coconut oil
- 2-3 tbsp honey or maple syrup
- 1/2 tsp vanilla extract
- 1/2 tbsp almond milk
- 1 cup almond flour
- few shakes cinnamon
- 1/2 tsp flakey sea salt
- 1/4 cup mini chocolate chips
- 1.25 bar dark chocolate, or 3/4 cup chocolate chips, melted
Instructions
- Whisk together wet ingredients in large bowl.
- Add dry ingredients, then start rolling into small, bite-sized pieces (about 1-inch big). Lay on parchment paper.
- Once all rolled out, set in freezer for 30 min to harden.
- Melt chocolate, then using two forks, roll each cookie dough bite in chocolate. Let excess drip off, place on separate place with parchment paper.
- Immediately put back in freezer to harden for 30 minutes then enjoy! Store in airtight container in freezer.


So simple and SO good! I didn’t roll in chocolate because I didn’t plan ahead and didn’t have enough chocolate, but they are still delicious! Will definitely make again.
These are a favorite to cure my midday sweet tooth. Any idea on calories per ball??
Just made these today. They are so insanely delicious! Usually with freezer truffles/bites, the inside can be really hard and you have to let it defrost a bit, but these are different and are soft and truffle-like in the center. So good!
I used peanut butter, only 2 tbsp of maple syrup, and I ended up using about 1/4 more almond flour. Will definitely be making again!
Do you think it is okay to use peanut butter instead of cashew? or all purpose flour instead of almond?
Can you use manuka honey for the honey?
Is there a good substitute for coconut oil?
These are over the moon delicious! You really have a knack Rachael, to make all these candies so deliciously healthy, thank you!!
Like all of Rachael’s recipes these were another major HIT! I definitely needed to add about another 1/4-1/2 cup of almond flour than suggested to be able to form the balls before freezing. Thanks Rachael for creating the tastiest recipes that I don’t have to feel guilty about enjoying 🙂
OH MY GOD. These are amazing. You would never know they were healthy-ish. I don’t know how long they’ll last… Everyone has to make these.
Do you think it would be okay to substitute oat milk for the almond milk? Thanks!
I made these a few times now and just substitute with whatever plantmilk I have on hand, and they turn out amazing every single time