
If you’re looking for a healthier take on a classic cookie, these Peanut Butter Blossoms are soft, chocolatey, and made with better-for-you ingredients—without sacrificing flavor. This recipe keeps everything you love about traditional peanut butter blossom cookies (a soft peanut butter base topped with chocolate) but uses simple, wholesome ingredients for a more balanced treat.
Unlike the original version—typically made with refined sugar and flour—these cookies are naturally sweetened and can easily be made gluten-free and dairy-free. The result is a healthier peanut butter blossom recipe that’s perfect for holidays, cookie swaps, or whenever you’re craving something sweet.
What Are Peanut Butter Blossoms?
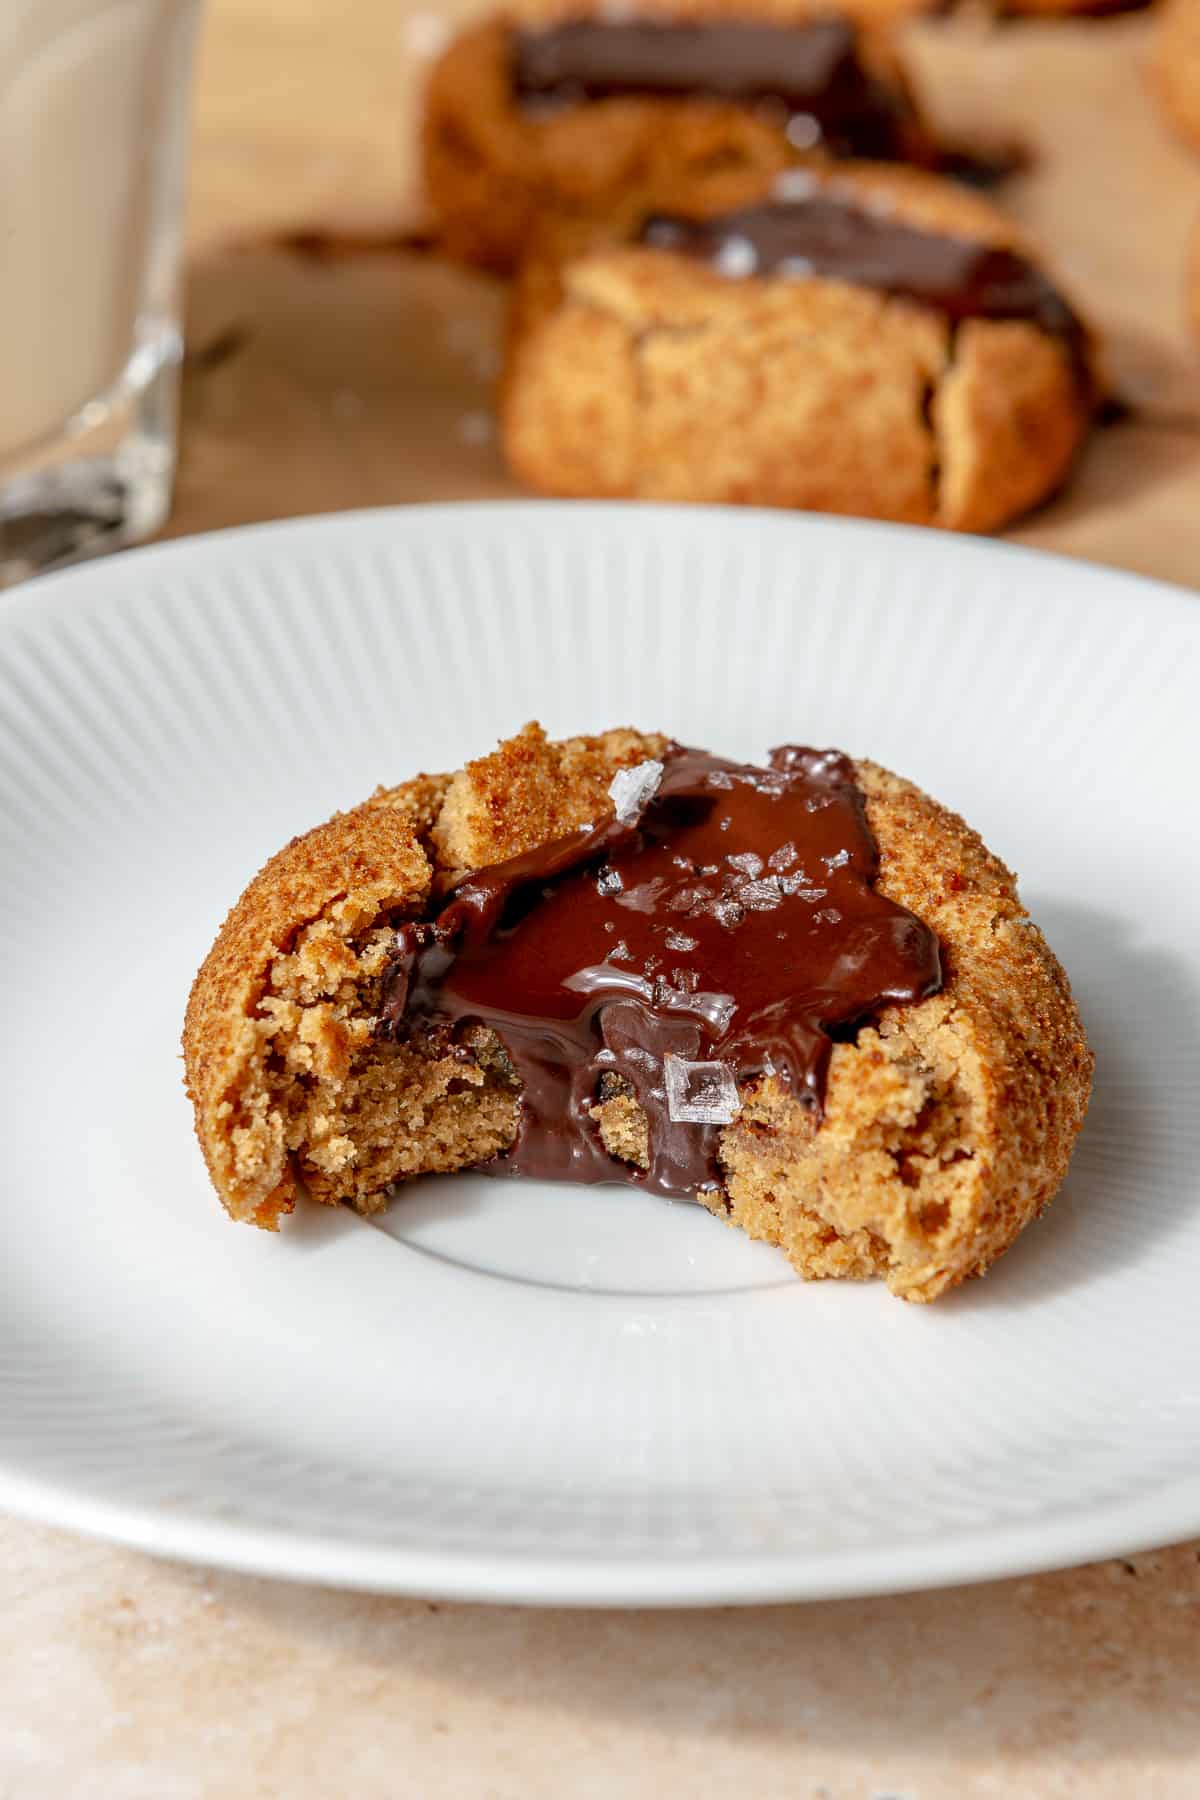
Peanut butter blossoms are a classic cookie made from soft peanut butter dough rolled in sugar and topped with a chocolate center, typically a chocolate kiss . They’re known for their chewy texture and sweet-and-salty flavor combination.
These cookies will be a hit especially if you have peanut butter-chocolate lovers in your life, like yours truly. And not to digress, but while we’re on the PB-chocolate subject, you also have to try my Copycat Reese’s Peanut Butter Cups – a classic remake that is to-die-for!
Why These Peanut Butter Blossoms Are Healthier
- Made with natural peanut butter for healthy fats
- Naturally sweetened (no refined sugar)
- Option to be gluten-free and dairy-free
- Balanced with protein + fats for better satiety
Just because these cookies are more wholesome, does not mean we’re cutting corners! They’re perfectly sweetened with and rolled in coconut sugar, my go-to alternative to regular sugar. I like to use coconut sugar because it’s a natural, plant-based sweetener that does a better job at keeping your energy levels up and lowering your chances of a blood sugar spike post-consumption.
Also in this recipe, I used a creamy peanut butter. Peanut butter is loaded with so many good health-promoting nutrients, such as vitamins E + B6, magnesium, iron and selenium. My tip when getting store-bought peanut butter is to aim for one where peanuts are the only listed ingredient; sea salt is ok too. You’d be surprised how many PB options out there include unnecessary ingredients like sugar, oils and/or emulsifiers. Keeping it simple is best! Of course, “everything in moderation”, but it definitely feels good to know you’re taking a more nutritious approach to what you’re making, even when it comes to dessert.

An Easy, Anytime Peanut Butter Blossom Treat
These Peanut Butter Blossoms are the kind of cookie you can make any day of the year—simple, delicious, and always a crowd favorite. They’re naturally gluten-free and dairy-free, with that perfect soft peanut butter base and rich chocolate center that makes this classic recipe so irresistible.
One of the best parts? How incredible they smell while baking. If you’re looking for an easy dessert that feels cozy and nostalgic, this recipe delivers every time.
There are so many fun ways to enjoy them. Try spreading a little jam on top for a sweet twist (raspberry pairs especially well), pack them up for an easy grab-and-go treat, or bring a batch to share with friends and family. They’re also perfect for holidays, cookie swaps, or gifting.
Whether you’re baking for a special occasion or just want a simple homemade treat, these easy peanut butter blossom cookies are guaranteed to be a hit.
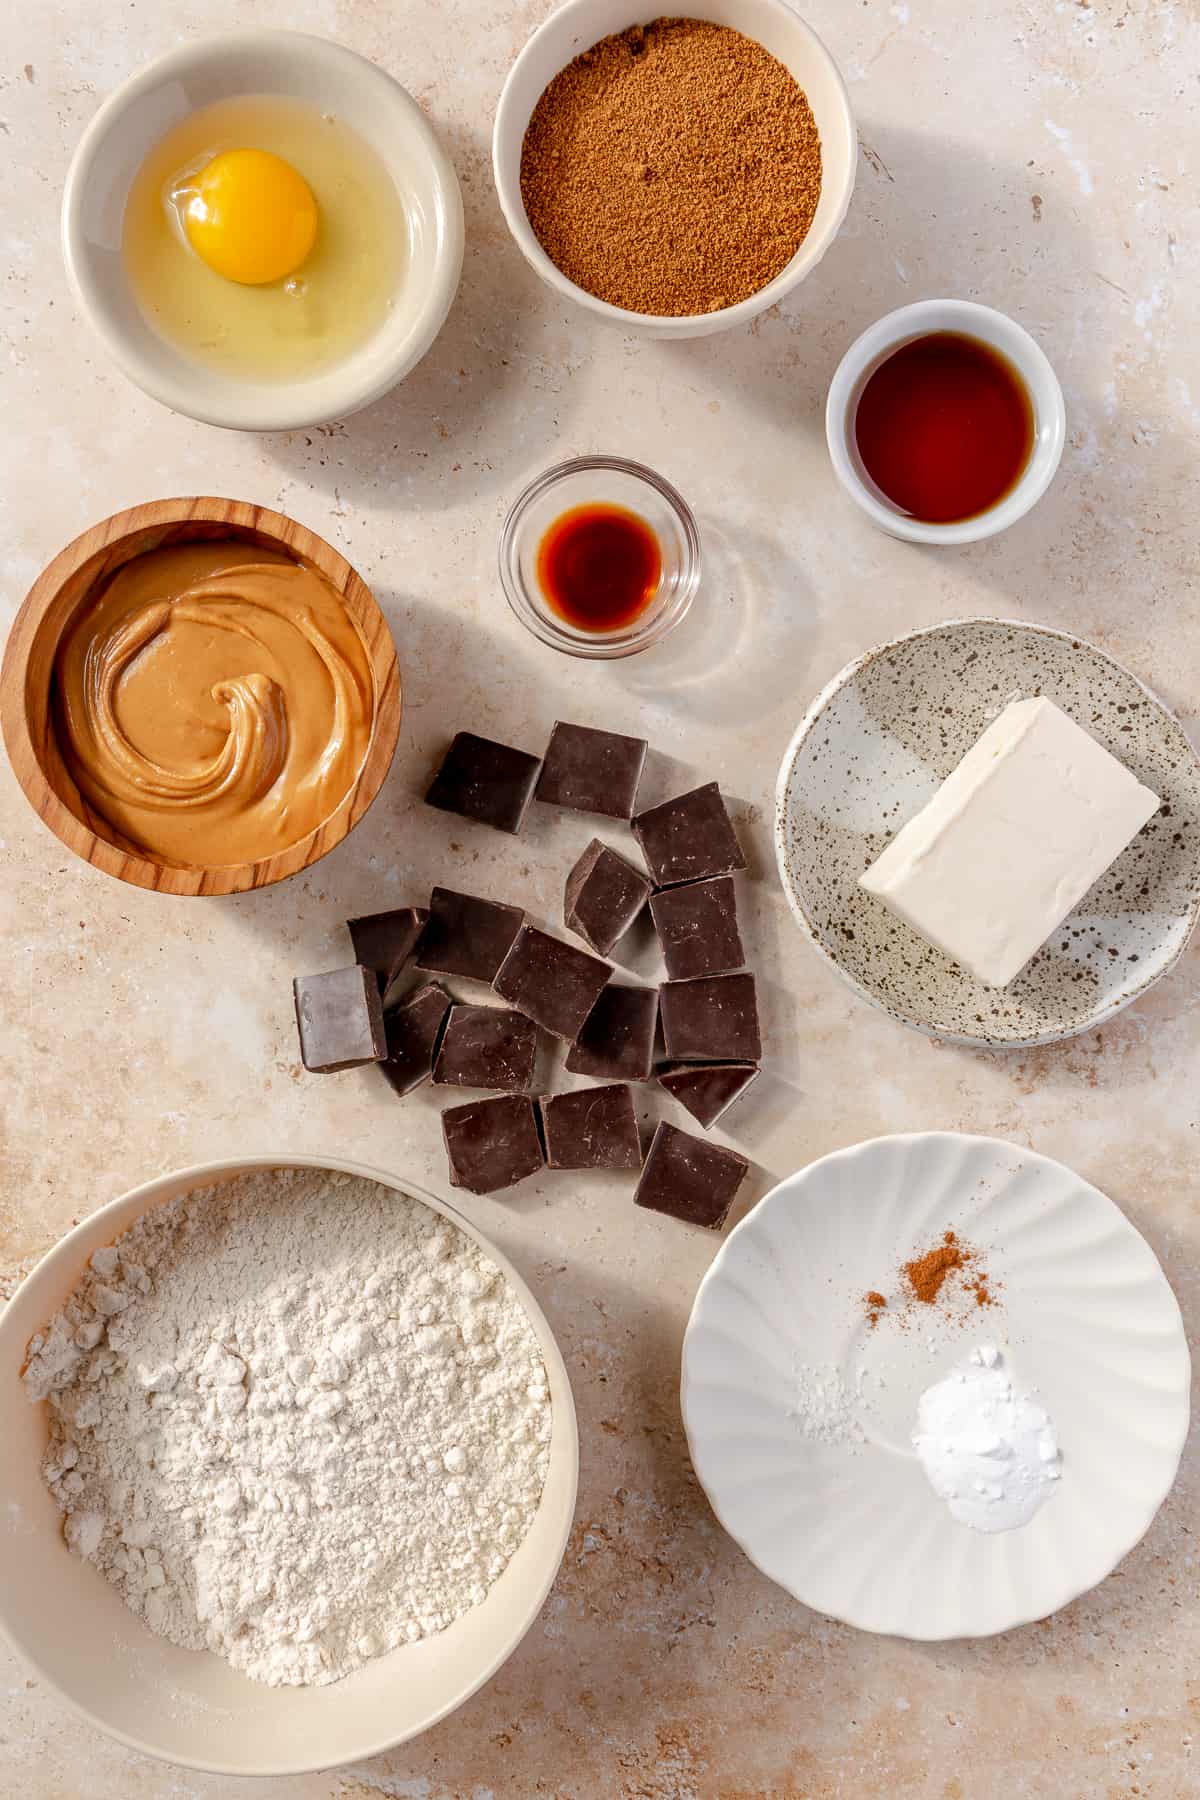
Ingredients You’ll Need:
- Egg
- Creamy peanut butter
- Butter (you can also use ghee)
- Maple syrup
- Coconut sugar
- Vanilla extract
- Gluten-free flour (I used Bob’s Red Mill GF all-purpose baking flour)
- Baking soda
- Sea salt
- Cinnamon
- Dark chocolate chunks (dairy-free)
How to Make Peanut Butter Blossoms
These peanut butter blossom cookies come together quickly with simple ingredients and just a few easy steps.
1. Prep the oven
Preheat your oven to 350°F and line a baking sheet with parchment paper.
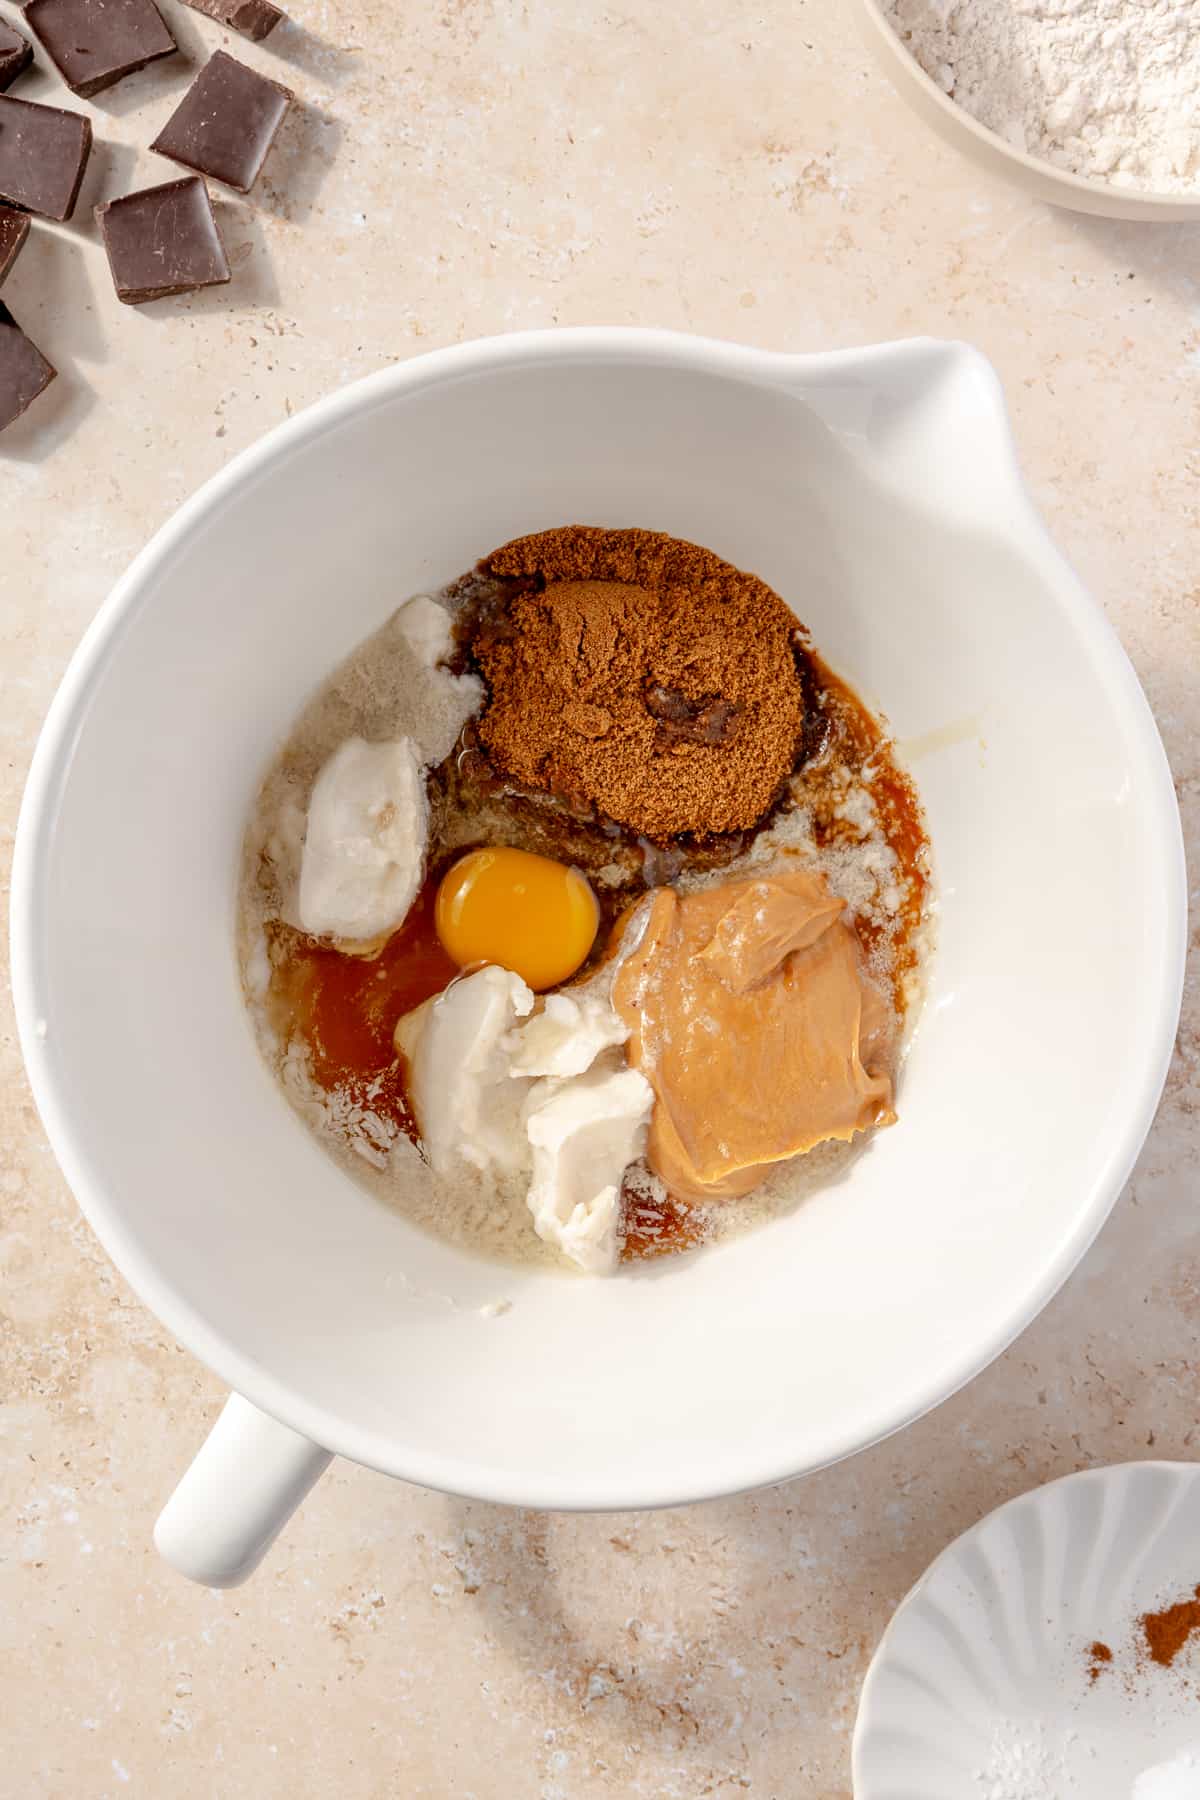
2. Mix the wet ingredients
In a large bowl, whisk together the egg, peanut butter, softened butter (room temperature), maple syrup, coconut sugar, and vanilla extract until smooth and fully combined.
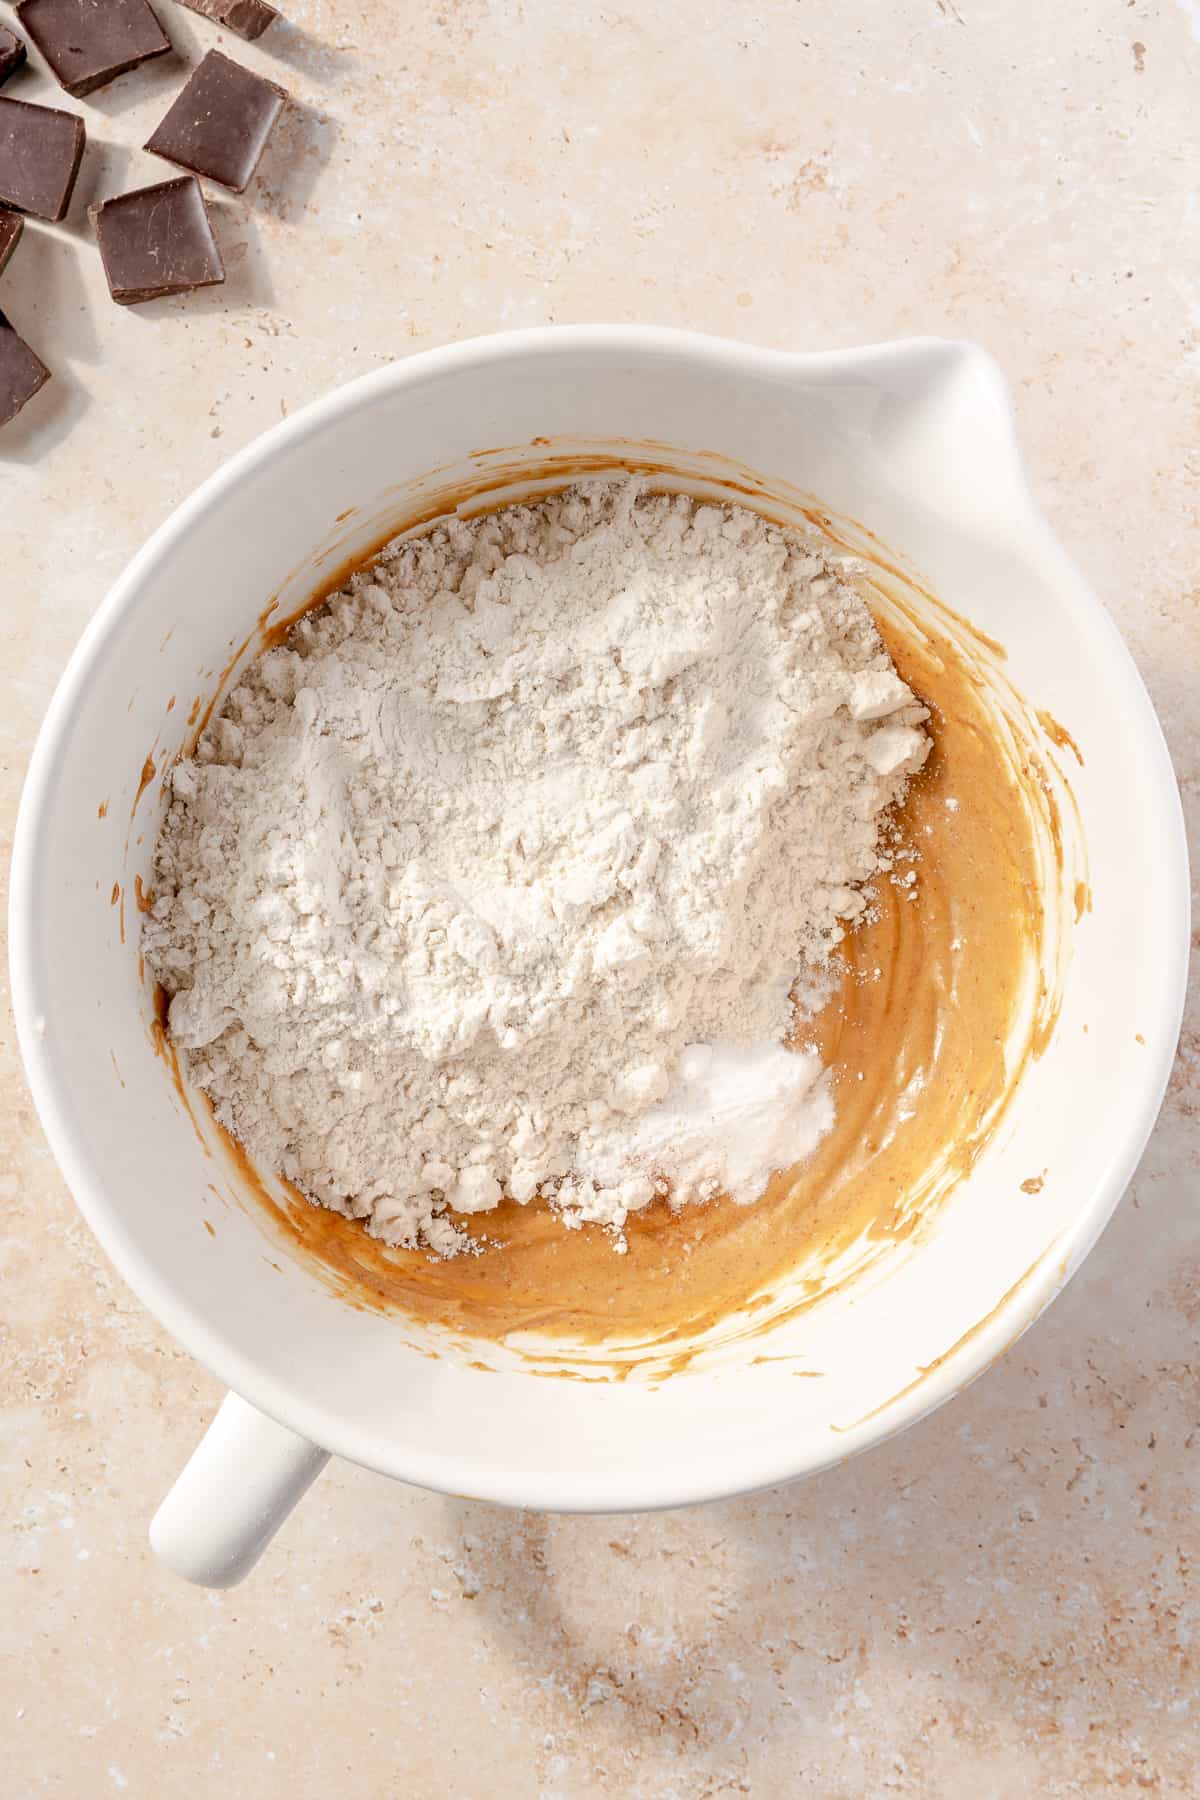
3. Add the dry ingredients
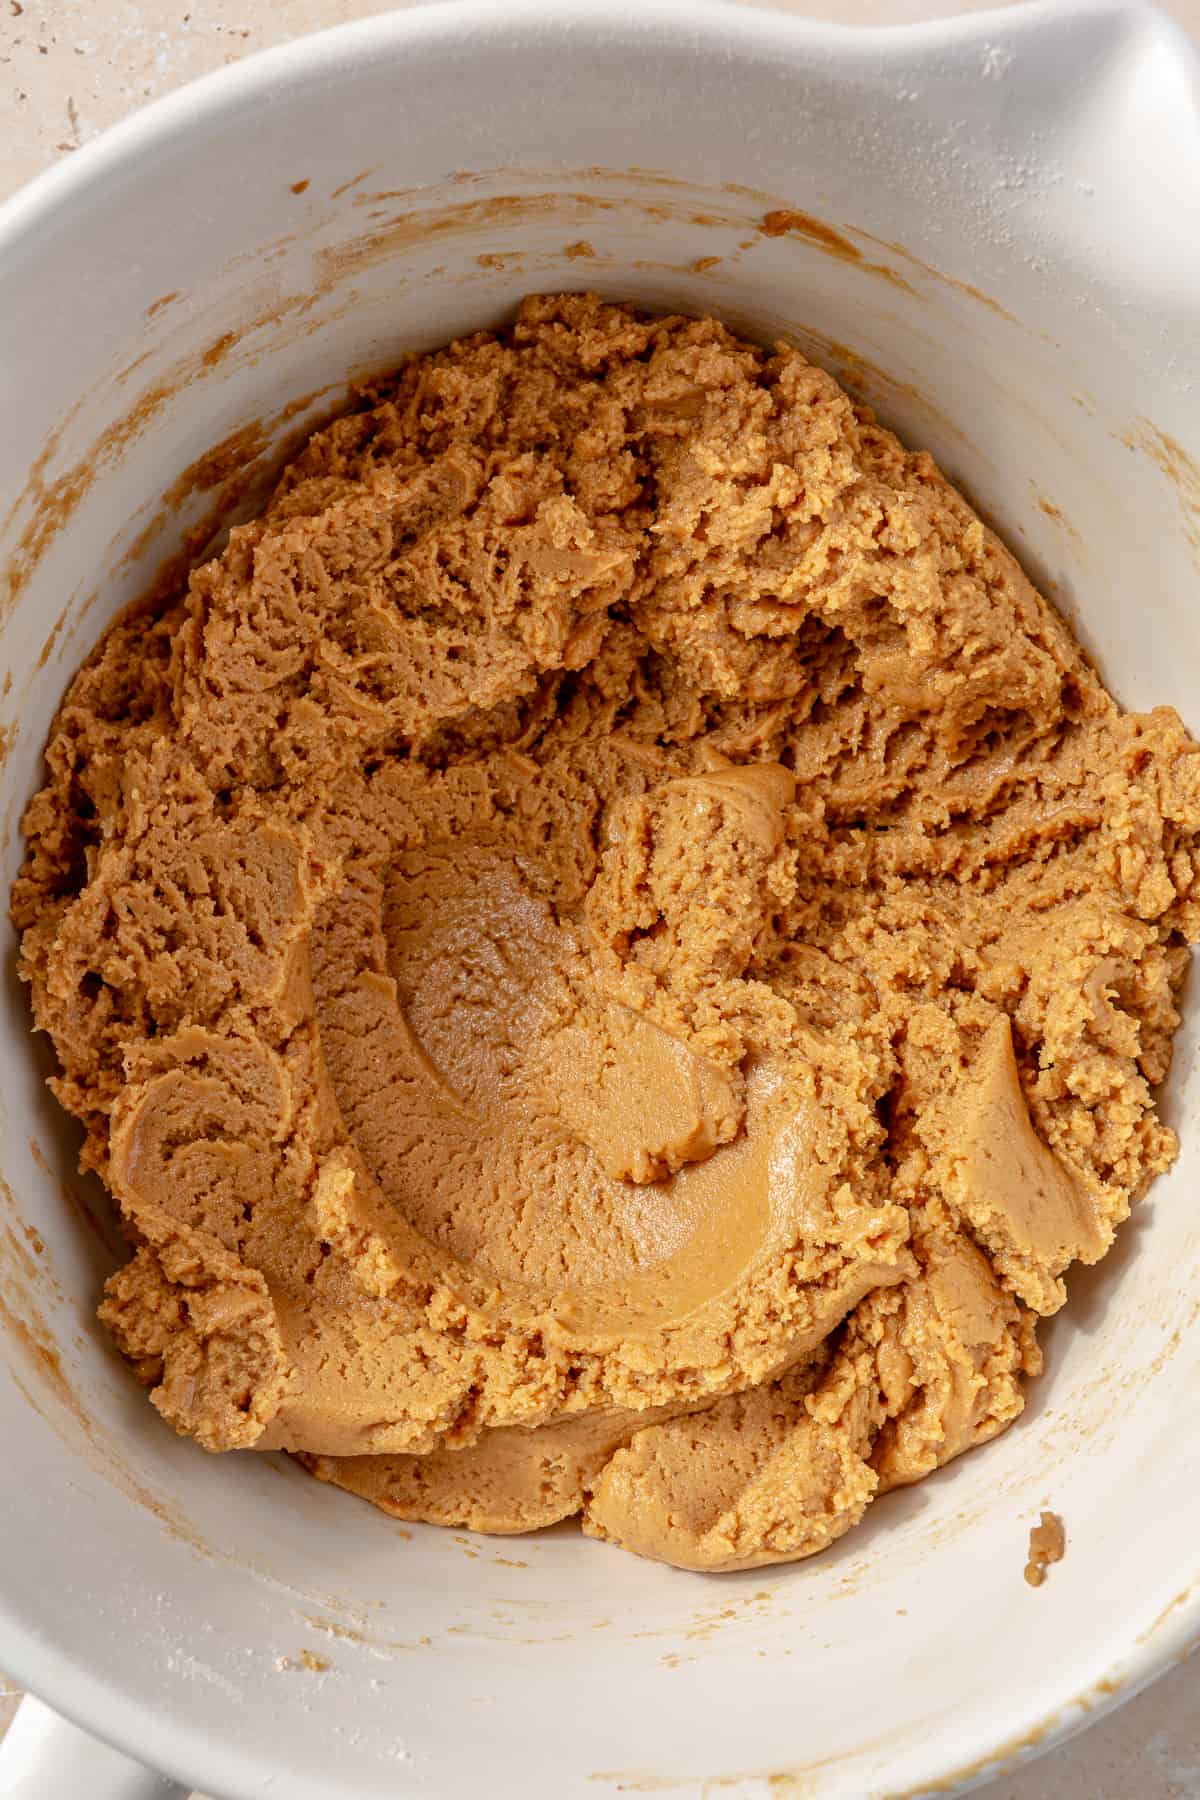
Stir in the dry ingredients and mix until a thick cookie dough forms.
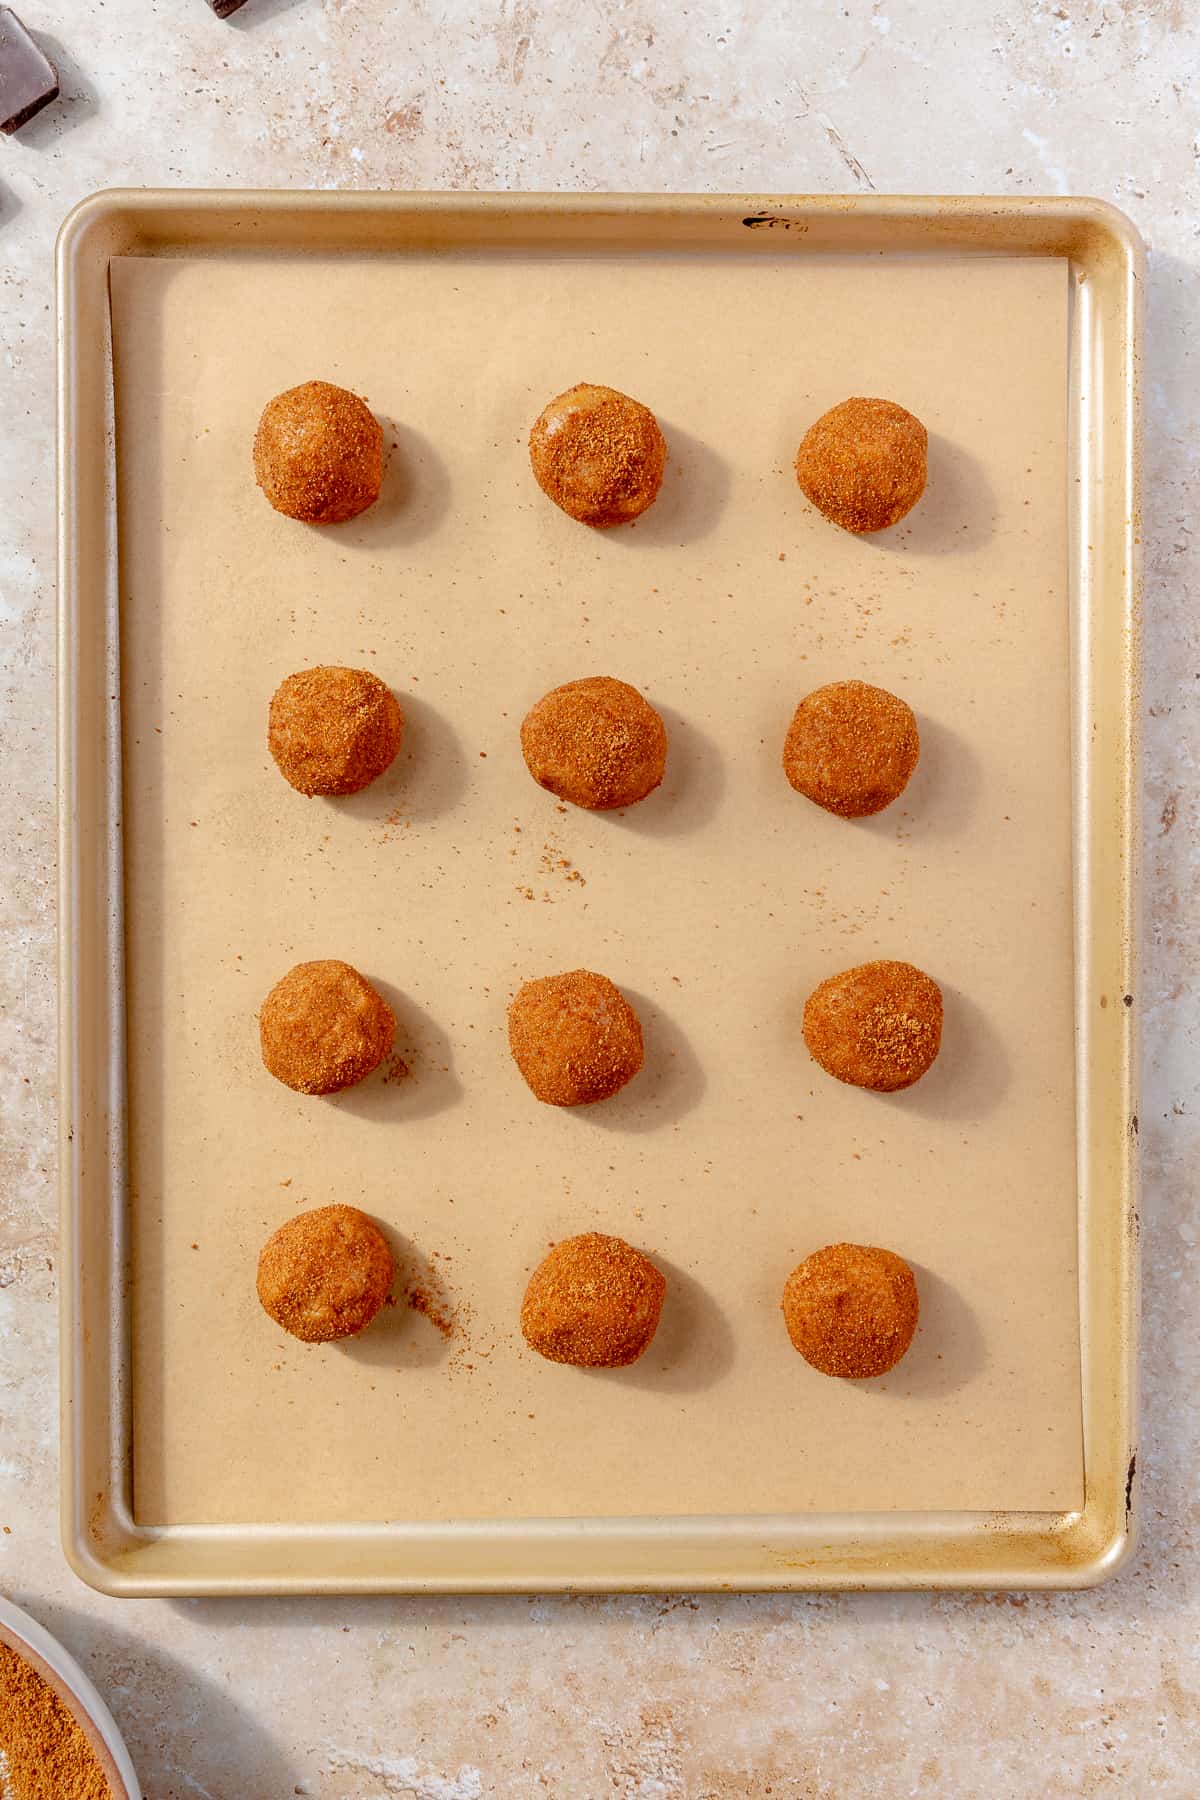
4. Roll the dough
Add about 1/3 cup coconut sugar to a shallow bowl or plate. Roll the dough into 1.5-inch balls, then coat each ball in the coconut sugar.
5. Bake
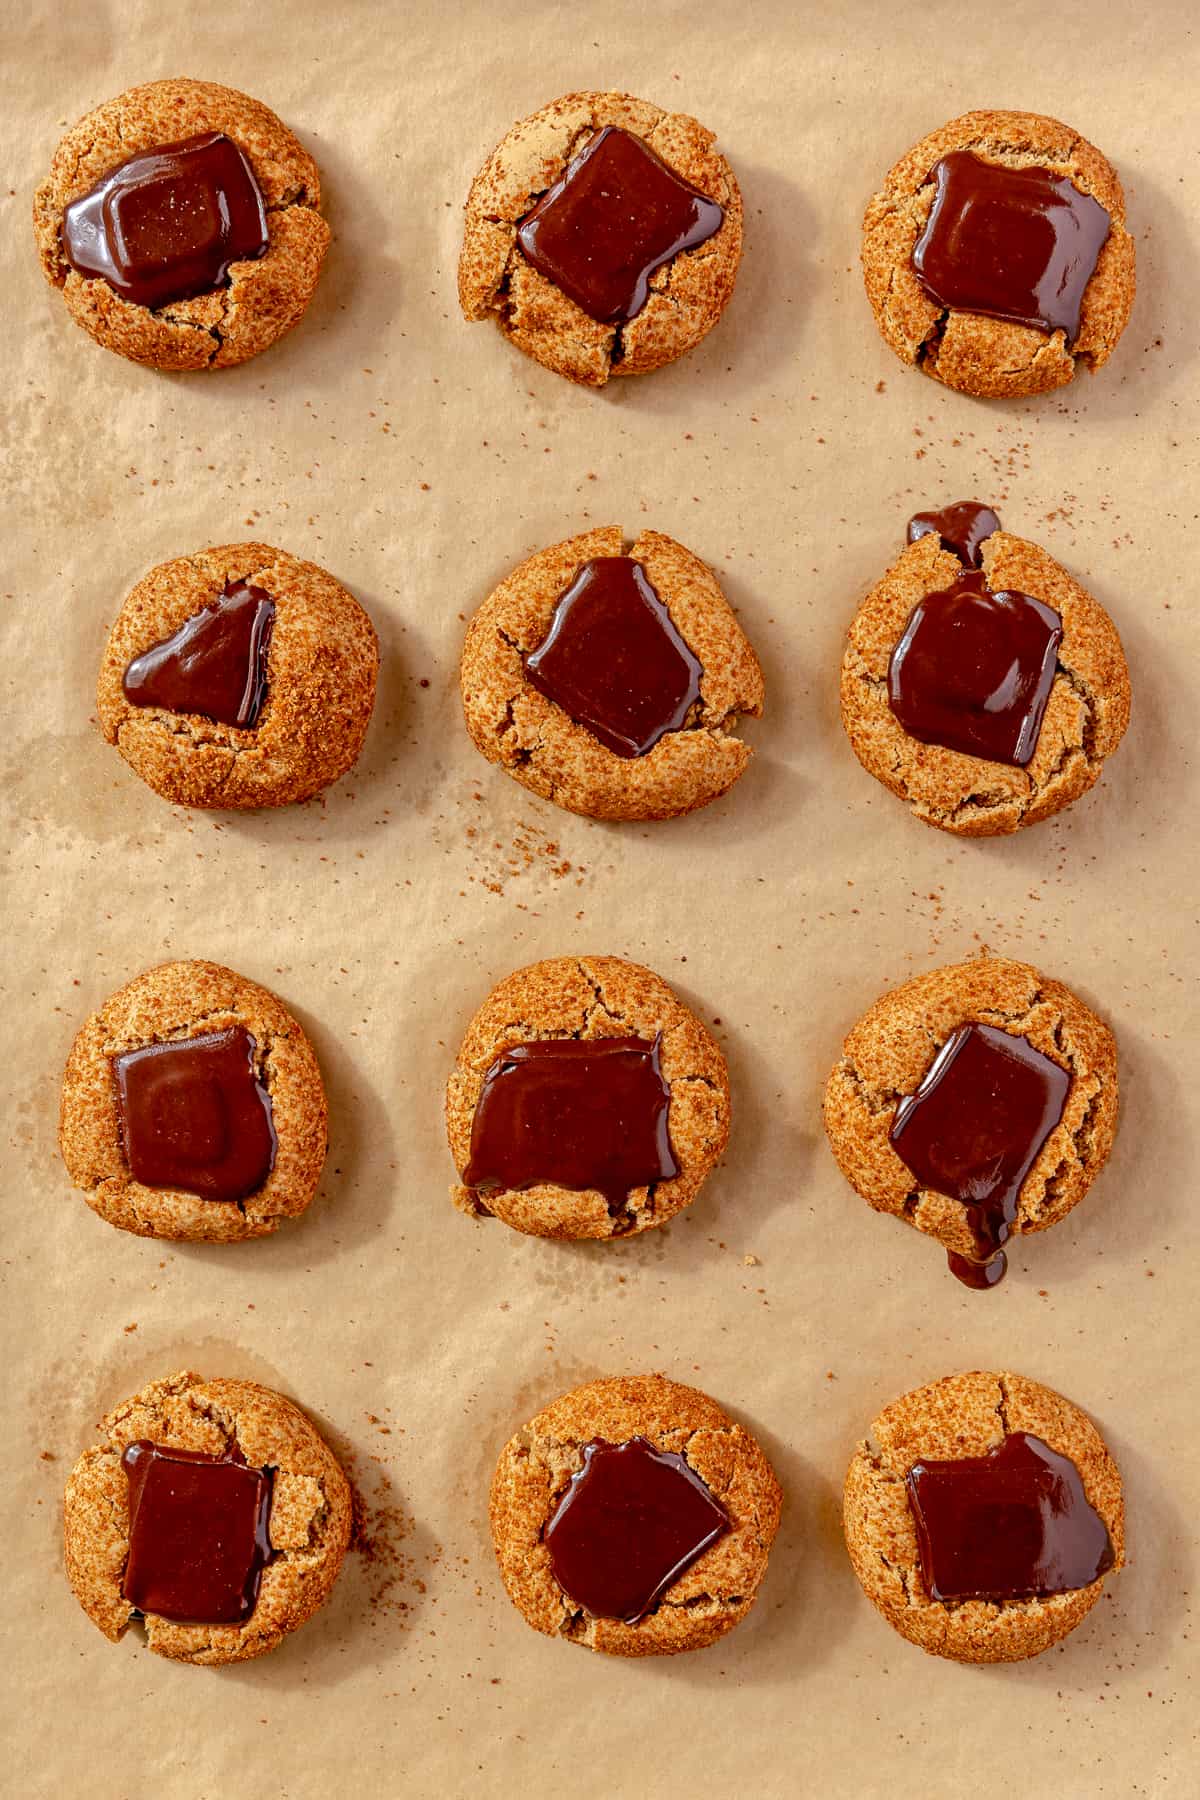
Place the cookie dough balls on the prepared baking sheet and bake for 9 minutes.
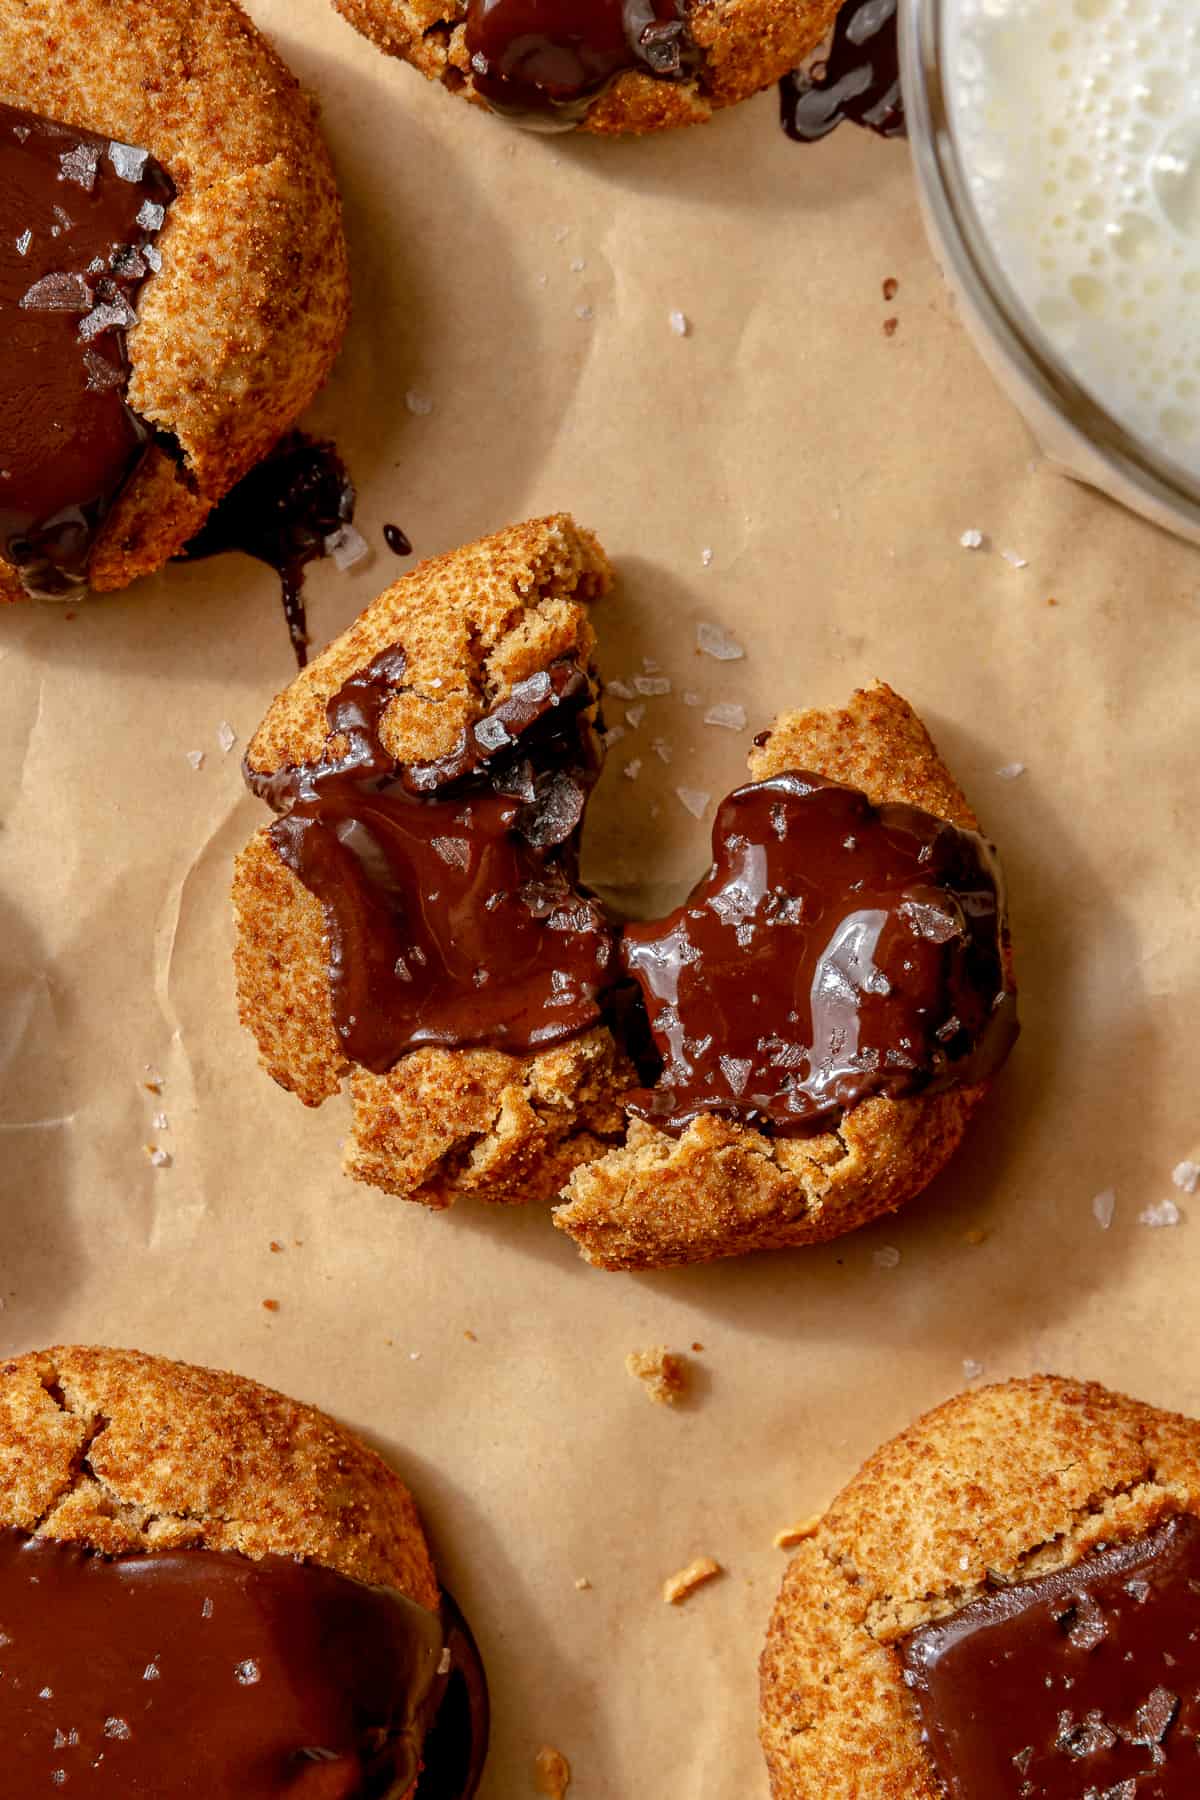
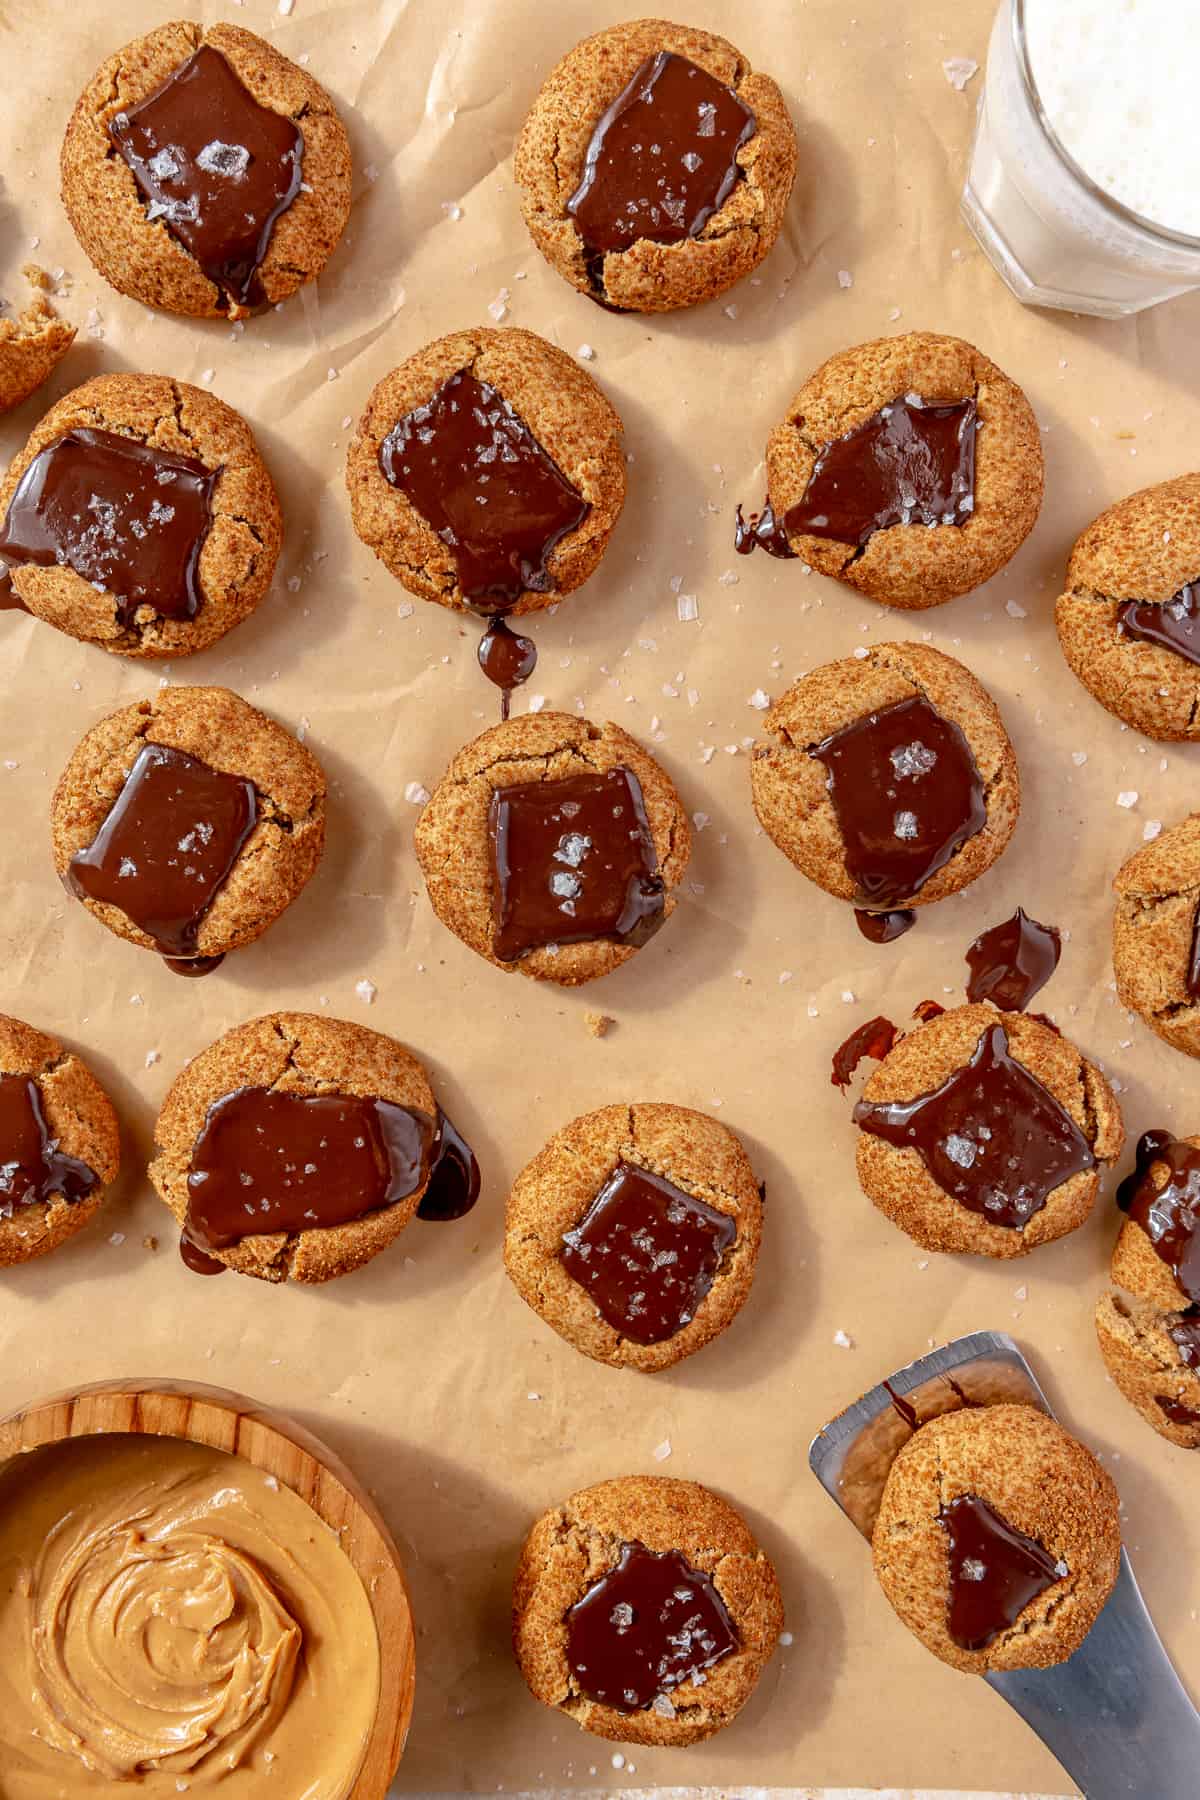
6. Add the chocolate center
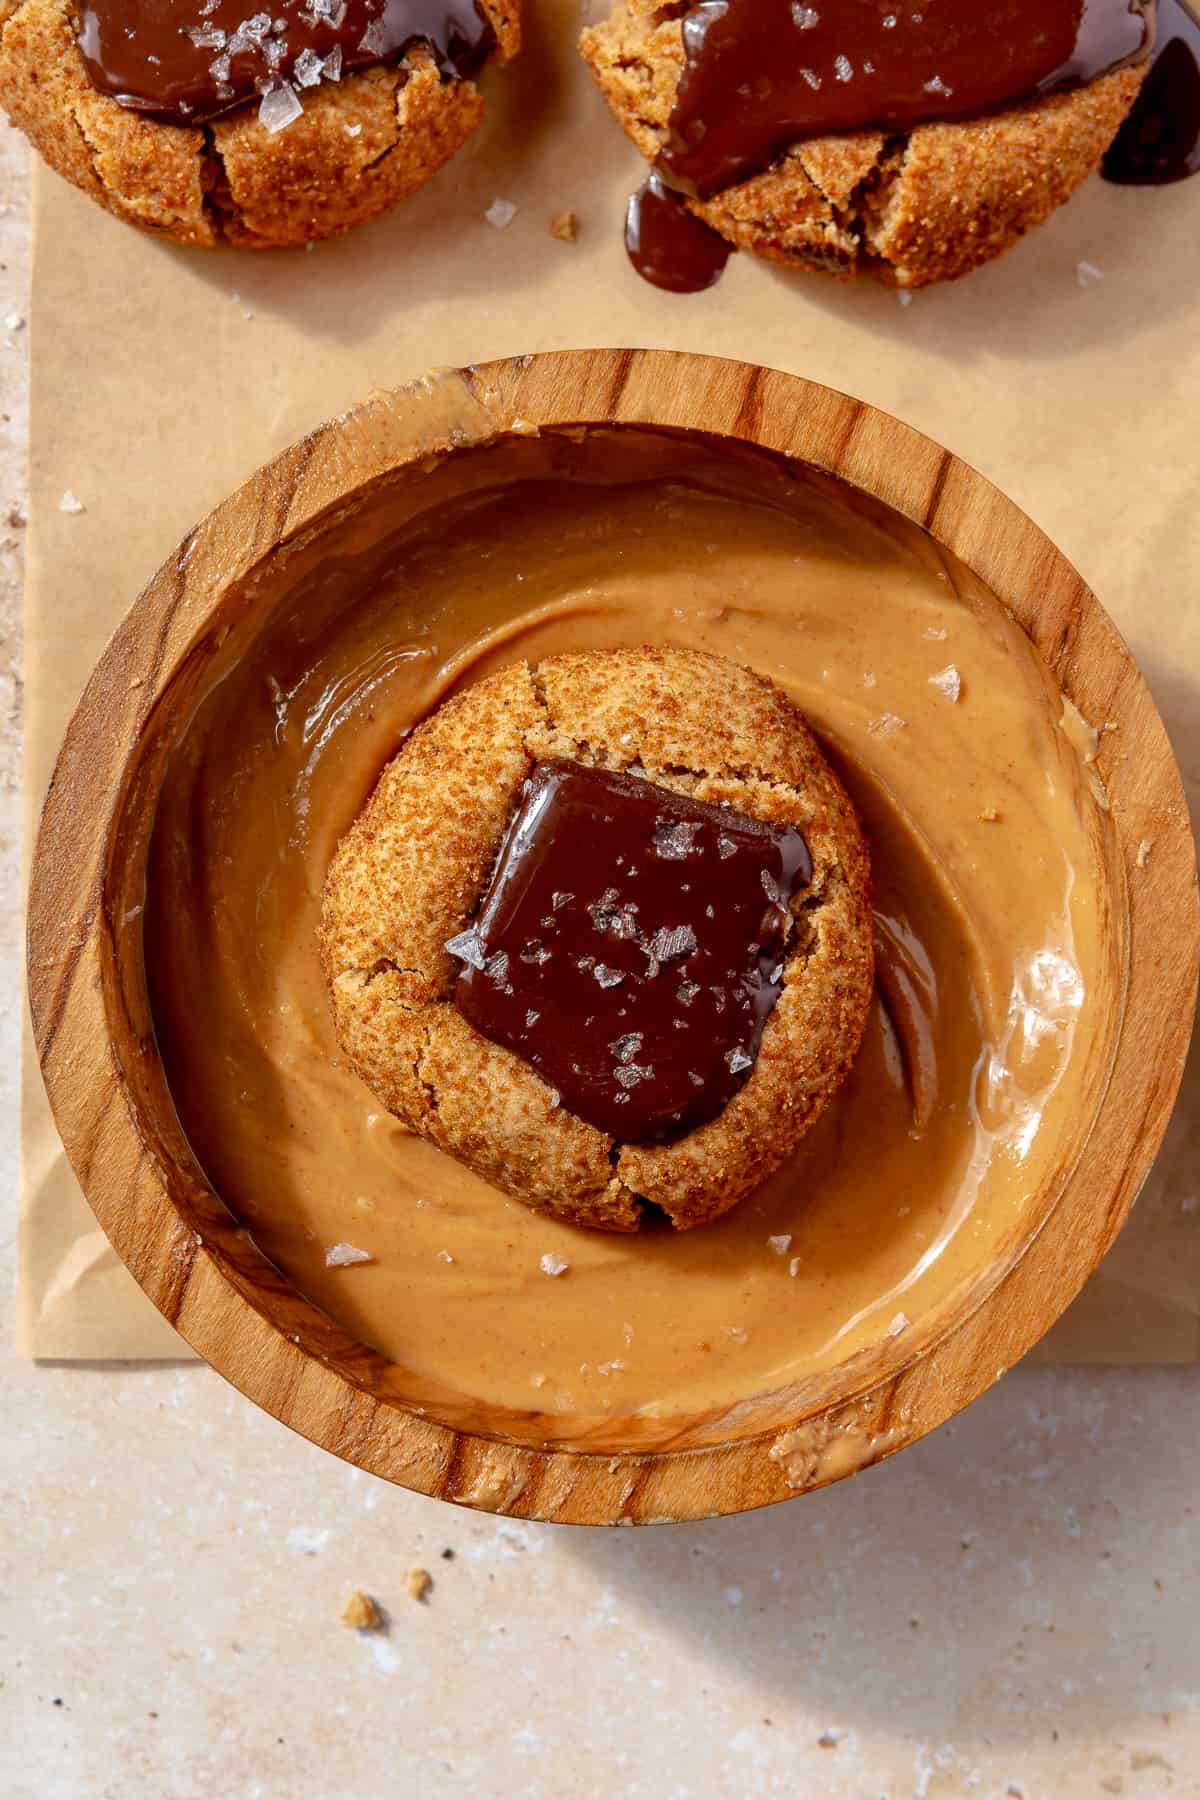
While the cookies bake, break or cut chocolate into large pieces. Remove the cookies from the oven after 9 minutes and gently press a piece of chocolate into the center of each cookie.
Return to the oven and bake for 1 additional minute.
7. Cool
Remove from the oven and let the cookies cool on the baking sheet for at least 10 minutes before serving.

Tips for the Best Peanut Butter Blossoms
- Use creamy peanut butter for best texture
- Don’t overbake—cookies should stay soft in the center
- Press chocolate in immediately after baking
- Chill dough if it’s too soft
Variations & Substitutions
- Gluten-free: Use almond or oat flour, if you’re not GF regular all-purpose will work
- Dairy-free: Use dairy-free chocolate
- Refined sugar-free: Use coconut sugar or maple syrup
- Nut-free: Swap peanut butter for sunflower seed butter

How To Keep PB Blossom Cookies From Falling Apart?
To keep your Peanut Butter Blossoms from falling apart, make sure you don’t add too much flour or over-bake them. Everyone measures flour differently, but try not to overpack or pack your measuring cup too tightly when scooping the flour. Also be sure to level out the top of the measuring cup so you scoop the exact amount called for. Do this by scraping the flat side of a butter knife across the top of the measuring cup to level the flour.
To avoid over-baking, follow the baking time provided in the recipe and monitor your cookies as they bake (everyone’s ovens may work slightly different). It’s best to pull them out a minute or two early as they’ll harden as they cool. If you feel like they need more time, you can always pop them back in the oven.
What is the Best Gluten-Free Flour For Cookies?
Bob’s Red Mill gluten-free 1-to-1 baking mix is a great gluten-free all-purpose flour blend for baking. It has a mild texture and plenty of “stick” thanks to it’s blend of (gf) flours. Other options that work well when baking gluten-free goods include almond, oat, buckwheat and sorghum flours, to name a few. Generally, it depends what you’re making to determine which option will work best.
SHOP THE RECIPE

LOVE THESE PB BLOSSOM COOKIES? TRY THESE BAKED GOODS AND SWEET TREATS:
Tahini Chocolate Chunk Cookies
Peanut Butter Swirl Fudge Brownies
Gluten-Free, Dairy-Free Banana Bread
Copycat Reese’s Peanut Butter Cups

Click here to watch the reel I made of this recipe 🙂
Peanut Butter Blossoms
Ingredients
- 1 egg
- 1/2 cup creamy peanut butter
- 1/2 cup room temp butter, I used Miyokos vegan butter but you can also use ghee
- 3 tbsp maple syrup
- 2/3 cup coconut sugar, plus more for rolling
- 1 tsp vanilla extract
- 1 3/4 cup gluten-free flour, I used Bob’s Red Mill GF all-purpose baking flour
- 1 tsp baking soda
- Few pinches sea salt
- Pinch cinnamon
- 1/2 cup dark chocolate chunks, dairy-free
Instructions
- Preheat the oven to 350 degrees F. Whisk together the egg, peanut butter, butter (make sure it’s room temp and not too cold), maple syrup, coconut sugar and vanilla until smooth. Add in dry ingredients and mix thoroughly.
- Add about 1/3 cup coconut sugar to a wide, deep plate. Add parchment paper to a baking sheet. Roll dough into 1.5-inch balls, then roll in the coconut sugar. Add to the baking sheet. Bake for 9 minutes.
- *Break or cut chocolate into large chunks and set aside. Remove the cookies from the oven after 9 minutes, then gently press a piece of chocolate into the center of each cookie. Bake in the oven for 1 additional minute.
- Remove the cookies from the oven and let them cool for 10+ minutes. Optional: once the chocolate has been added and the cookies are out of the oven, sprinkle a pinch of sea salt over top of the cookies while they cool.


Comments